• Porsche 935
  • Porsche 956/962
  • Commissions
  • Special Editions
  • Original Co-Hogs
  • Your Co-Hogs
  • Blog
  • Contact
  • About
Menu

Co-Hog Toys

  • Porsche 935
  • Porsche 956/962
  • Commissions
  • Special Editions
  • Original Co-Hogs
  • Your Co-Hogs
  • Blog
  • Contact
  • About
CoHogToys Spray booth progress update

Spray Booth Progress - Part 2

January 6, 2023

It's been over five months since we took a look at progress on the spray booth. A lot of things have happened and the booth work has been interwoven with all of them. It's certainly not done, but I'm ready for some serious spraying. Warning - this is a long post - you may need additional sustenance before the end.

BEFORE: Air comes in from the compressor outside the booth through the yellow hose in the lower right corner. All the rest of the stuff here has to be mounted, hosed and wired to be used effectively in a small space.

CoHogToys Spray booth progress update

AFTER: A quick view. I hope it works the way I planned for. The next image shows what's what and what it does.

CoHogToys Spray booth progress update

Compressor air comes in at the lower left and loops up to regulator, which is mounted very high so I can read and adjust the tiny gauge for each specific tool being used. After going through the water filter/regulator, all lines out to the various devices are connected on the left. There's the line for the ion gun (for static control), airbrush and two separate spray guns.

All of the air tools are mounted on an angle to keep the paint pots level when they're not being used and to bring them easily to hand in a better position.

The ion generator unit is mounted down low and upside down to keep debris out and help with proper placement of everything else. All electrical switching (except the explosion-proof exhaust fan which has its own proper switch) will be done outside of the booth to prevent any arcing problems. The area below the outlet will be walled off and the switch box will be mounted there.

CoHogToys Spray booth progress update

An overall view as you enter the booth. Tools to the right, drying and storage to the left. I'll get into the filtered air supply as I finish those sections.

CoHogToys Spray booth progress update

The stack up in the plenum was done in CAD to keep the rampaging possibilities under control. Anything can be anywhere in 3D space until it's screwed down.

I don't think I've mentioned that the entire booth, structure and contents, are screwed together so that I can make any needed changes more quickly. It takes longer to design and construct, but has already brought many benefits.

The extra time needed also gives my thought-process a chance to meld with what is actually possible.
CoHogToys Spray booth progress update

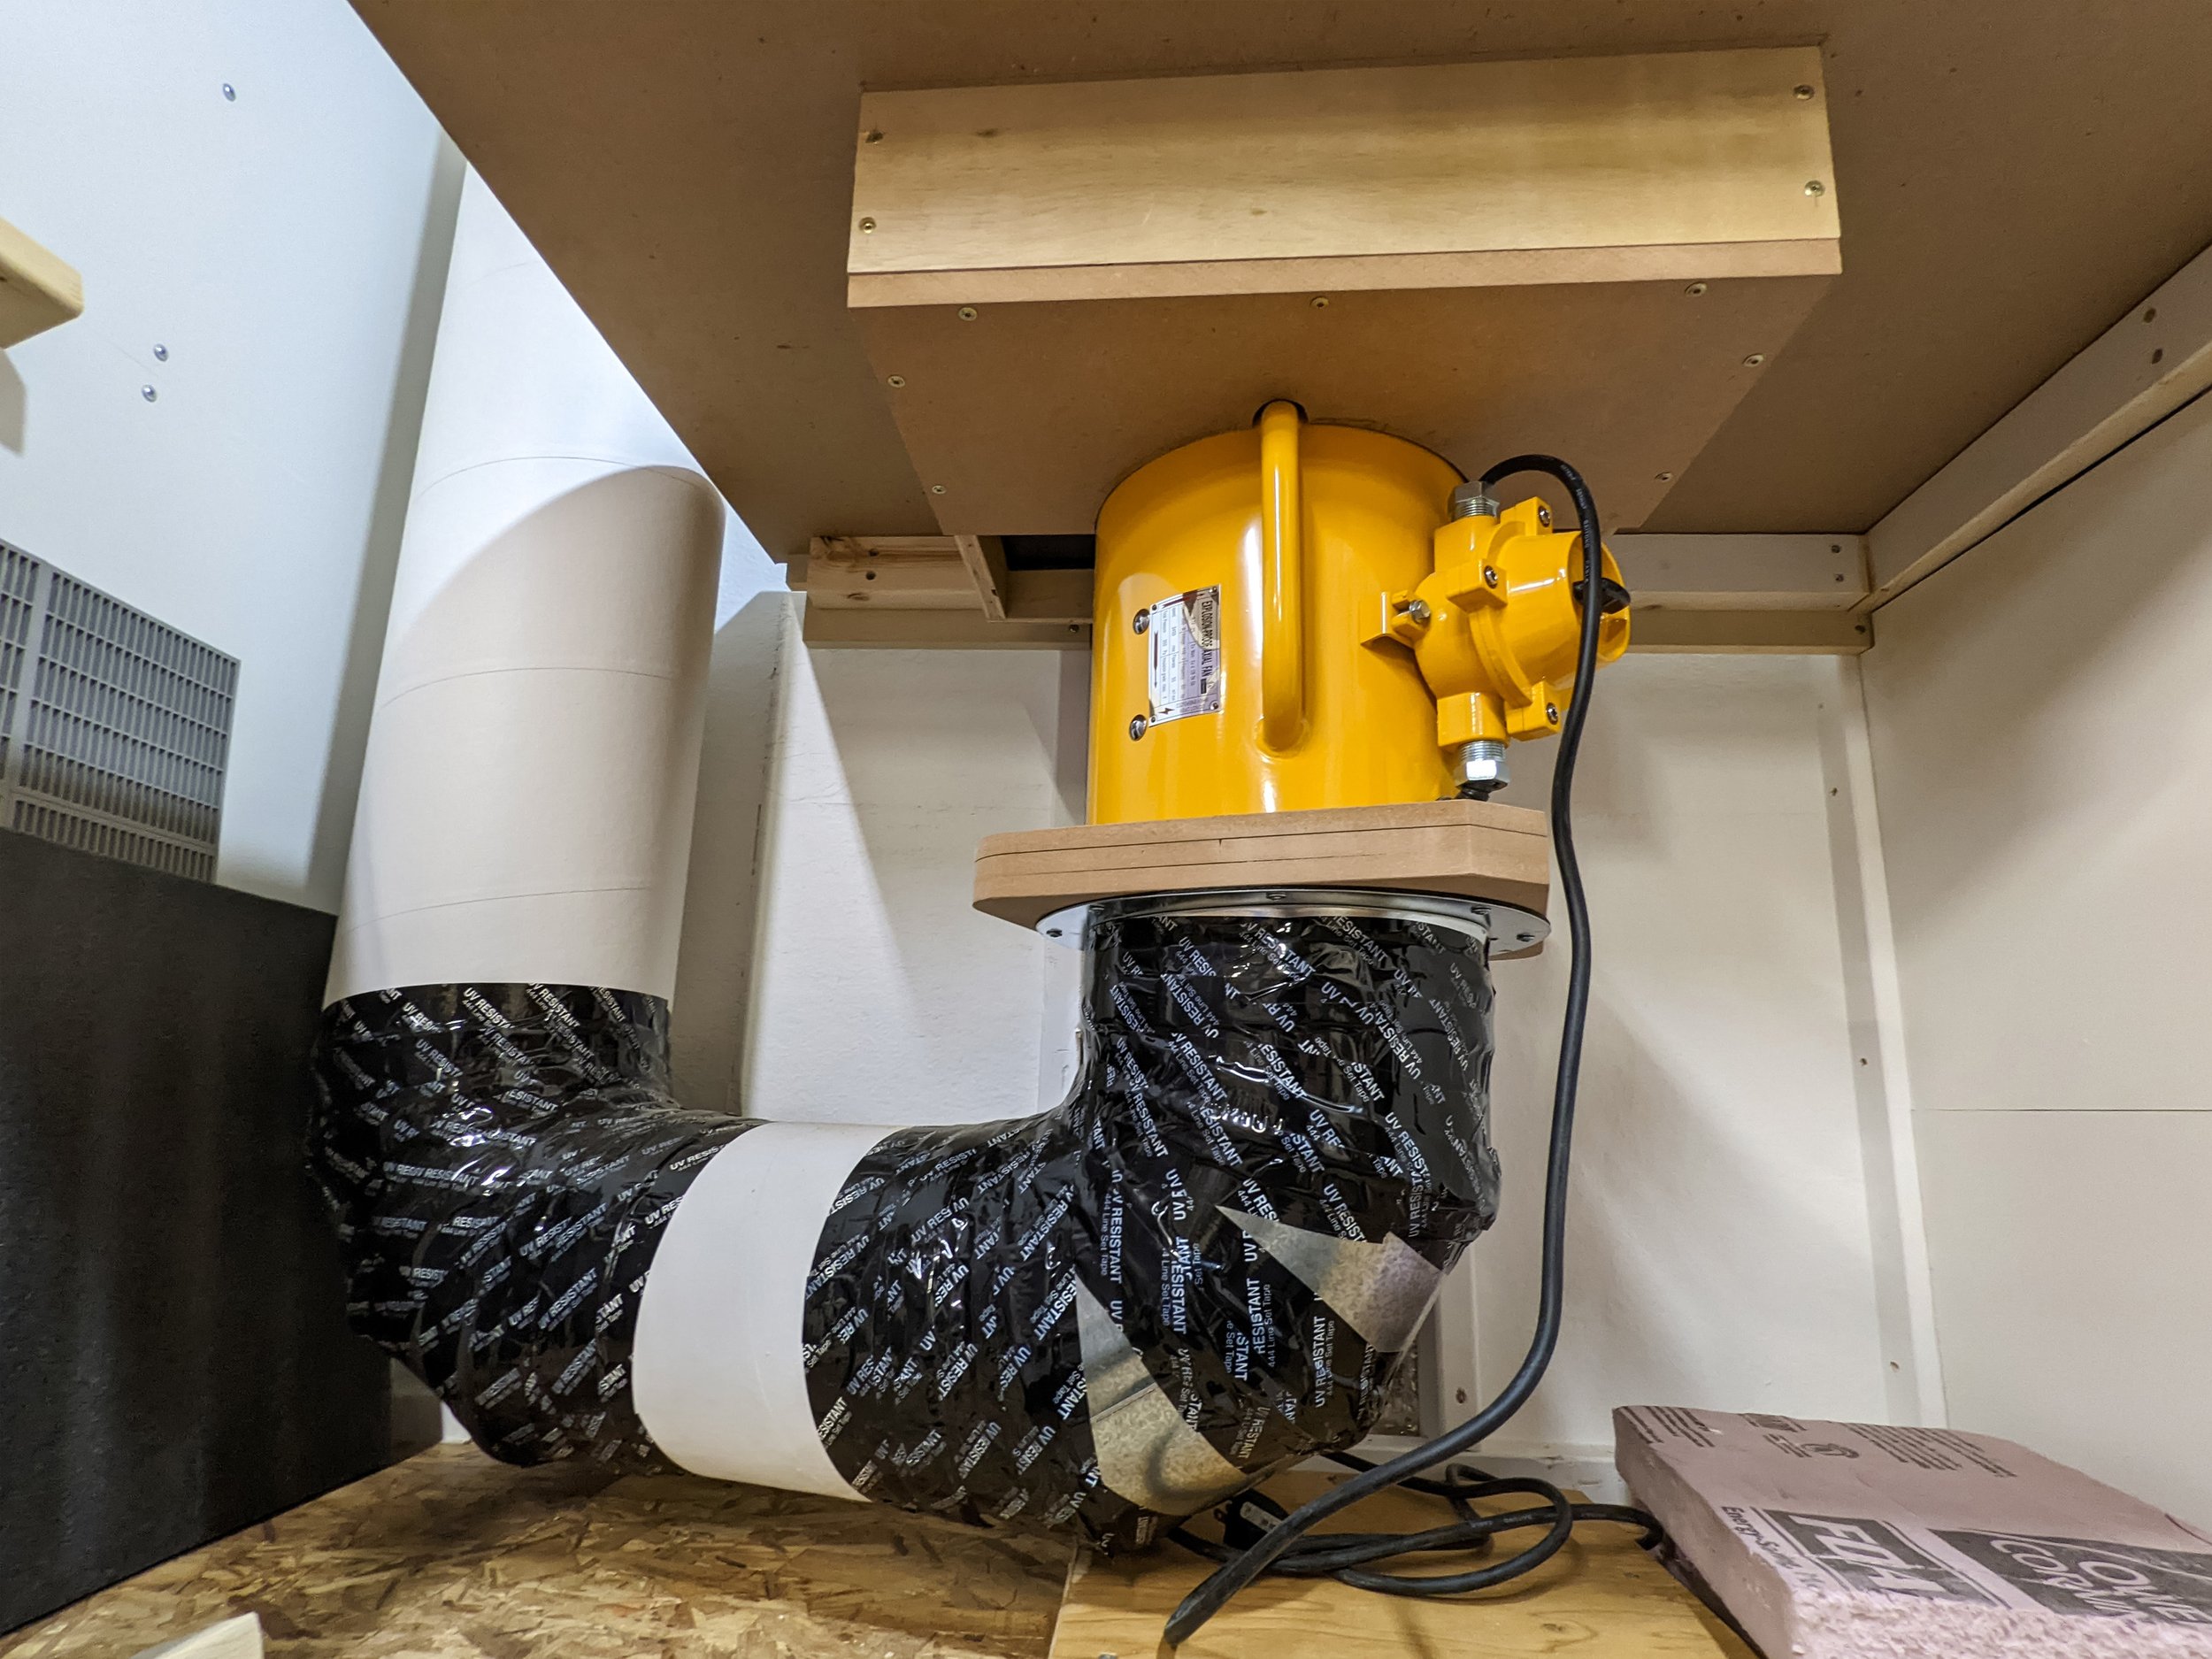
The vertical position of the plenum box’s bottom was determined by the ducting and fan geometry. There's about 3/8" (9.5 mm) clearance under the bottom duct tube.

Thus the height of the structure needed to support the plenum was finally determined so it could be screwed in place. Only the back and right sides are supported by this framing. The front and left are determined by upcoming additions so a temporary leg is used to support the left front.

CoHogToys Spray booth progress update

Corner blocks with bolts and t-nuts were used to join the plenum surfaces. I can take the whole thing apart and make adjustments as needed.

Additions can be handled similarly.
CoHogToys Spray booth progress update

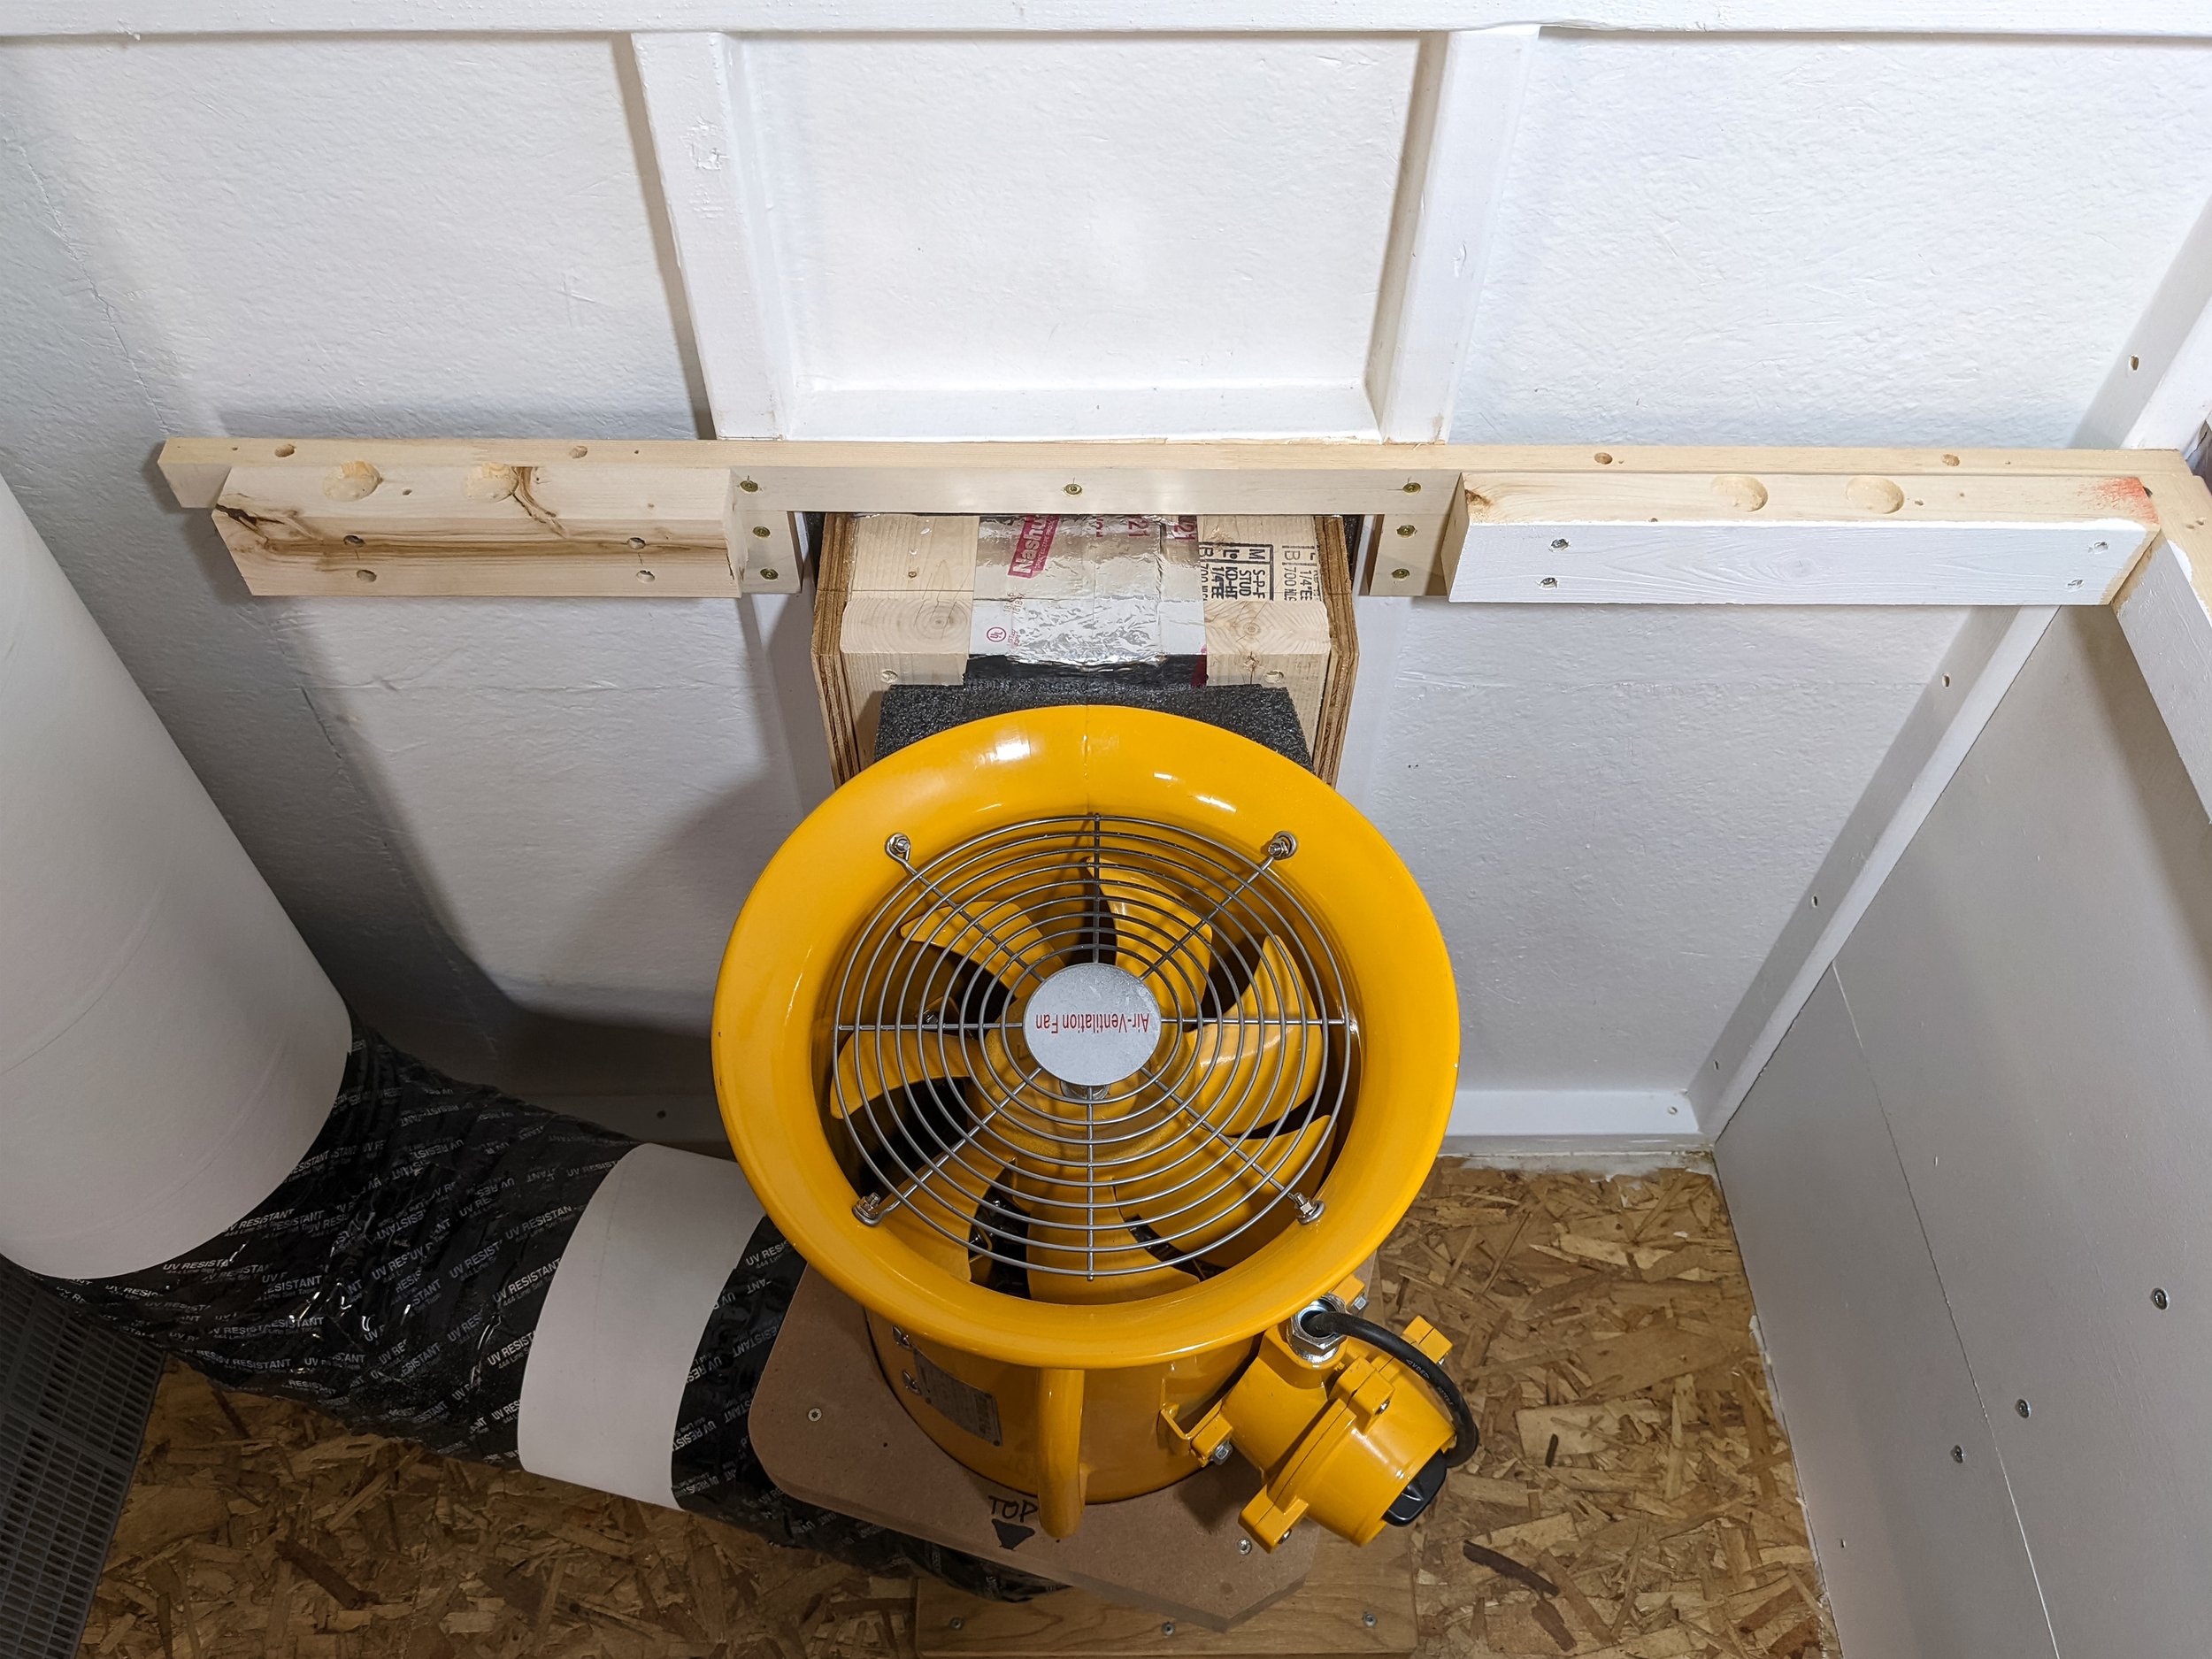
Since the whole booth concept rests on isolating the fan from the booth, having a fan inlet shaped like a trumpet bell presented challenges. It must be isolated and whatever it mates to must be air tight too.

I built a box to fit close to, but not touch, the fan. This was filled with two thick layers of foam shaped to fit the fan bell and odd spaces. Depicting the box and foam development process alone would fill a lengthy post, so I've spared you that.

The box foam transitions the air flow from the fan inlet size down to the fan bell diameter. After the plenum base and the box frame were in place, the foam pieces were added and the box bottom pieces were screwed in.

CoHogToys Spray booth progress update

The plenum box walls were added using the corner blocks. Additional holes are for mounting taller overspray walls later in the build.

Four 3D printed throat baffle supports position a nicely sized pail lid. This baffle is intended to create a more complicated path for the entering air so that it doesn't all just rush down into the fan.

A simple green vinyl coated fence support structure will hold up the plate baffle above it.

CoHogToys Spray booth progress update

3D Printing was also used to make a customizable baffle plate made up of 16 separate sections. I calculated the open area based on some previous industry experience and went from there.

Each plate section took 6 hours to print. They're held together with 3D printed U-channels and it sits freely on the screen support.

The free space at the ends is intended to encourage some air to move away from the center to avoid excessive turbulence in the center.*

(*Please note that my degree in the science of the fluid dynamics of moving air is from MSU - the esteemed Making Stuff Up University that most of us make frequent use of.)

CoHogToys Spray booth progress update

First test! Green filter sections and cardboard walls were added and the spraying began. Fortunately, the results were good. I was confident enough that the booth could be cajoled into further good results that I've continued apace with development.
CoHogToys Spray booth progress update

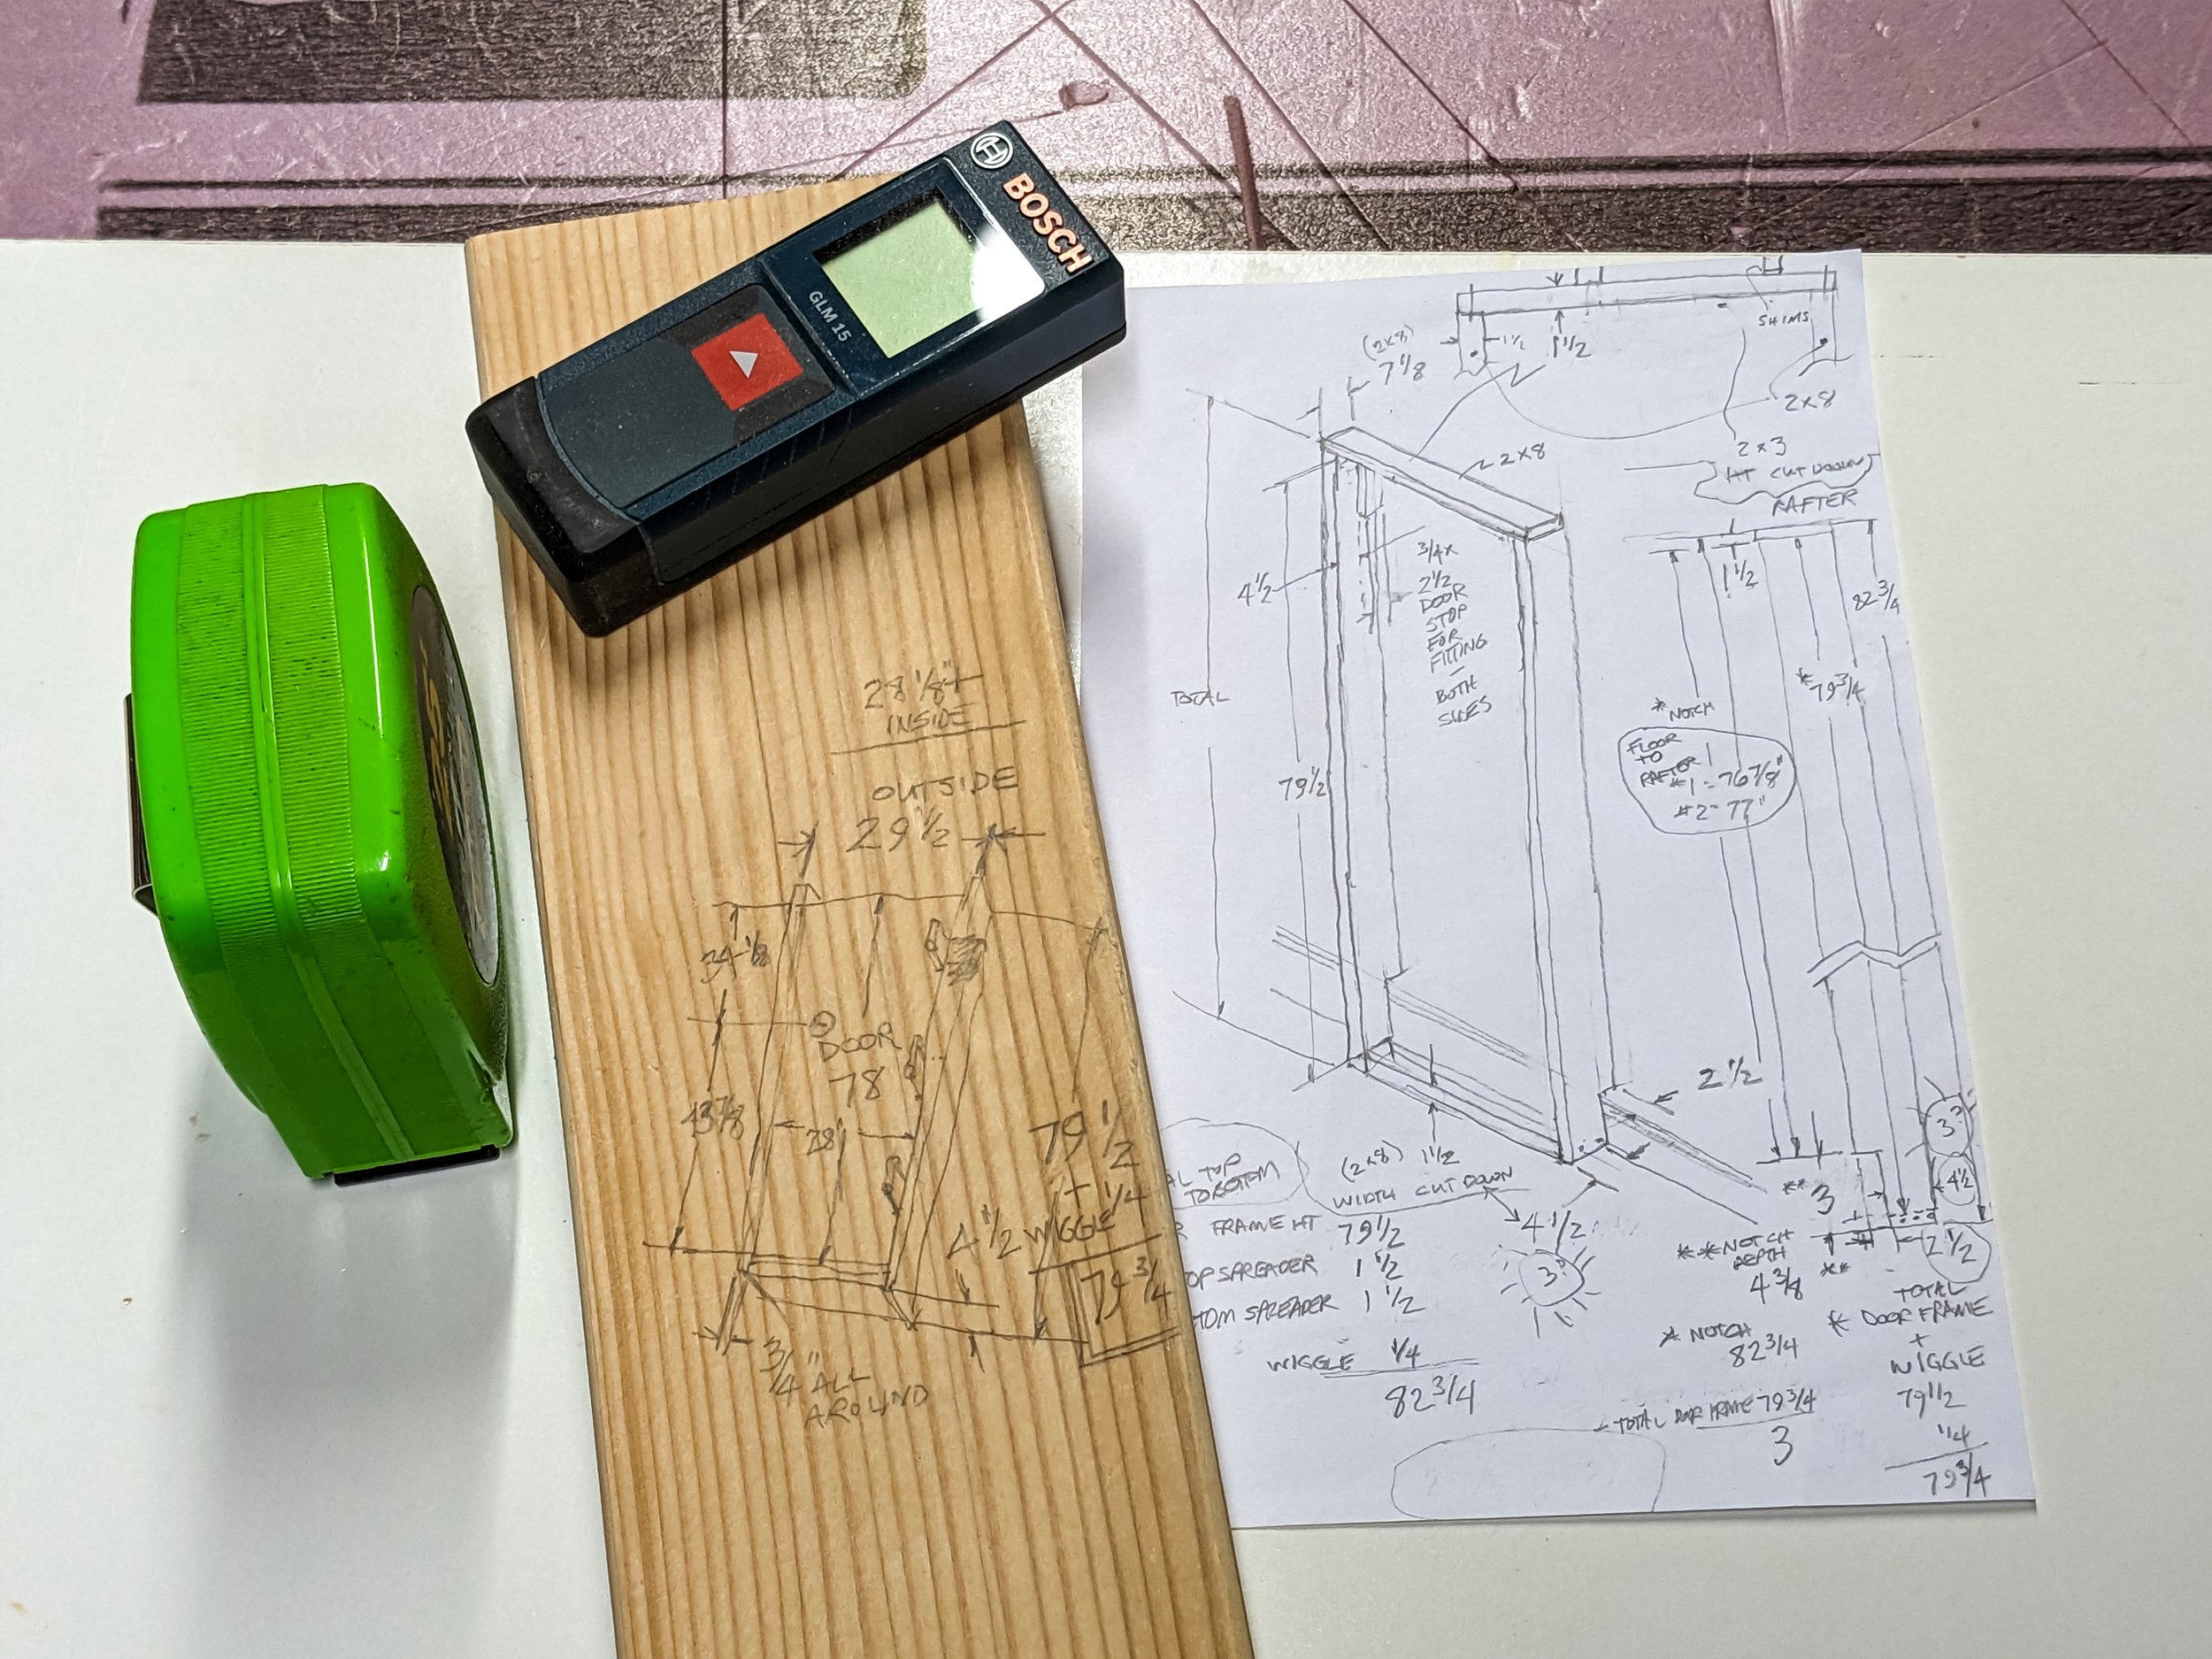
Just to reassure you that I don't do everything in CAD, these on the spot hand-drawn projected build pencil drawing attest to some informality when that is the fastest way to get there.

Of course, the as-built version is different and therefore functional.

CoHogToys Spray booth progress update

The previous bit of drawing was to figure out how to graft a prehung door onto the existing structure. The largish openings to the upper left of the door space are where the booth intake openings will be, complete with sticky filters.

The door was successfully installed with proper measures of patience and persuasion.

CoHogToys Spray booth progress update

Properly drying paint is helped by both controlled heat and air movement. I purchased a good-sized enclosed drying booth and have tested it successfully on small pieces.

Fitting it into the booth has been interesting.

It will live to the left of the painting area on top of this just-started structure that will also provide some much-needed storage area.

CoHogToys Spray booth progress update

The front glass panel folds down so it must have some support to rest on and the higher off the floor it is, the better my back will feel. It barely fits in under the plenum box and the heat adjustment knob just clears the plenum box front. Electrical connection is made in the upper left rear through a hole in the booth wall.

Before installation I lined the interior with white shelf paper to keep it from being a black cave. Even lights didn't help without using up too much space.

The available storage area below is a good start. Time will tell whether it is enough.


Back to top
← Porsche G935 - 015 - Fender FandangoCo-Hog Ferrari & Ferrari Racing Teams →

Latest Posts

Featured
Special Edition - Mercedes-Benz 380SEC AMG
May 8, 2026
Special Edition - Mercedes-Benz 380SEC AMG
May 8, 2026

AMG came on in a big way in the late 60s by building exquisite racing engines. By the mid-70s they were tuning select Mercedes-Benz models into absolute beasts. The combination of a fierce engine and finely tuned suspension mods with more aggressive bodywork led to more than a few unsuspecting drivers wondering what the devil had just passed them.

Read more →
May 8, 2026
Lola T70 MK IIIB - 008 - Headlights Hurdle
February 6, 2026
Lola T70 MK IIIB - 008 - Headlights Hurdle
February 6, 2026

As you might surmise, there are no straight lines surrounding the Lola T70 Mk IIIB Coupe headlights. Such a sensuous body demands curves just about everywhere. Three-dimensional curvilinear lines abound. The original 1982 version of the Co-Hog Lola had subtle grooves to delineate the headlight shapes. The resulting interior surfaces were then painted silver. Seems it would be a simple proposition to duplicate the idea on the totally reshaped nose of this restored version. There was only one problem - I’d forgotten how I did them 40-odd years ago!

Read more →
February 6, 2026
Lola T70 MK IIIB - 007 - Stance Matters
October 3, 2025
Lola T70 MK IIIB - 007 - Stance Matters
October 3, 2025

Race cars have a stance that instantly catches and holds the eye. This effect is created by the relationship between the wheels and tires to the forms surrounding them. Aggressive, low, and ready to attack. The Lola T70 Mk IIIB Coupe is one of racing’s most sensuous race cars. It relies on its stance to help accomplish that.

Read more →
October 3, 2025
Lola T70 MK IIIB - 006 - Persistent Bodywork
August 29, 2025
Lola T70 MK IIIB - 006 - Persistent Bodywork
August 29, 2025

Repair and renewal of the Lola T70 body have been my main focus but work on the other parts is ongoing simultaneously. An occasional dry reassembly gives me a feeling of progress and a sensible check that all is going in the right direction.

Read more →
August 29, 2025
Special Edition - Ferrari 512 BB
July 25, 2025
Special Edition - Ferrari 512 BB
July 25, 2025

The Co-Hog version of the Ferrari 512 BB was introduced in 1982 and a scant 45 were made. Two were given to Enzo Ferrari (#28), and Brenda Vernor, (#29), his private secretary for 16 years (1977-1993), by the late Gary Kohs (#33). Gary was an appreciative Ferrari collector who had been granted unusual access to photograph the complete build of his 1:1 512 BB and wanted to show his appreciation.

Read more →
July 25, 2025
002a Porsche 917-10.jpg
June 13, 2025
Commission - Porsche 917-10
June 13, 2025

One of the first Co-Hog commissioned sculptures I made was the Brumos Racing Porsche 917-10/007 as raced by Peter Gregg and Hurley Haywood in Can-Am from 1972-1974. It was commissioned by a gentleman in Florida who was well-acquainted with many of the top drivers of the time.

Read more →
June 13, 2025
Lola T70 MK IIIB - 005 - Ongoing Enhancements
May 23, 2025
Lola T70 MK IIIB - 005 - Ongoing Enhancements
May 23, 2025

It took a while, but I finally decided the front end had to be improved over my original (1982) Lola T70 MK IIIB sculptural interpretation. It just didn't do justice to the voluptuousness of Tony Southgate's original design. With so much more visual information available today, I've been working on gradually creating a whole new nose.

Read more →
May 23, 2025
001 blog w border.jpg
April 25, 2025
Porsche G935 - 021 - First of Four Completed
April 25, 2025

The first of only four Co-Hog Porsche G935's has been completed. Three more will be finished, one for each of my sons and a final one that will stay in the Co-Hog collection. It has been quite a development process as I've squeezed them in with the other on-going projects over the last 3+ years.

Read more →
April 25, 2025
Special Edition - F1
February 28, 2025
Special Edition - F1
February 28, 2025

Formula One racing is about to begin again. Love it or hate it, drama at the highest-level swirls around it like a tornado. This Co-Hog Special Edition F1 distills the essence of an early 1980’s F1 race car into a 7" (18cm) long sculpture that looks like it’s ready for the coming season.

Read more →
February 28, 2025
Porsche G935 - 020 - Graphics - Clear Coat - Assembly
February 7, 2025
Porsche G935 - 020 - Graphics - Clear Coat - Assembly
February 7, 2025

The first of four Co-Hog Porsche G935's is ready for its beauty shots photography. The next three are in various stages of completion and will be finished in due time.

Read more →
February 7, 2025

EARLIER POSTS

  • Oct, 4 2024

    Go to post

  • Sep, 13 2024

    Go to post

  • Aug, 9 2024

    Go to post

  • Jul, 19 2024

    Go to post

  • Jul, 6 2024

    Go to post

  • May, 10 2024

    Go to post

  • Mar 30, 2024

    Go to post

  • Mar 1, 2024

    Go to post

  • Feb 2, 2024

    Go to post

  • Jan 12, 2024

    Go to post

  • Dec 22, 2023

    Go to post

  • Dec 9, 2023

    Go to post

  • Nov 19, 2023

    Go to post

  • Nov 10, 2023

    Go to post

  • Oct 24, 2023

    Go to post

  • Oct 6, 2023

    Go to post

  • Sep 8, 2023

    Go to post

  • Aug 18, 2023

    Go to post

  • Jul 28, 2023

    Go to post…

  • Jul 7, 2023

    Go to post…

  • Jun 23, 2023

    Go to post…

  • Jun 2, 2023

    Go to post…

  • May 5, 2023

    Go to post…

  • Apr 22, 2023

    Go to post…

  • Mar 3, 2023

    Go to post…

  • Feb 10, 2023

    Go to post…

  • Jan 6, 2023

    Go to post…

  • Dec 30, 2022

    Go to post…

  • Dec 16, 2022

    Go to post…

  • Dec 5, 2022

    Go to post…

  • Nov 4, 2022

    Go to post…

  • Oct 29, 2022

    Go to post…

  • Oct 14, 2022

    Go to post…

  • Oct 3, 2022

    Go to post…

  • Aug 29, 2022

    Go to post…

  • Aug 19, 2023

    Go to post…

  • Jul 23, 2022

    Go to post…

  • Aug 19, 2022

    Go to post…

  • June 10, 2022

    Go to post…

  • May 14, 2022

    Go to post…

  • Apr 30, 2022

    Go to post…

  • Mar 28, 2022

    Go to post…

  • Mar 12, 2022

    Go to post…

  • Mar 5, 2022

    Go to post…

  • Jan 28, 2022

    Go to the post…

  • Jan 10, 2022

    Go to the post…

  • Dec 21, 2021

    Go to post…

  • December 5, 2021

    Go to the post…

  • Nov 11, 2021

    Go to the post…

  • Oct 24, 2021

    Go to the post…

  • Oct 14, 2021

    Go to the post…

  • Oct 6, 2021

    Go to blog post…

  • Sep 4, 2021

    Go to blog post…

  • Sep 4, 2021

    Go to blog post…

  • May 29, 2021

    Go to blog post…

  • May 1, 2021

    Go to blog post…

  • Apr 17, 2021

    Go to blog post…

  • Mar 3, 2021

    Go to blog post…

Powered by Squarespace