

Thanksgiving is a busy time here in the states (we would be smarter to have it a month earlier like Canada). I hope you and your families all had jolly good feasts!
Back to cutting wood. I always like to show the seemingly random jumble from which the finished pieces are created. It is actually a big help for keeping my next steps firmly in mind.
The Porsche G935 greenhouse is one of the most important pieces to be added since it determines the position and shape of so many other parts.
This is where the CAD work really pays off. The resulting templates give a great starting point to help define the 3D features while keeping track of the overall construction.
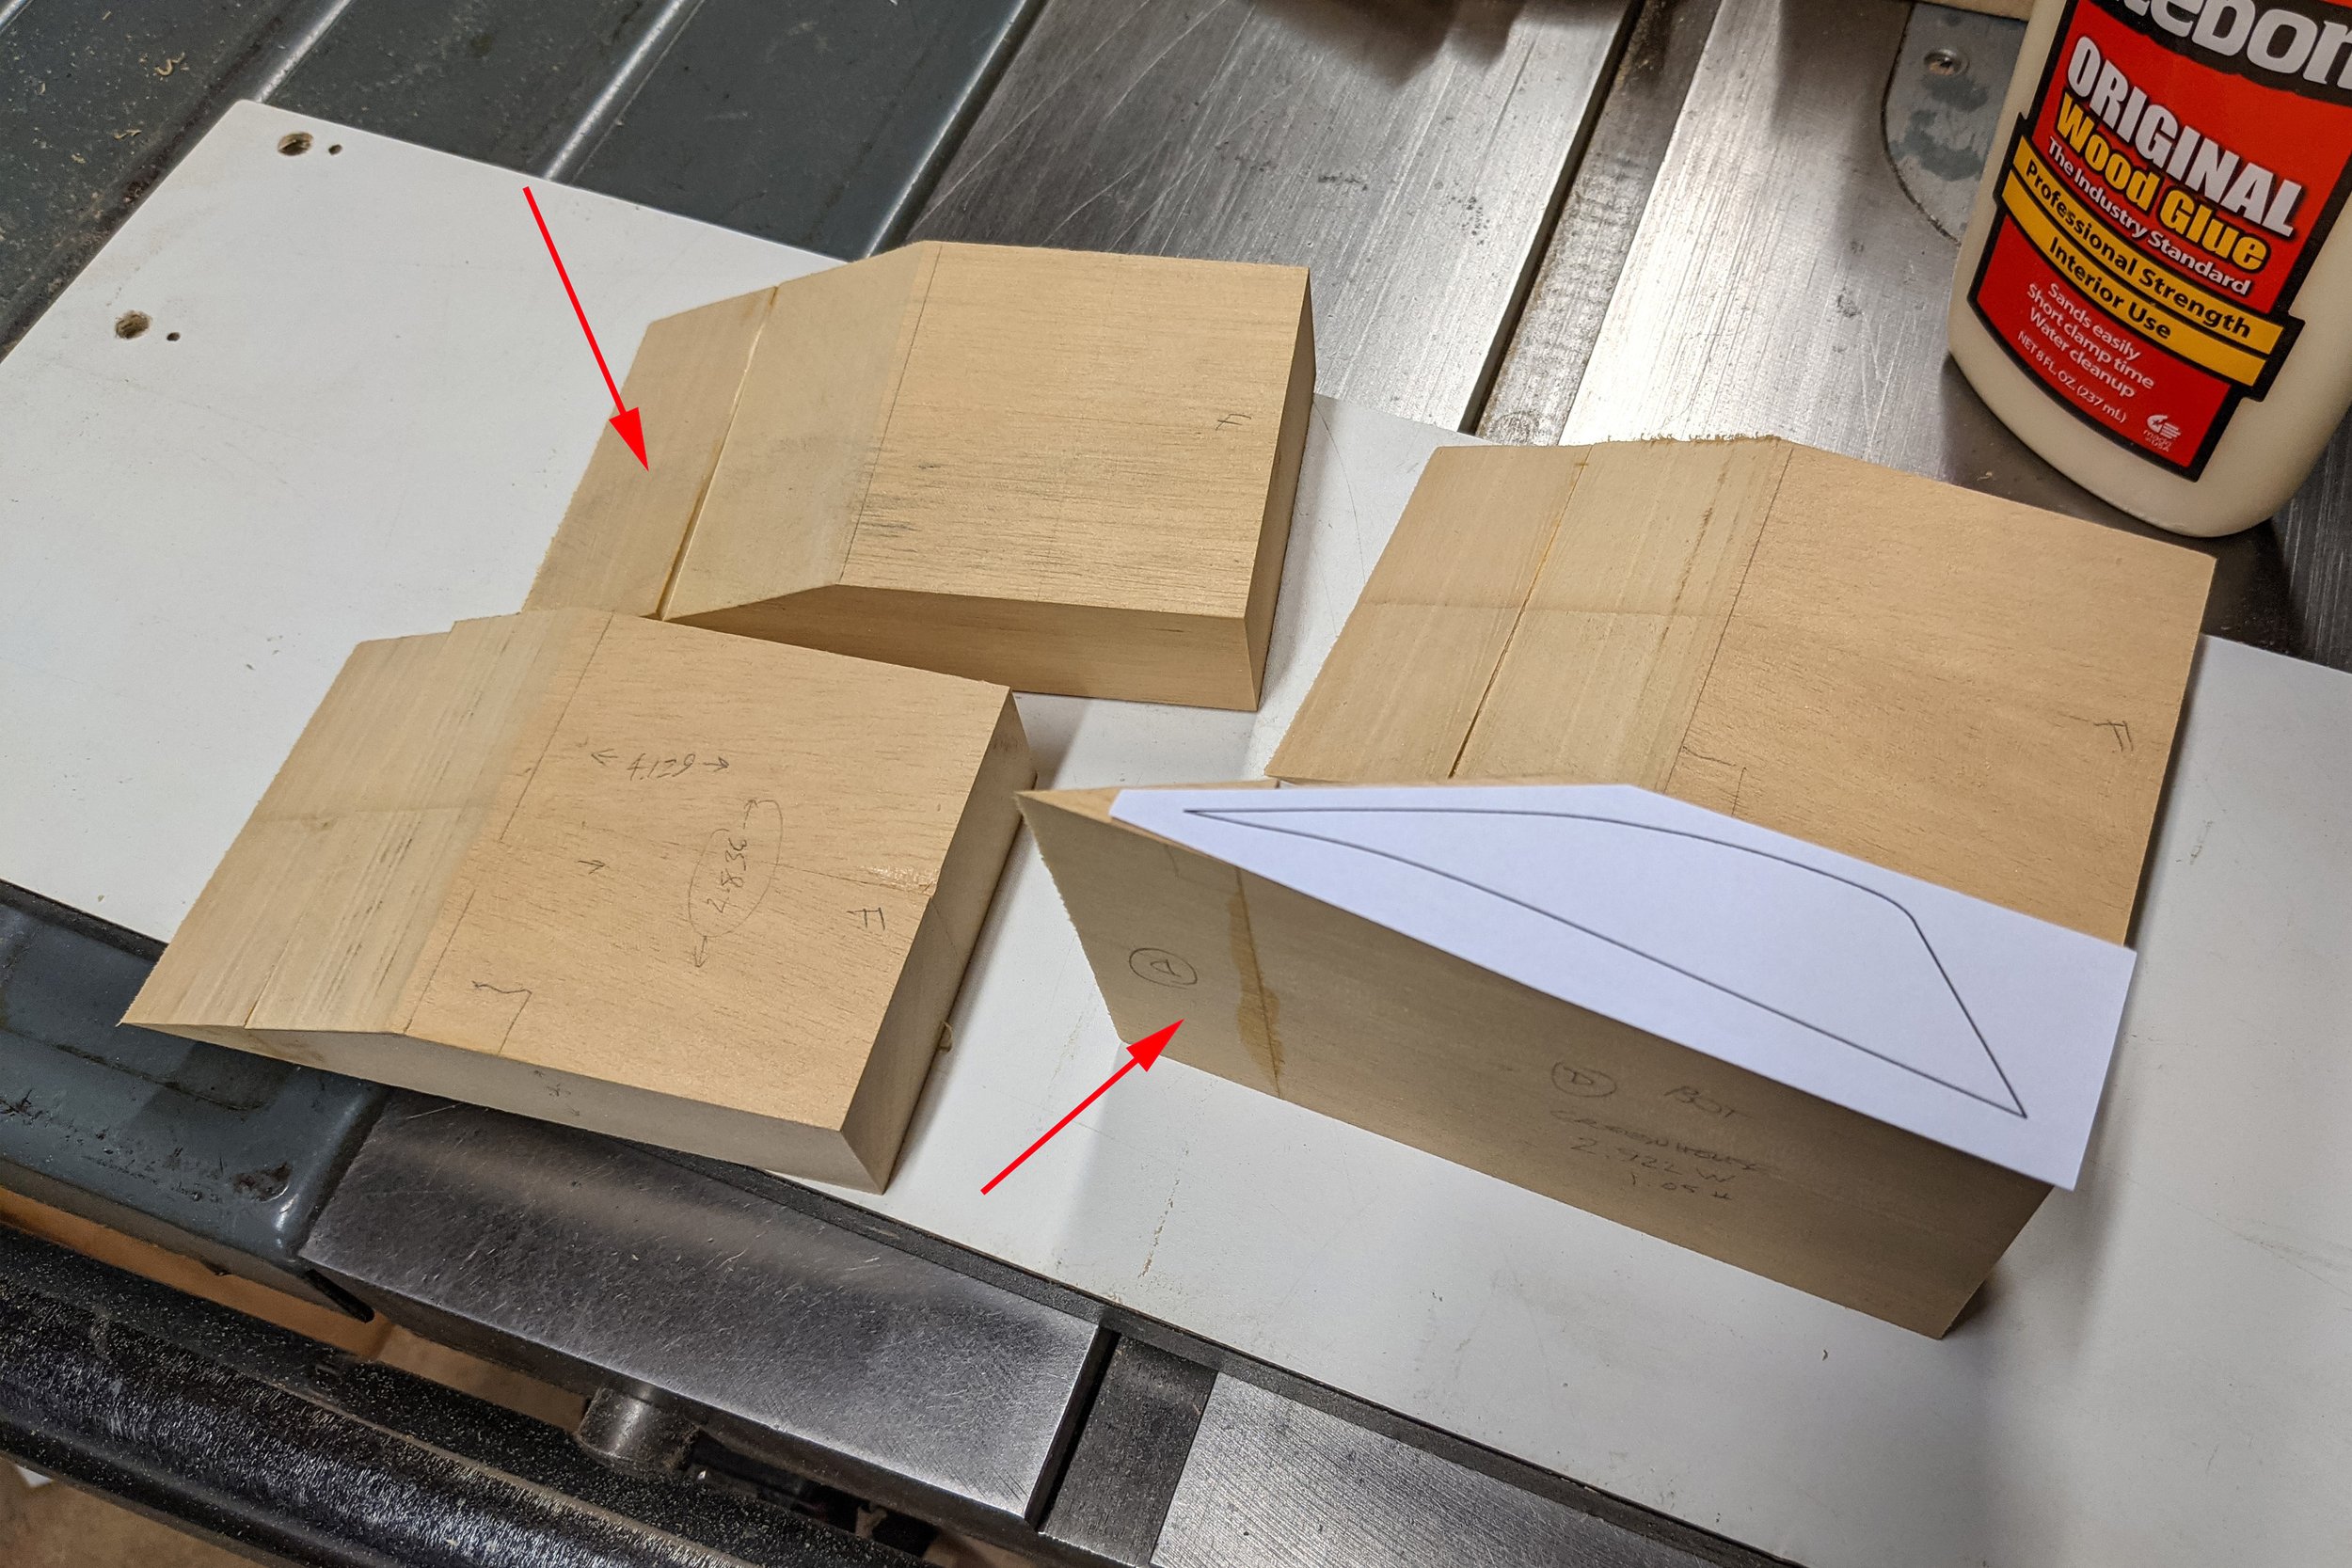
The template for the side window quickly showed that the starting blocks were a bit short. Small butterflied blocks were added to the ends and the rear top profile was roughly cut on the bandsaw.

The bandsaw was also used to remove the bulk of the material for the bottom profile.
The top arrow points to my golden squaring block to which I attach the various blocks with double-faced tape. Performing the proper sequence of operations is important in order to have a square reference surface available as long as it's needed.
The bottom arrow points to the glue line where the tip was added.

The bottom profile was sanded close to the final line on a drum sander and then hand shaped for a final fit.
Someday I'll get an oscillating sander to make these inside curves easier.

The top profile was added using the large disc sander and then hand sanded.
I use a 12" sander to remove the big whacks and then a speed-controlled 5" sander for the finer bits.

The greenhouse tumblehome (the angled, always changing surface from the A pillar back to the tail) requires a template for guiding the top and bottom curves. They are projected onto a flat plane in CAD, but each curve (red arrows) is actually a different length in 3D.
I measured the real length of each segment of the top and bottom curves with a flexible ruler and then adjusted the templates using Photoshop to stretch each segment (green dots) by the proper amount.
The templates have slots cut in them to allow visual lining up of the template with the greenhouse centerline during template placement.
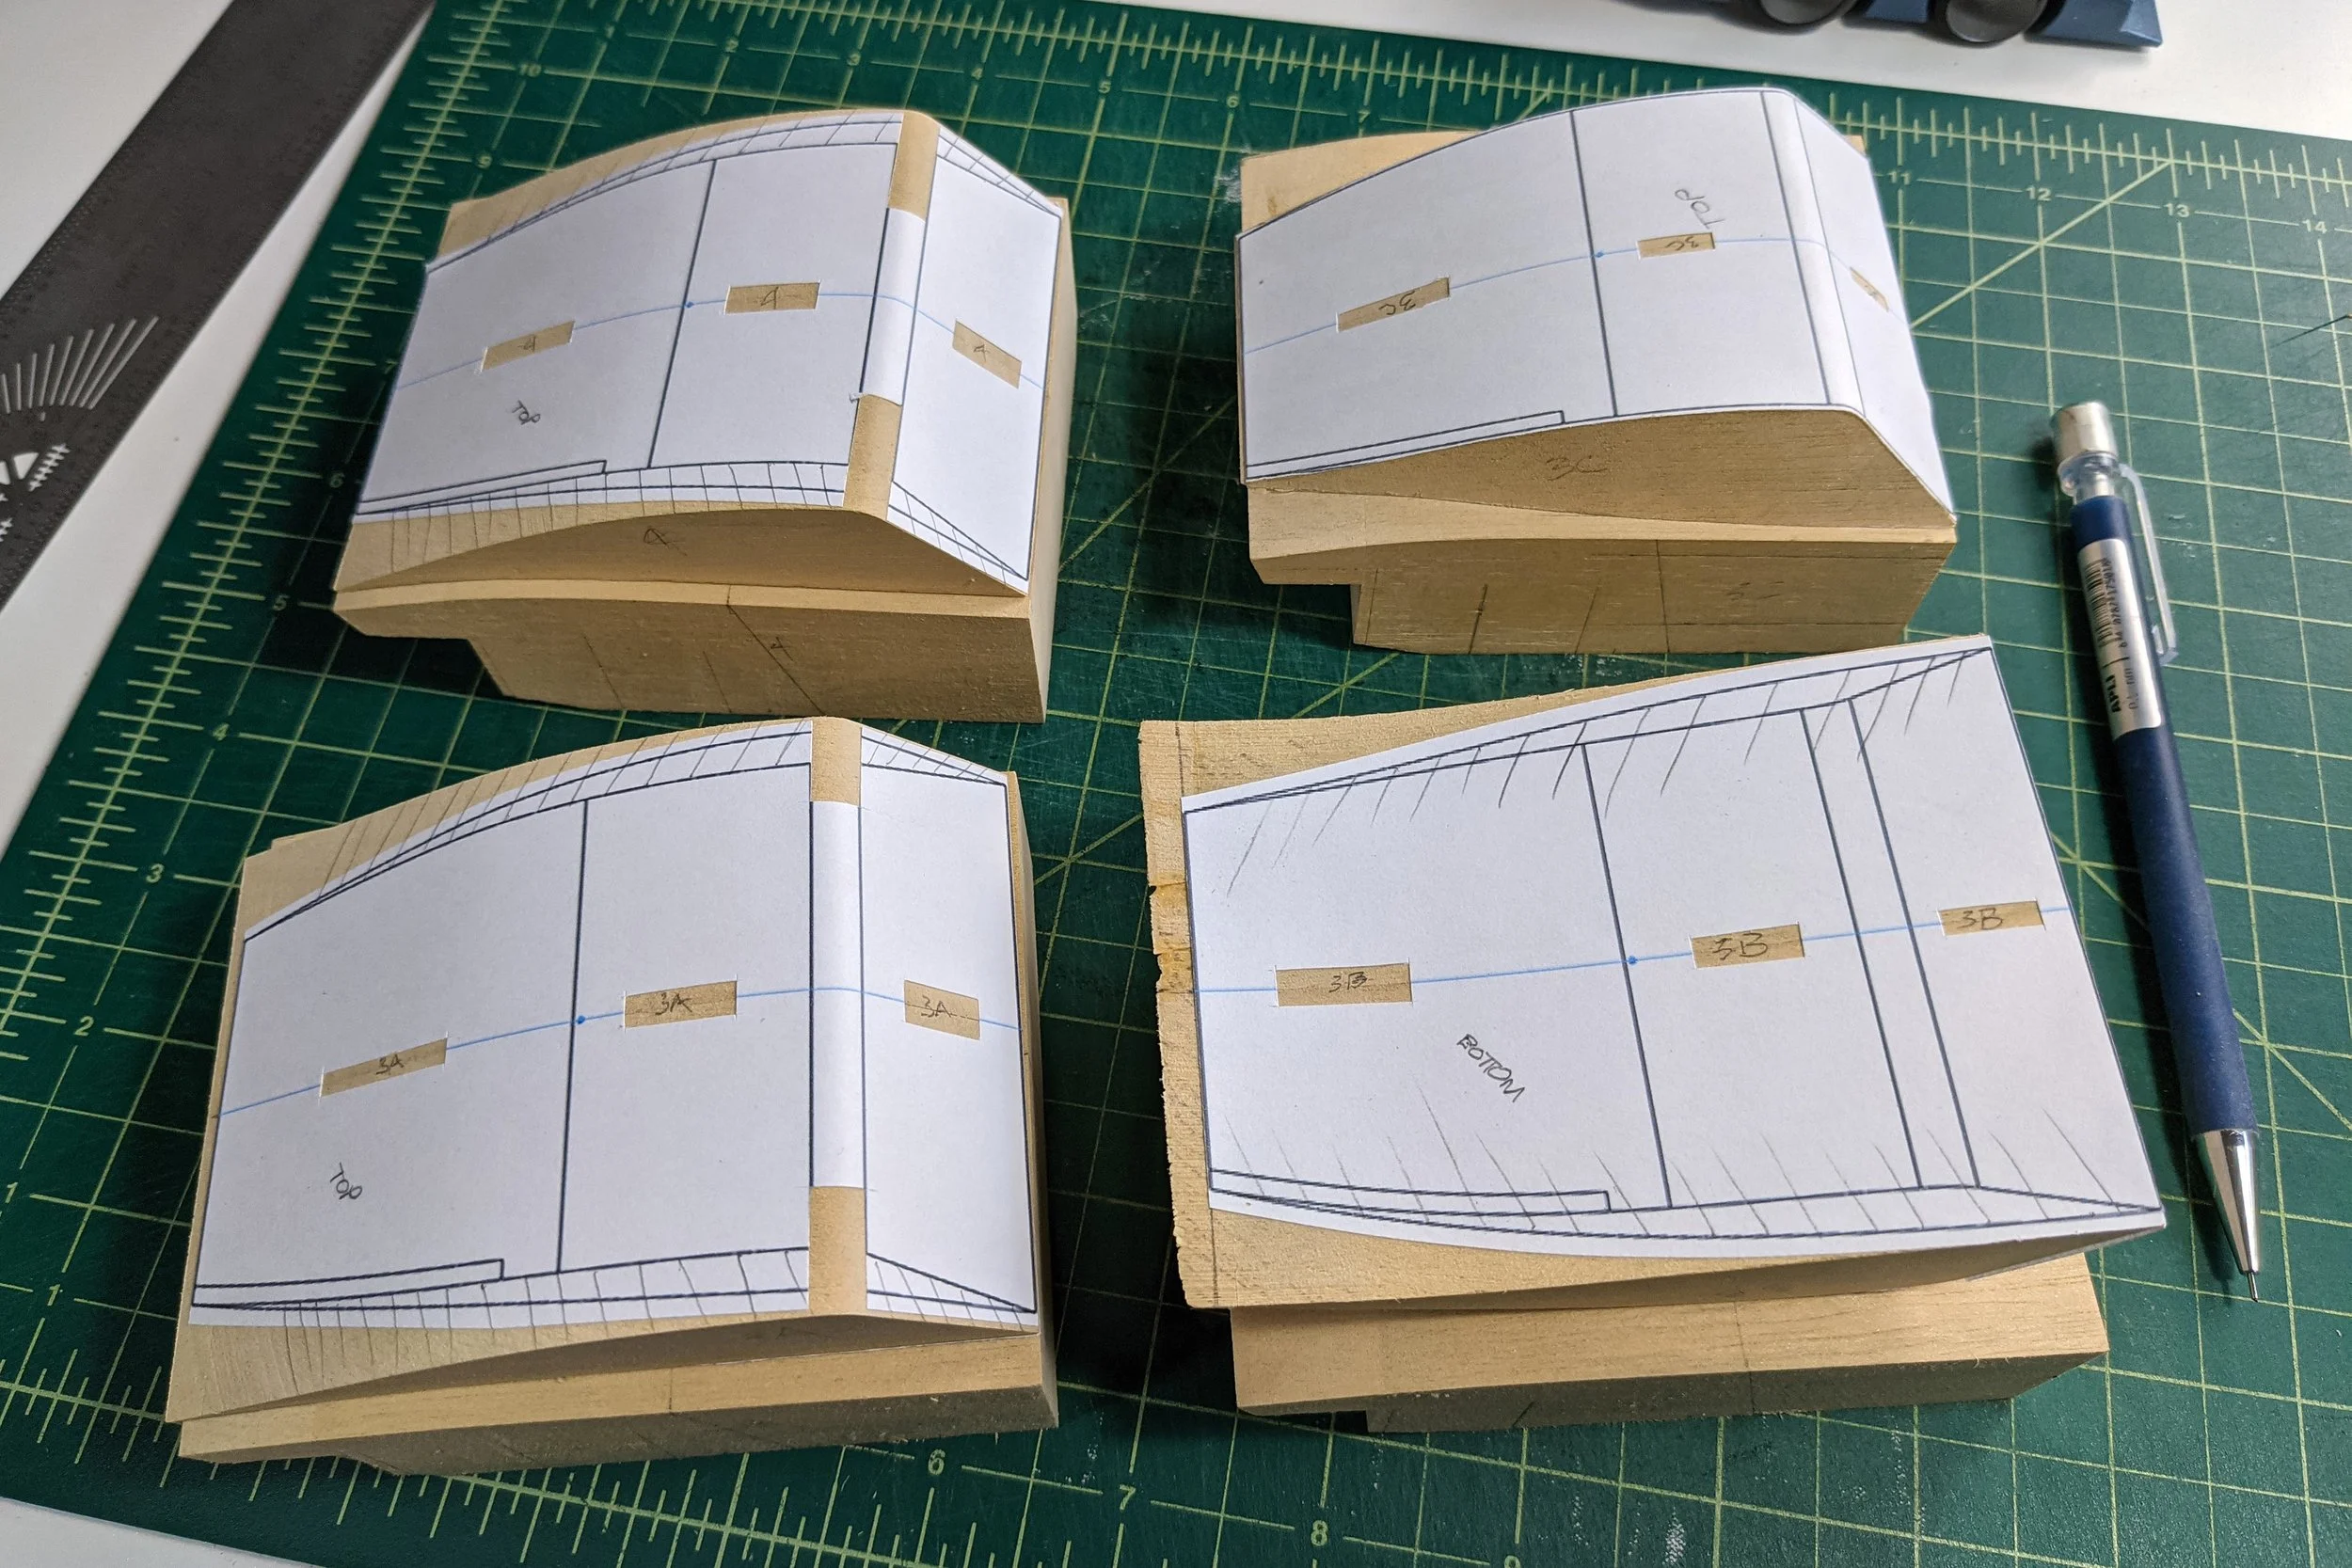
Templates are held in place with double-sided artist's adhesive. It comes in sheets and gives better coverage than tape on larger surfaces. It also helps keep the template edges in place.
Pencil hash marks are there to make sure that I sand to the correct lines since both the top and bottom curves are on each template.

Initial freehand shaping of the tumblehome surfaces was done on the big disc sander. I was able to get quite close on the top line while regularly checking the bottom line and keeping the overall surface flat.

The tricky part was to not sand off any of the top or bottom guide lines so that there was still material left to finish sand.

Finish sanding was done by hand with sanding blocks. A relief pocket was removed leaving a generous gluing border. That allowed me to get a better fit overall.

After final shaping the greenhouse was glued in place - ready for the main hood section to be added.
Next up - 006 – Hood-Fenders-Air Dam – Front end work on the Porsche G935s with the addition of the hood, front fender and air dam blocks.
For more of the story click on any of the following links:
020 - Graphics - Clear Coat - Assembly
012 - 2nd Skins Layer-Splitters
007 - 3D Printing the Engine Bay
005 - this post