
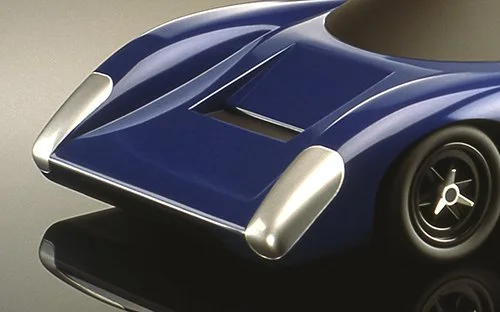
Three-Dimensional CUrvilinear lines
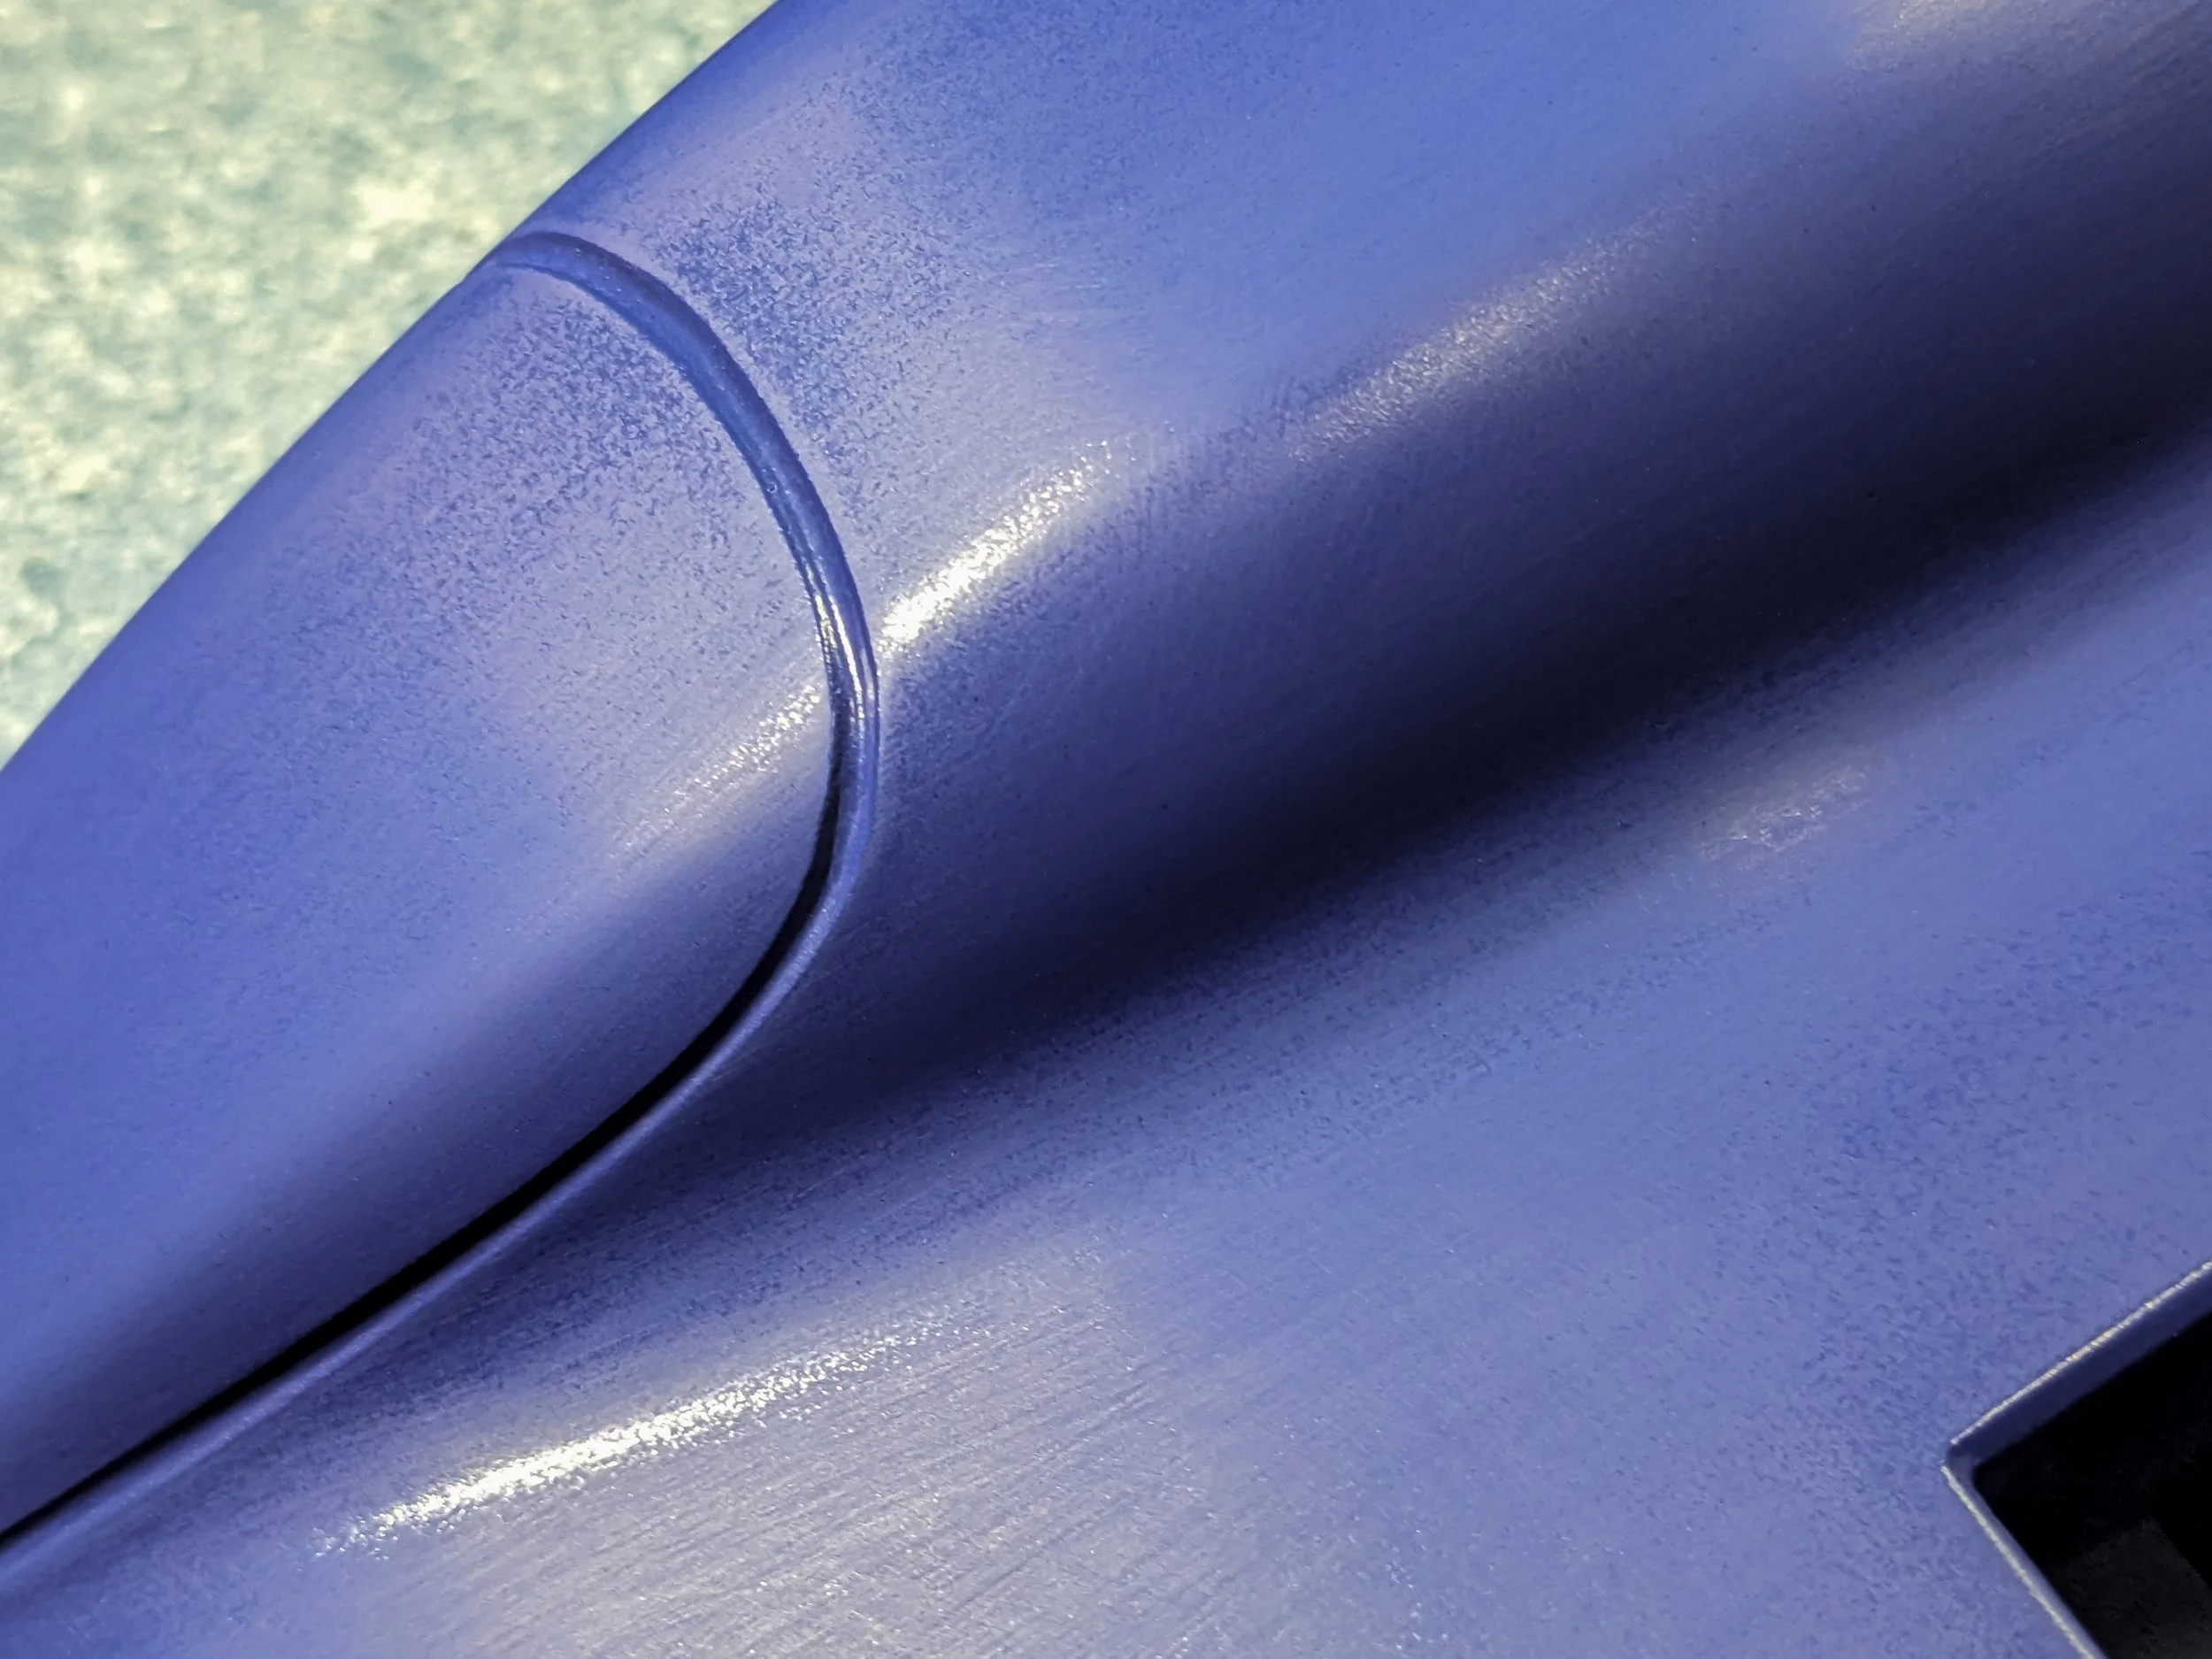
As you might surmise, there are no straight lines in the grooves surrounding the Lola T70 Mk IIIB Coupe headlights. Such a sensuous body demands curves just about everywhere. This is particularly true of the front fenders.
The original 1982 version of the Co-Hog Lola had subtle grooves to delineate the headlight shapes. The resulting interior surfaces were then painted silver. It seemed it would be a simple proposition to duplicate the idea on the totally reshaped nose of this restored version, except for one thing - I’d forgotten how I did them 40-odd years ago. That is the headlights hurdle to overcome!
As I worked on all the other parts of the restoration, the headlight situation was always lurking in my mind. There wasn’t a single obvious choice, so I started trying the ideas that had been floating around in my head for months.
I made two separate facsimile fenders and little by little figured out a process that is yielding proper results.
This post is about the journey.
CURRENT PROGRESS
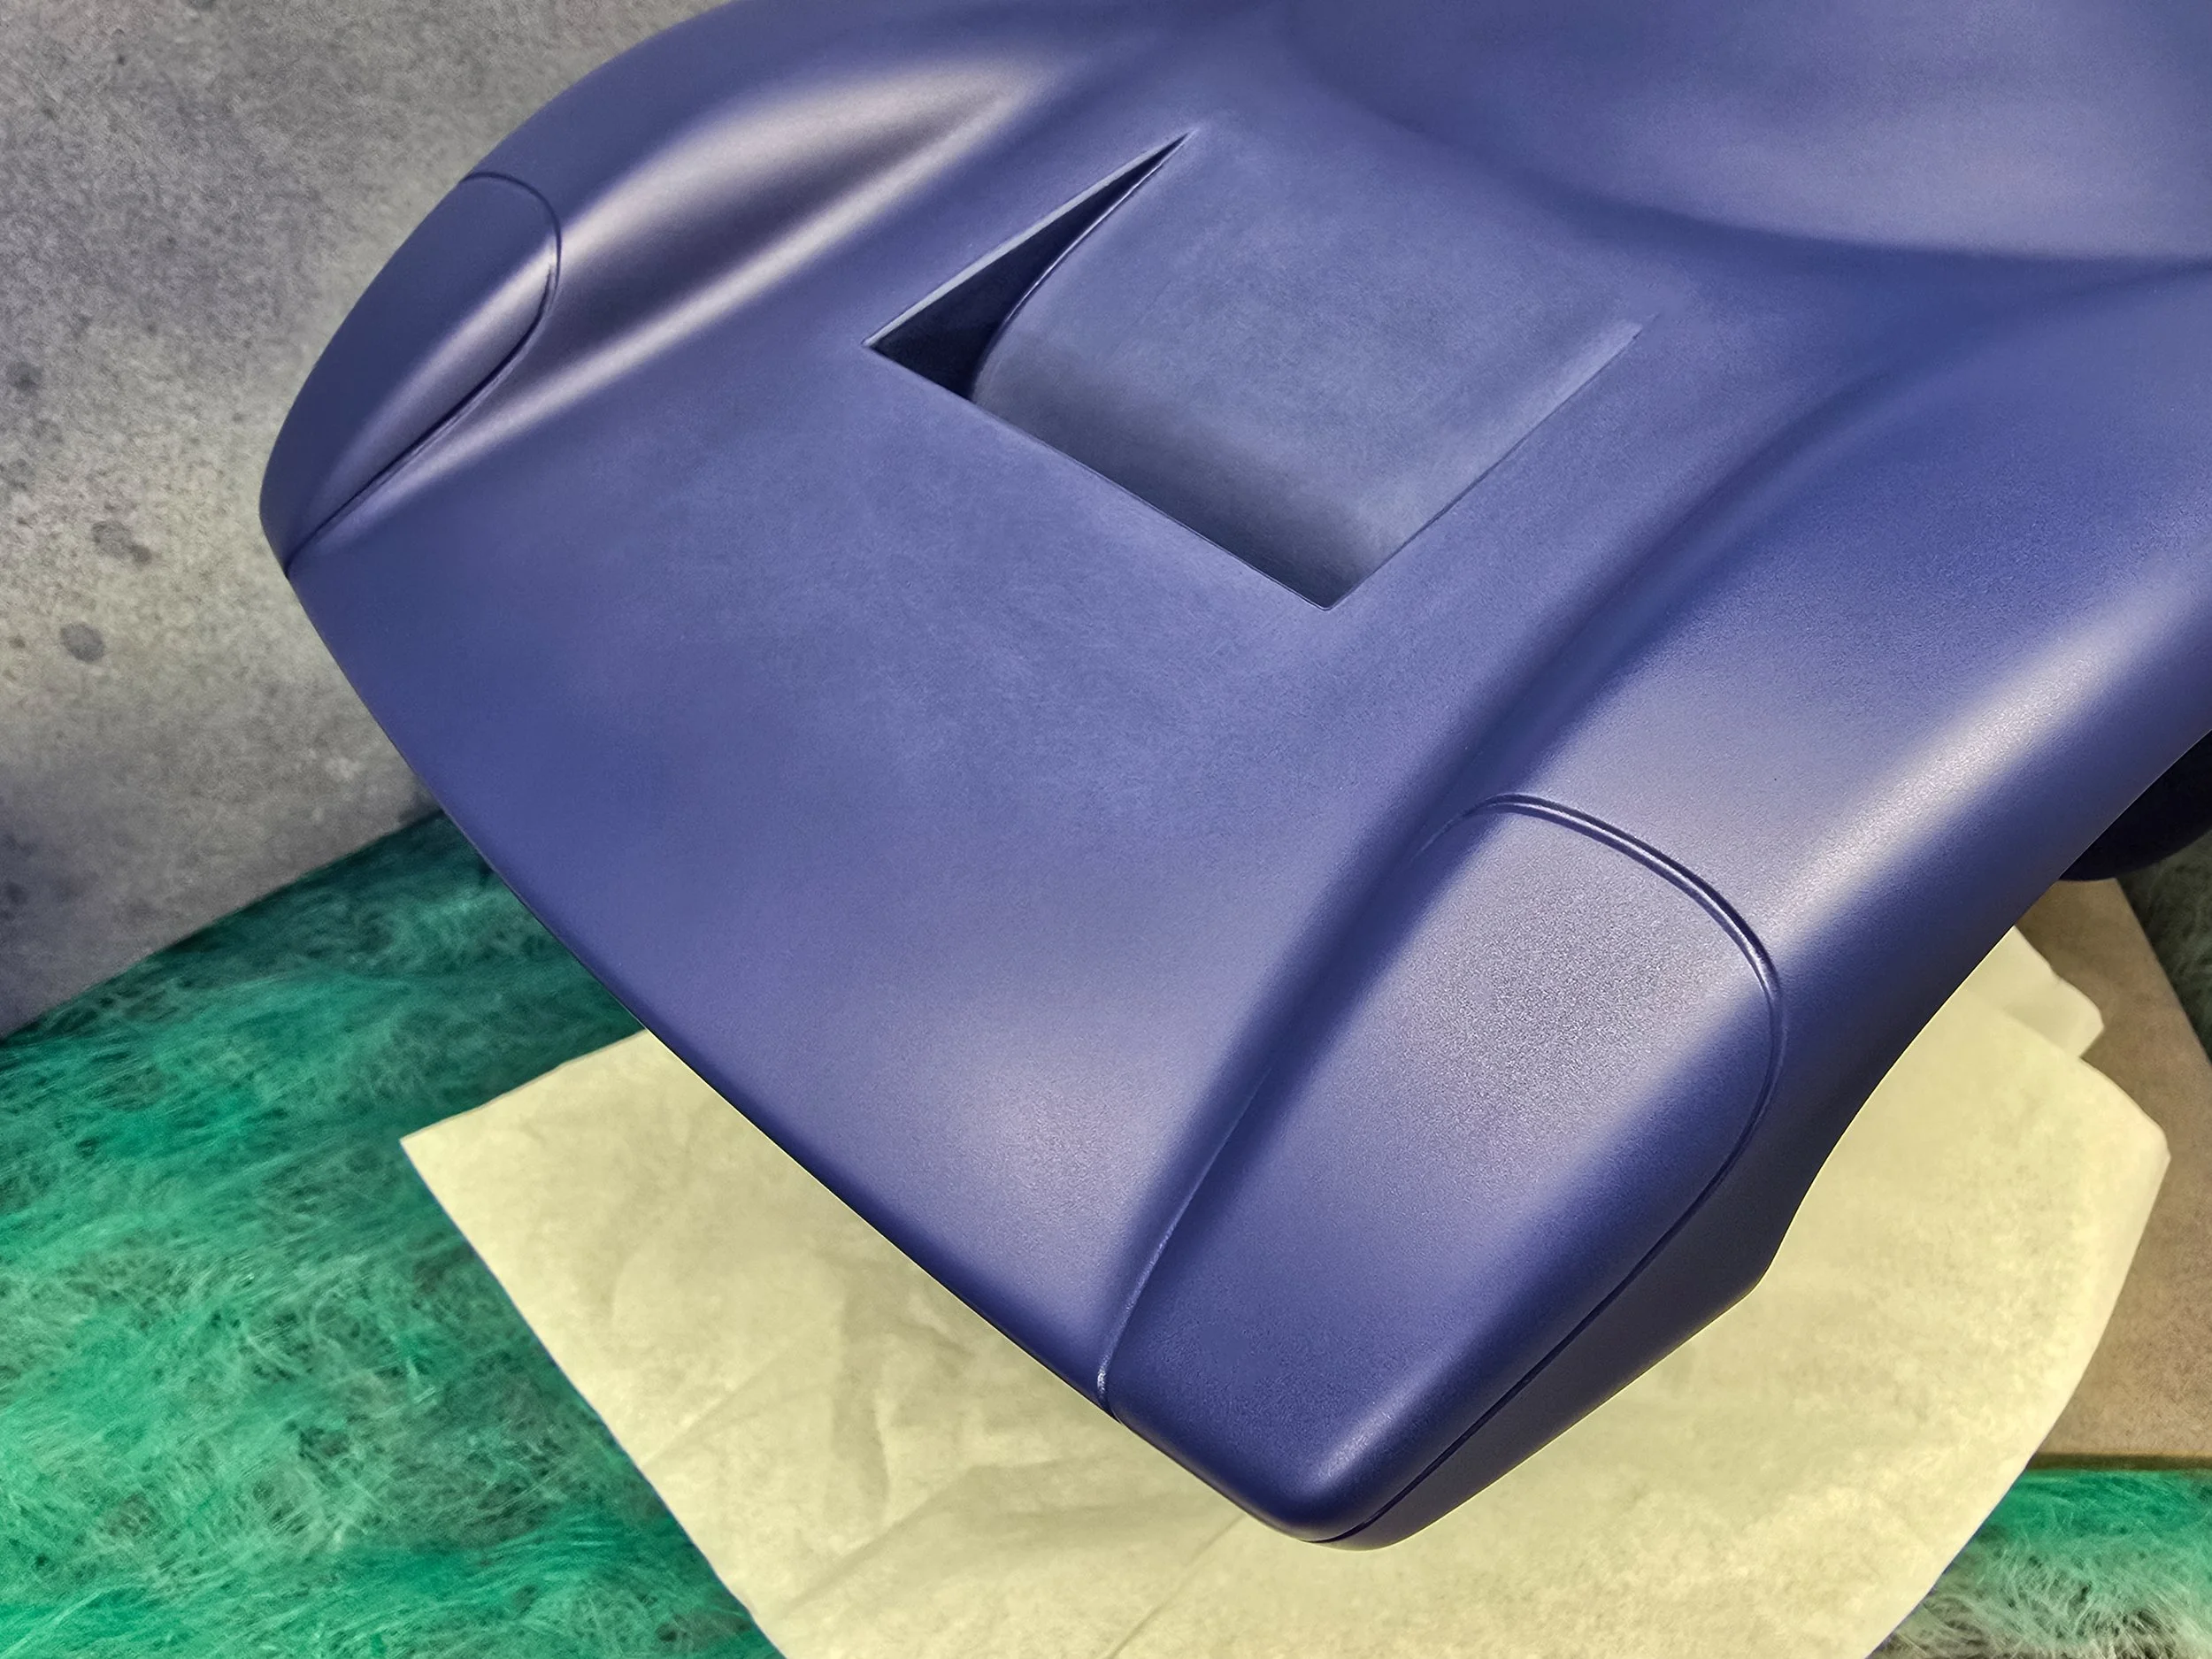
There have been some significant changes to the front of the body. Within the existing proportions, the previously flat front face has been curved to more closely resemble the 1:1 car. This led to re-profiling the area between the fenders and extensive changes to the fenders themselves - both in plan and profile views.
The radiator opening has also been moved rearward and deepened. This post - Persistent Bodywork - covers the changes more thoroughly.
Once the final front end reshaping was finalized, the addition of the headlights could begin.
DEFINING THE SHAPES
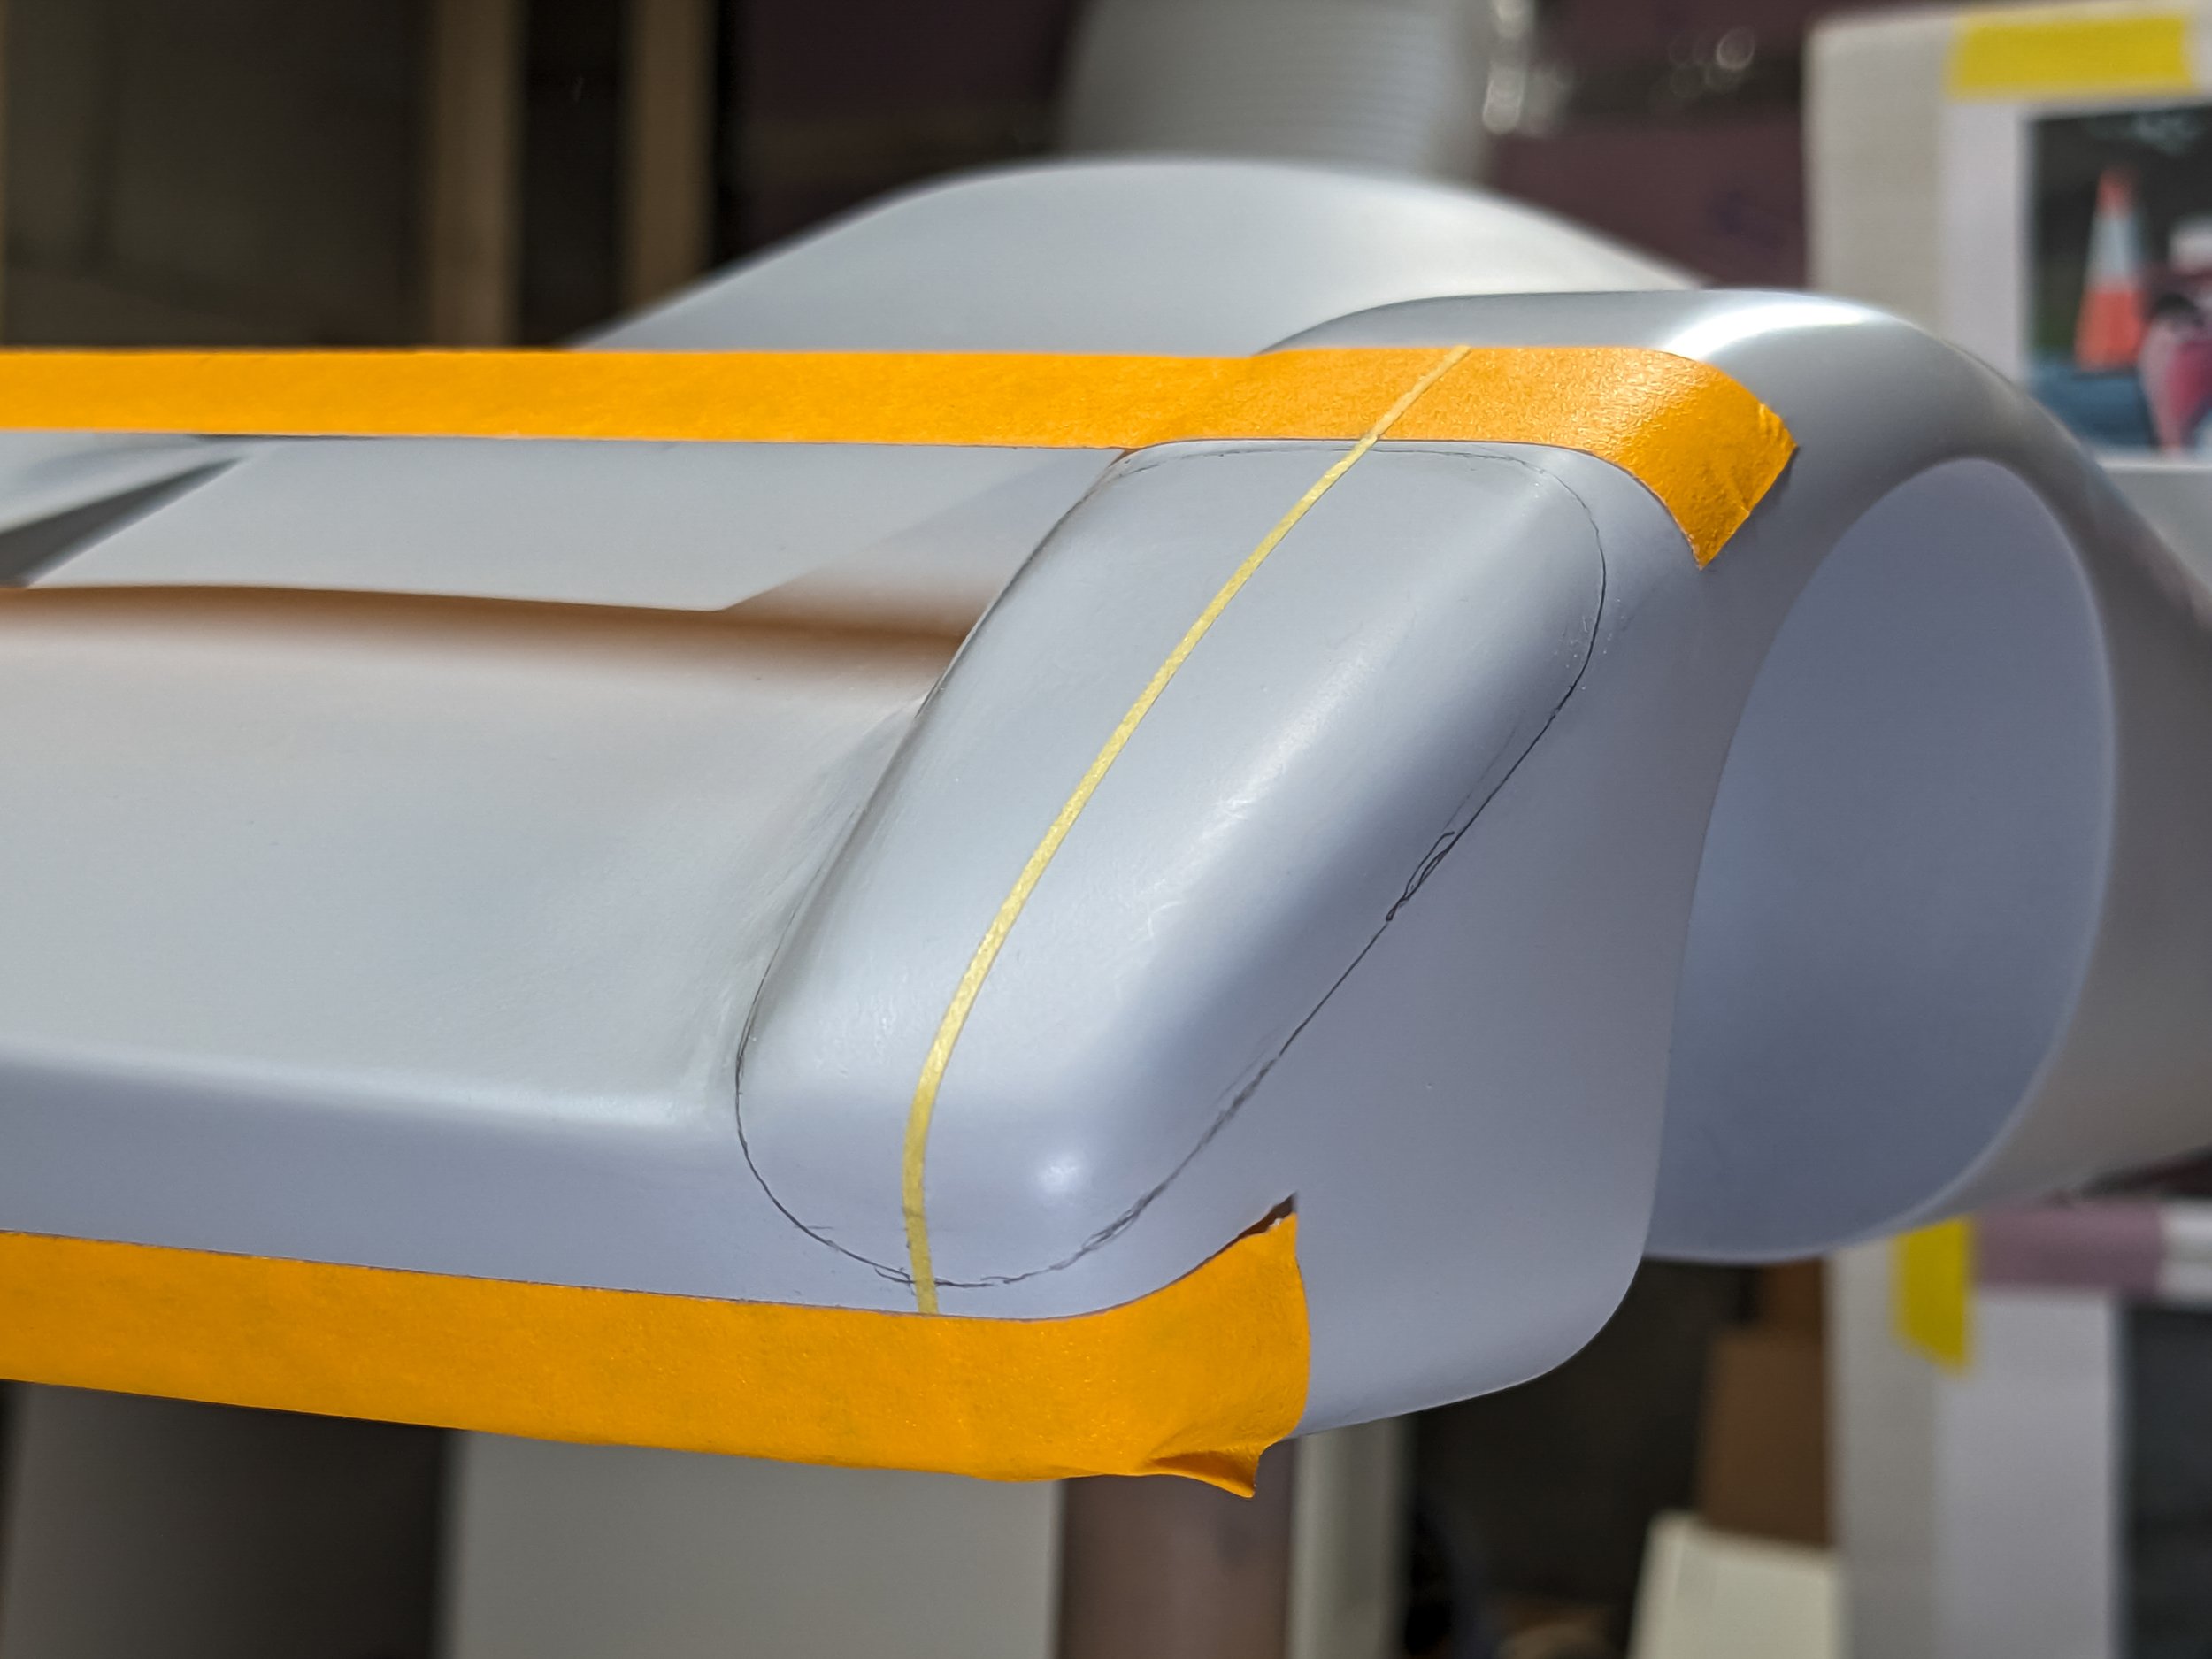
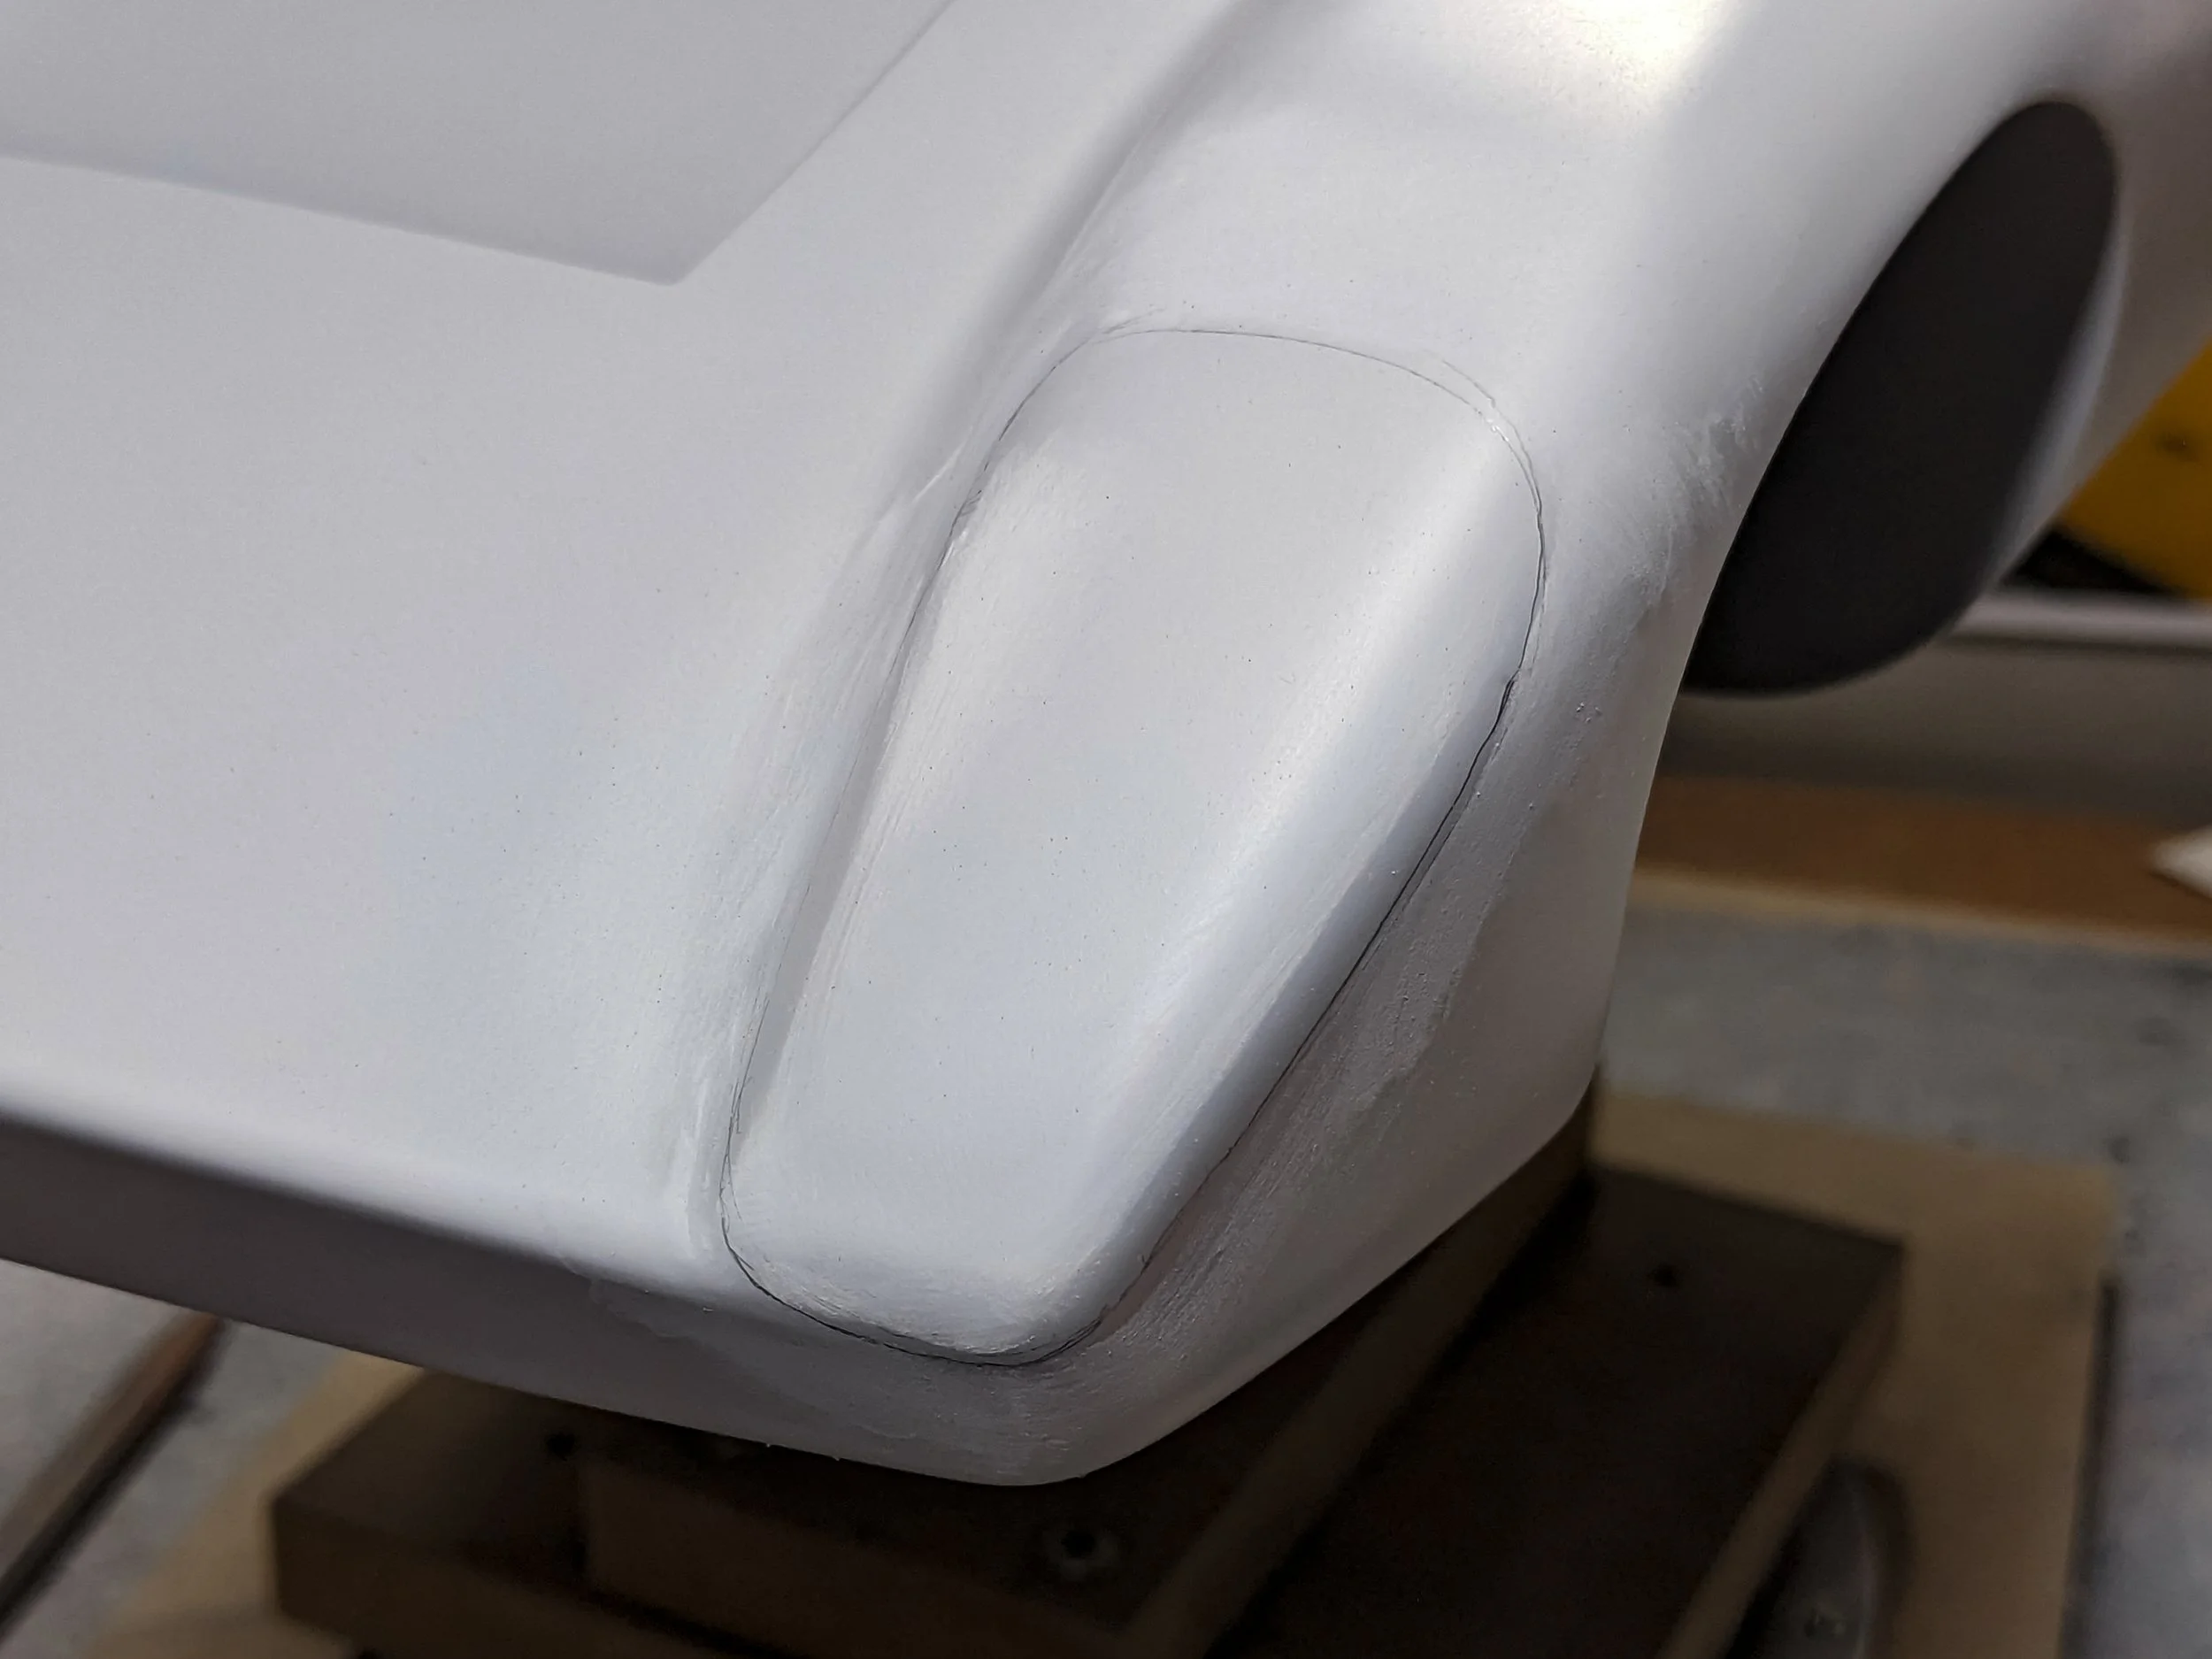
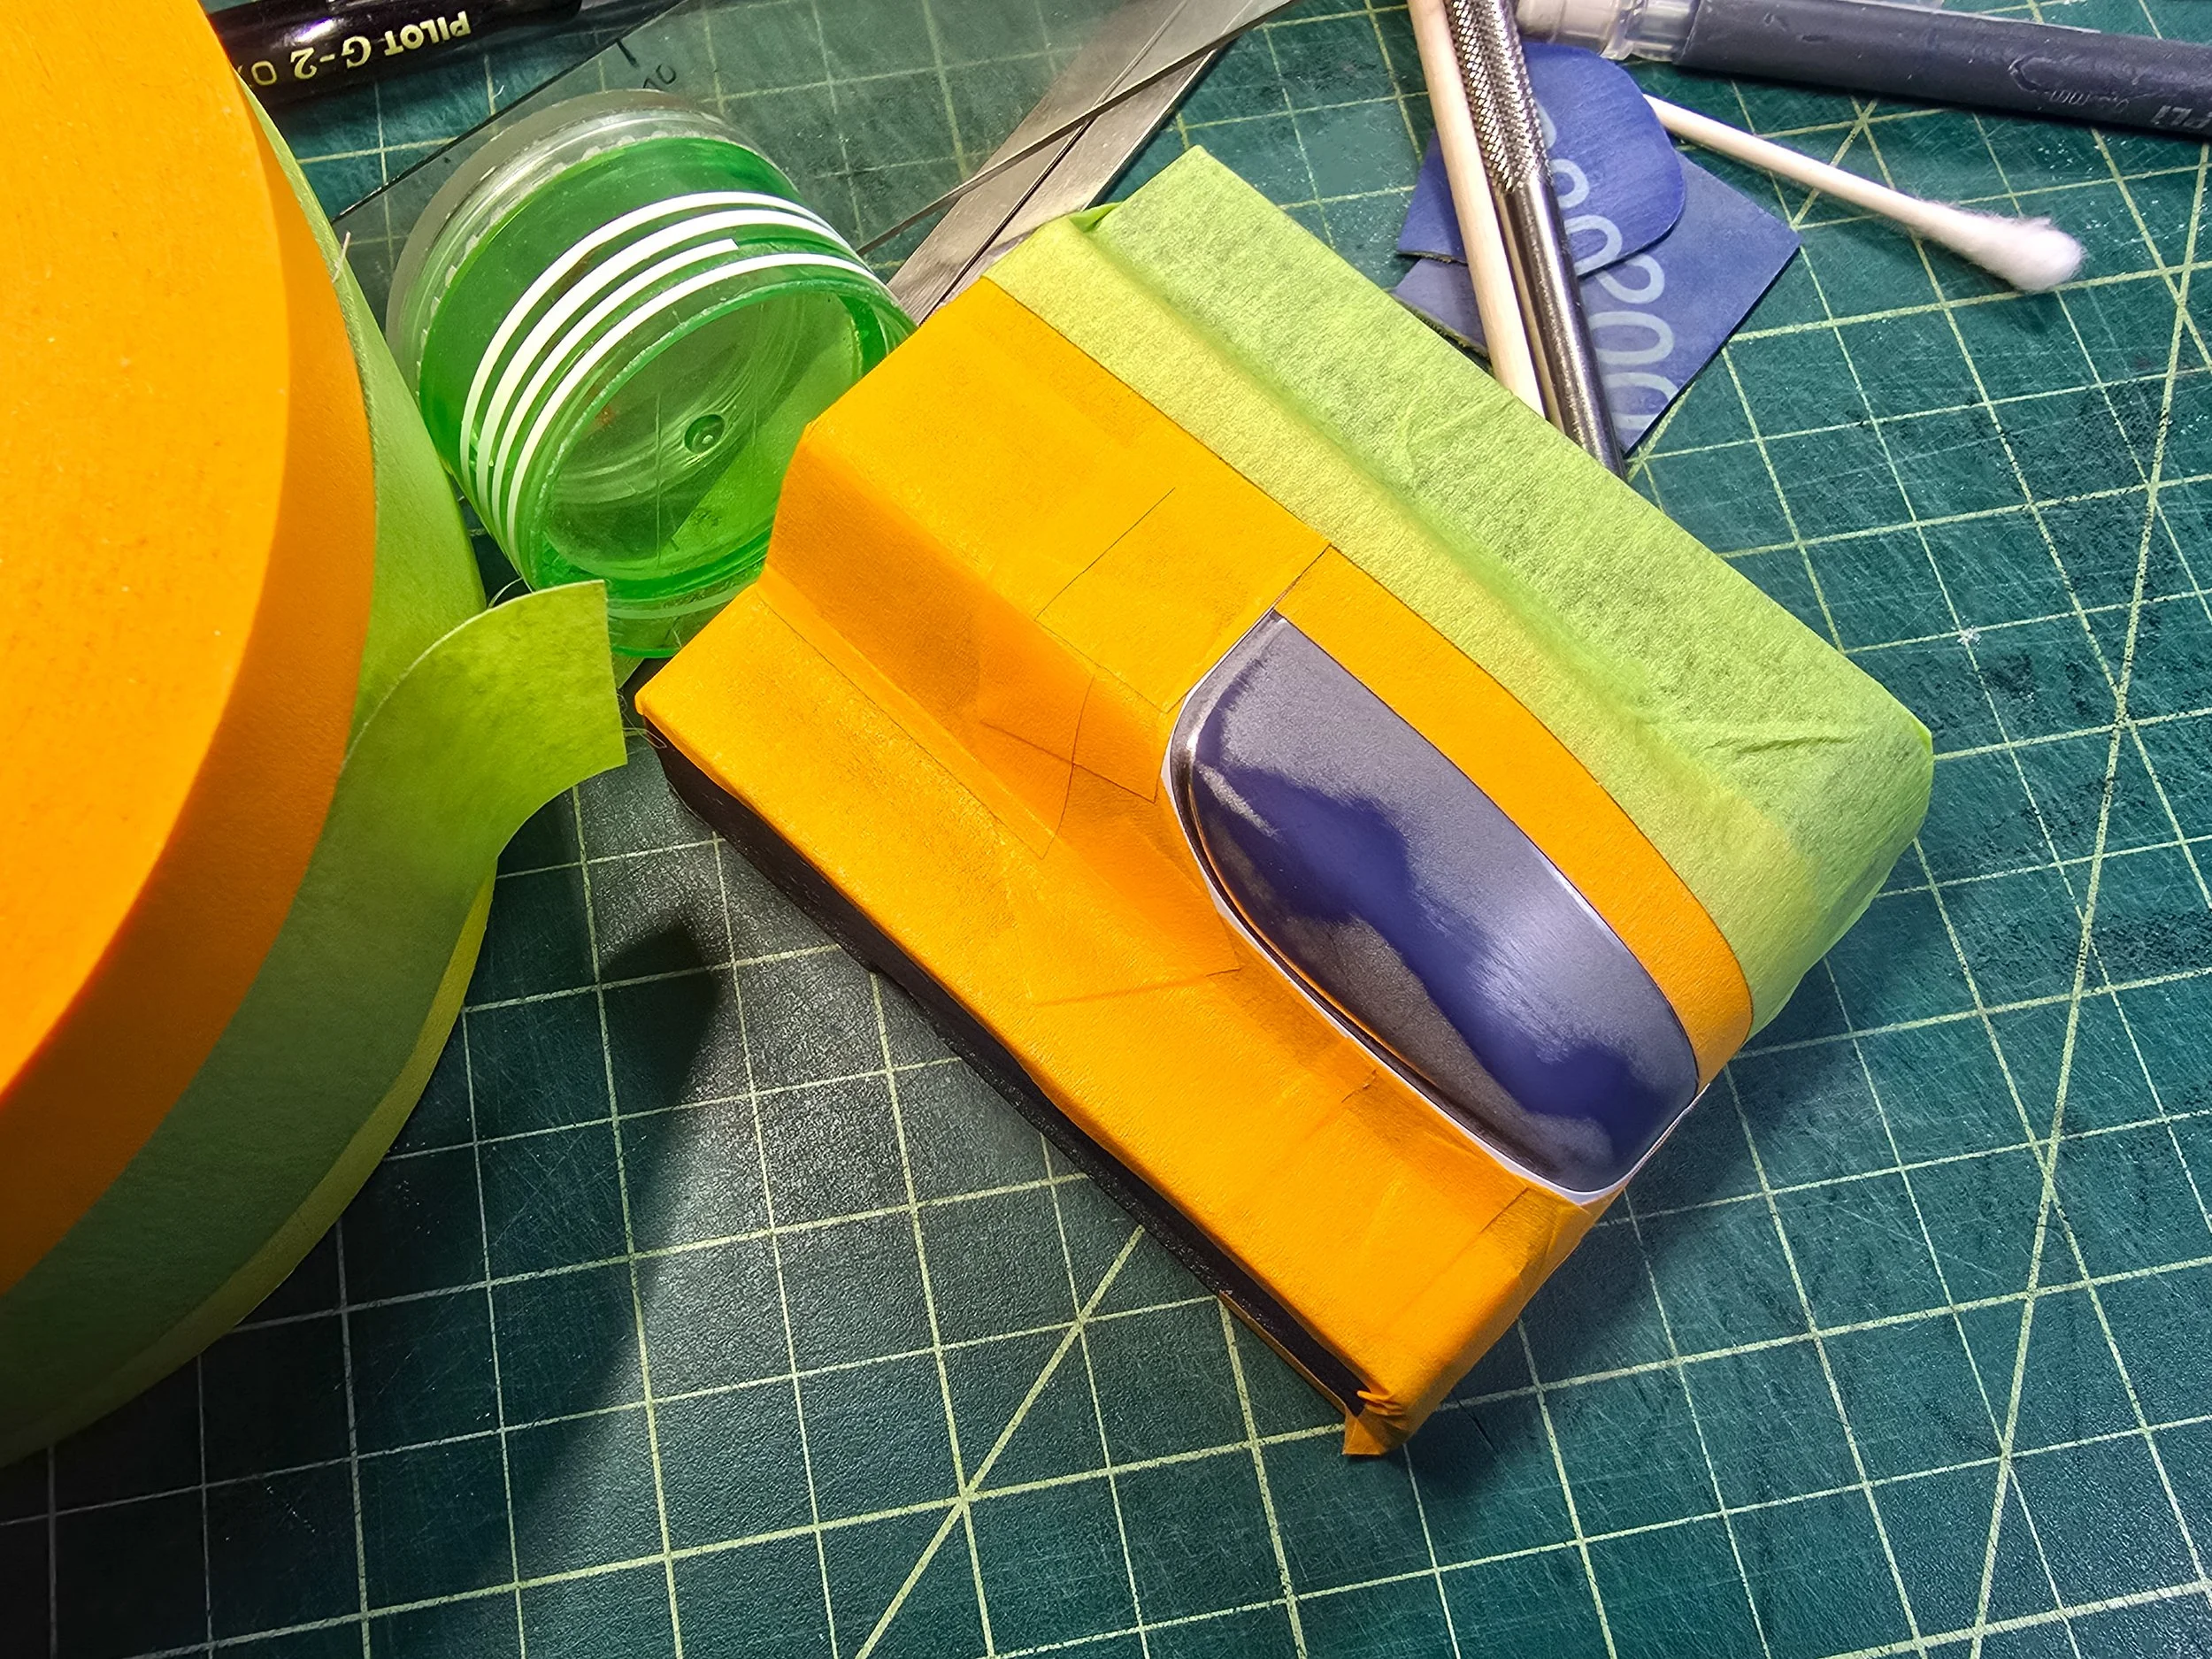
First, bilaterally symmetrical placement must be determined. The top broad yellow/orange tape sets the limits of the rearward edges. A similar tape stripe sets the lower limits along the font nose.
Next, the thin yellow tape sets the centerline. The actual outline was iterated numerous times with the thin yellow tape and then penciled in by hand while constantly referring to reference photos. The eraser was more important than the pencil as frequent changes were made over the course of more than a week.
The outline shown here is the final outline I settled on and mirrored onto the other fender.
This is one of the earlier outlines as we go backward in time a bit. I continued to work on the other body refinements which gave me the opportunity to see the outlines from many different angles and at different times of day.
What looked good in the morning was often quite awful when viewed later in the day.
PRACTICE, PRACTICE, PRACTICE
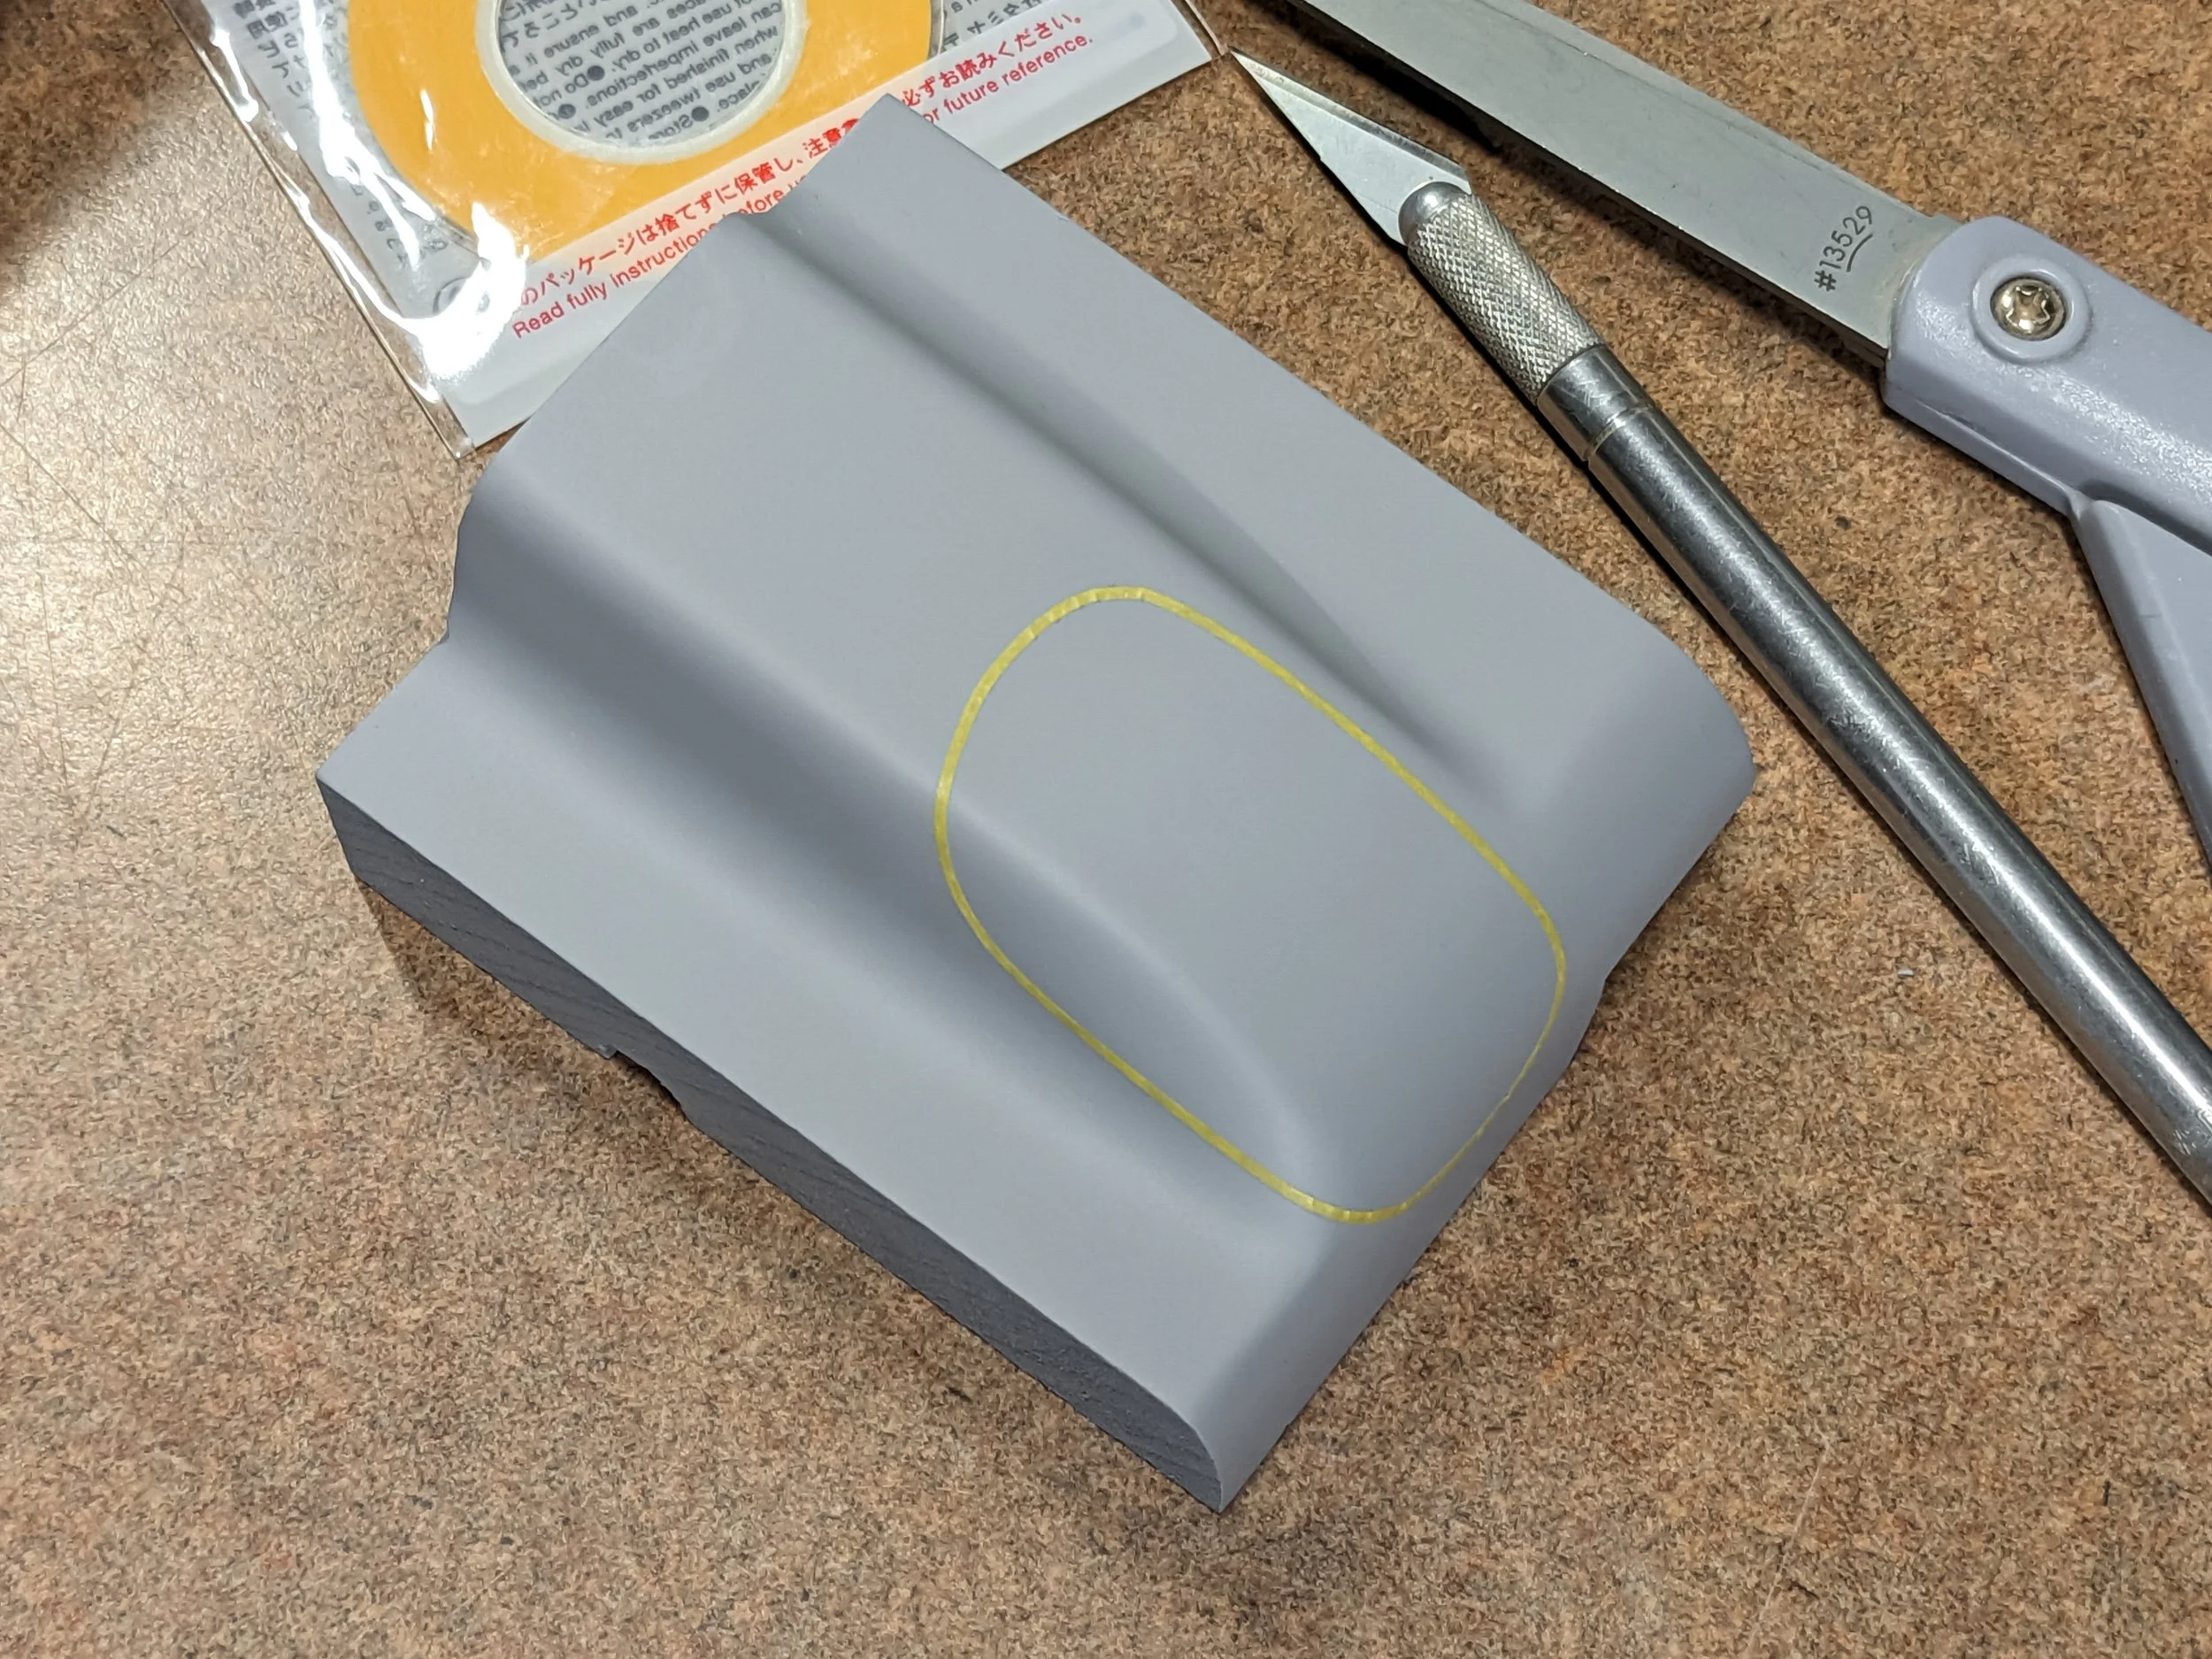
To facilitate the development of the groove making procedures, I made two prototype shapes to practice new techniques before touching the real thing. Each step of the process was tested to find the best solution. This testing is still ongoing as I write this, using even more practice blocks. Every block must be shaped, sealed, primed, spotted, and sanded before actual process testing can begin.
This taped outline is just one of many as I learned which tapes gave the most shaping options. Since the tape has thickness - 0.003” (0.08 mm) - I was able to use that edge to carefully trace the interior outline in pencil.
That outline became the path to be followed with the forming tools.
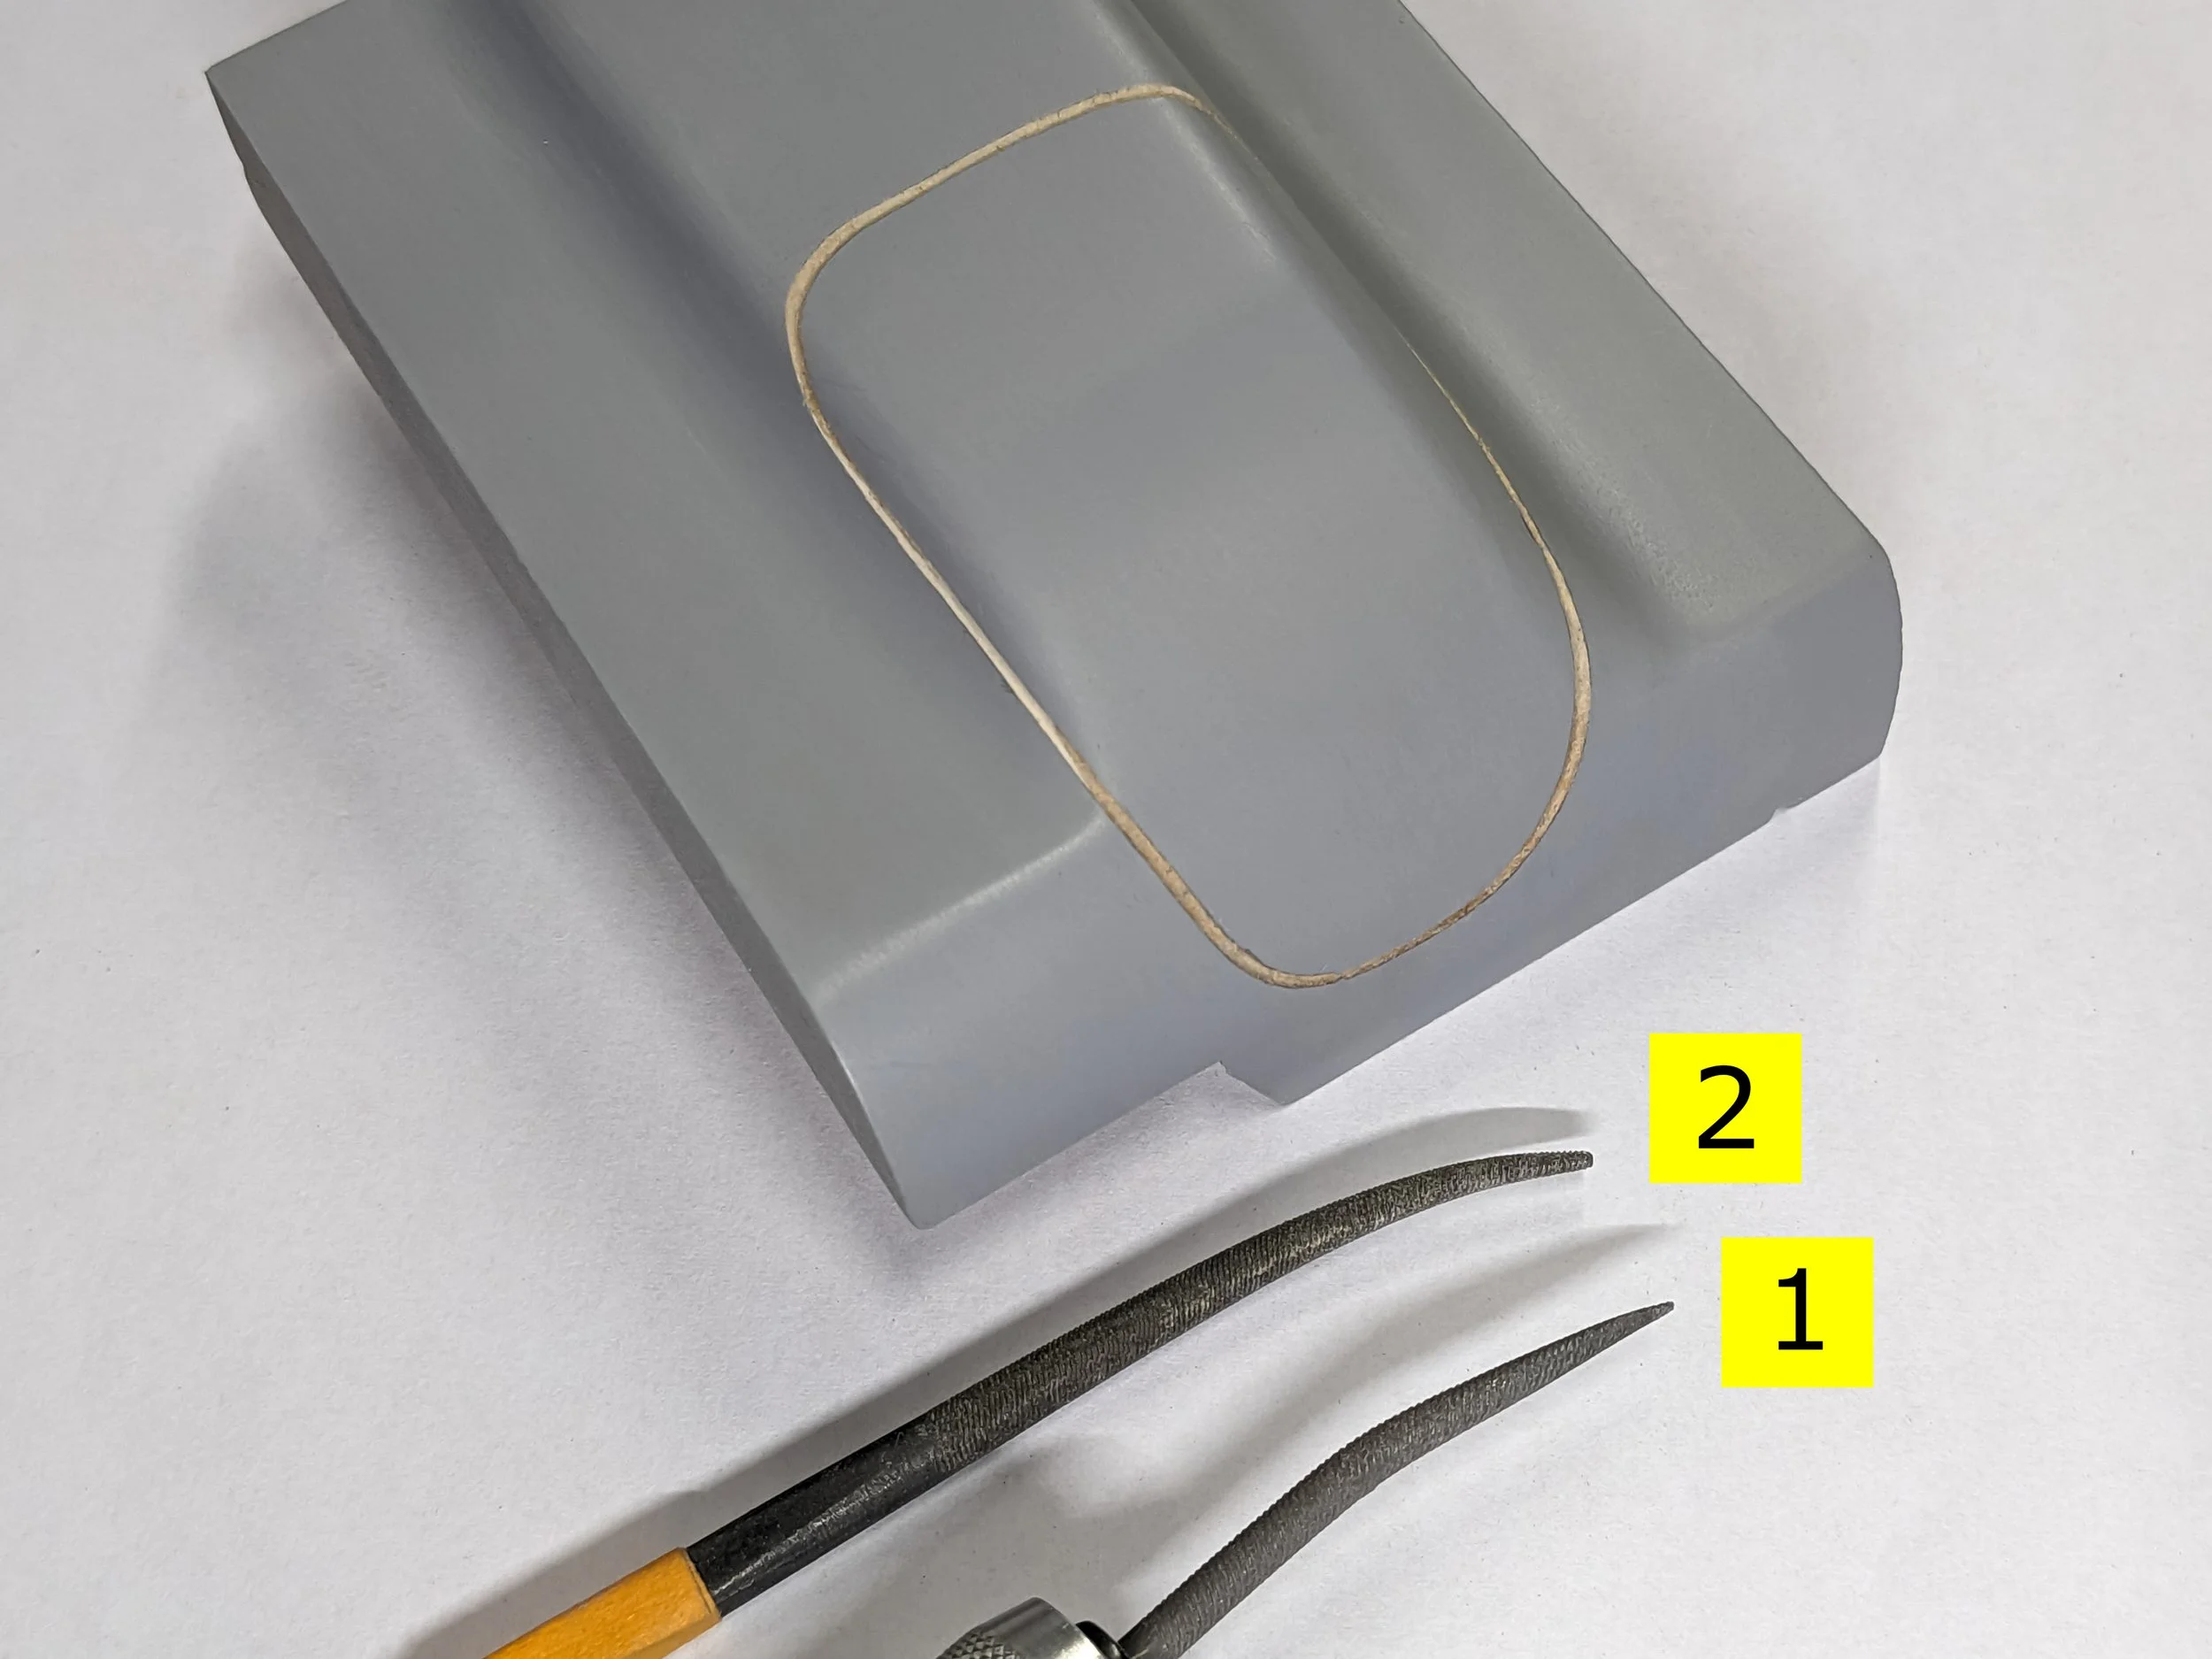
With the tape removed, I slowly used file ‘1’ to engrave a slight groove. The tip was used to create a small starting detent, then it was moved about 0.030” (0.8 mm) along the outline. I could then rock the tool back to a flatter curve and gradually lengthen and deepen the groove while also straightening any shaping variations.
A great deal of patience was required, but the outlines were eventually complete.
Next, I used the broader tool ‘2’ to widen and deepen the outline to its final size. When engraving on a flat, hard surface and a homogenous material, it is easier to control the depth and width. The Lola fenders are porous jelutong wood with many layers of sealer, filler, and primer to contend with. Tool pressure had to be minutely regulated as the groove was formed across the various material densities.
I could do several posts showing just this engraving process and the many methods tried to fill the minor defects to make the convex grooves as clean as possible. There were frequent filling, priming, filing sequences to reach an acceptable result. I’ll save you from seeing the endlessly repetitive tasks.
Once this process of defining and creating the headlight grooves was practiced numerous times, I took several deep breaths and tackled the real deal. It was nerve wracking, but all the practice made it that much better.
HEADLIGHT MASKING & FINISHING

Once the test headlight had been outlined and the block was painted, I had to figure out a way to mask the complex edge to allow painting the headlight itself.
As you can guess, it required more testing. I tried every method I knew and multiple new ones. So much time, effort, and material are condensed into that one sentence that it just doesn’t do it justice. Several months were used working it out, in between all the other work going on.
In the end, it has been the most tedious process that works the best for me in this situation. I cut thin strips of flexible automotive wrap material and wind them around the green cylinder. Once the outline is started, I can gently pull the cylinder which lets me keep the extra strip material under tension and maintain directional control as I work my way around the outline.
With practice, slowly stretching, bending and pressing the tape onto the edge of the groove gave good results.
The real deal is still to be done.
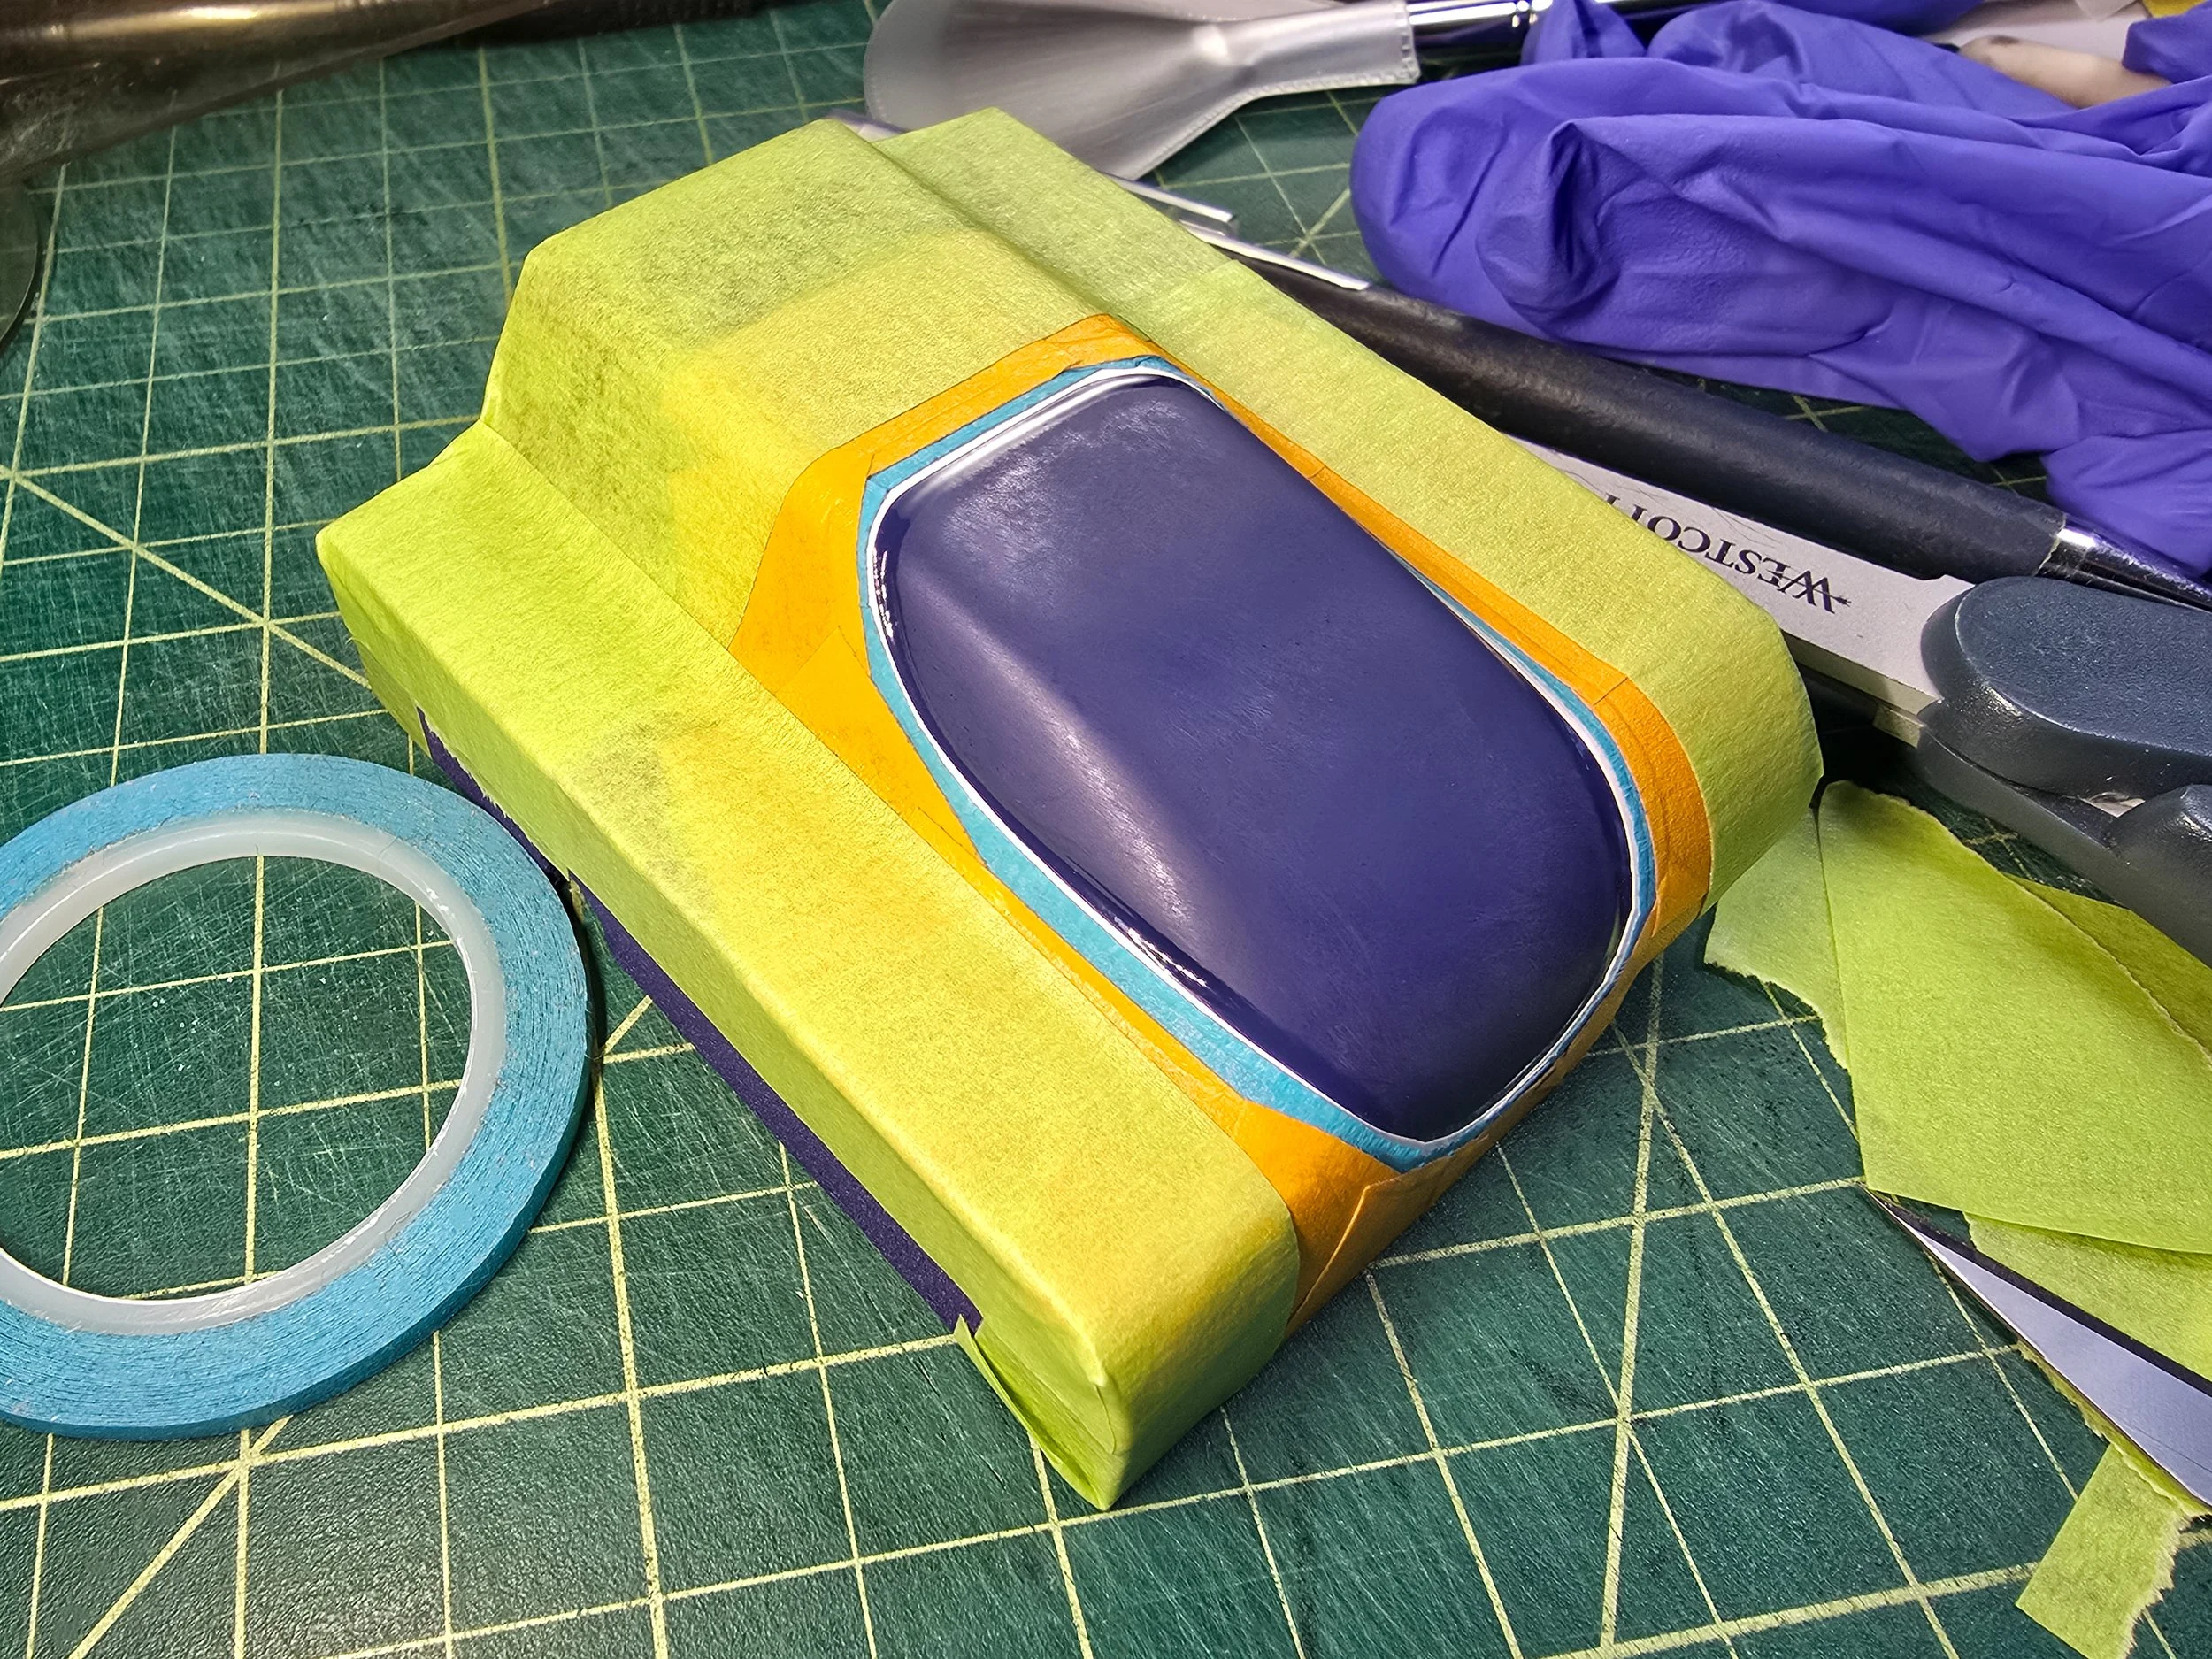
Three additional strips of tape were added to complete the masking. Each was slightly wider than the one before. Every edge and overlap had to be assiduously burnished to make sure the air pressure of the color spray didn’t get under any edges.
As with most painting, the prep takes the vast majority of time. The actual painting is done in a jiffy by comparison.
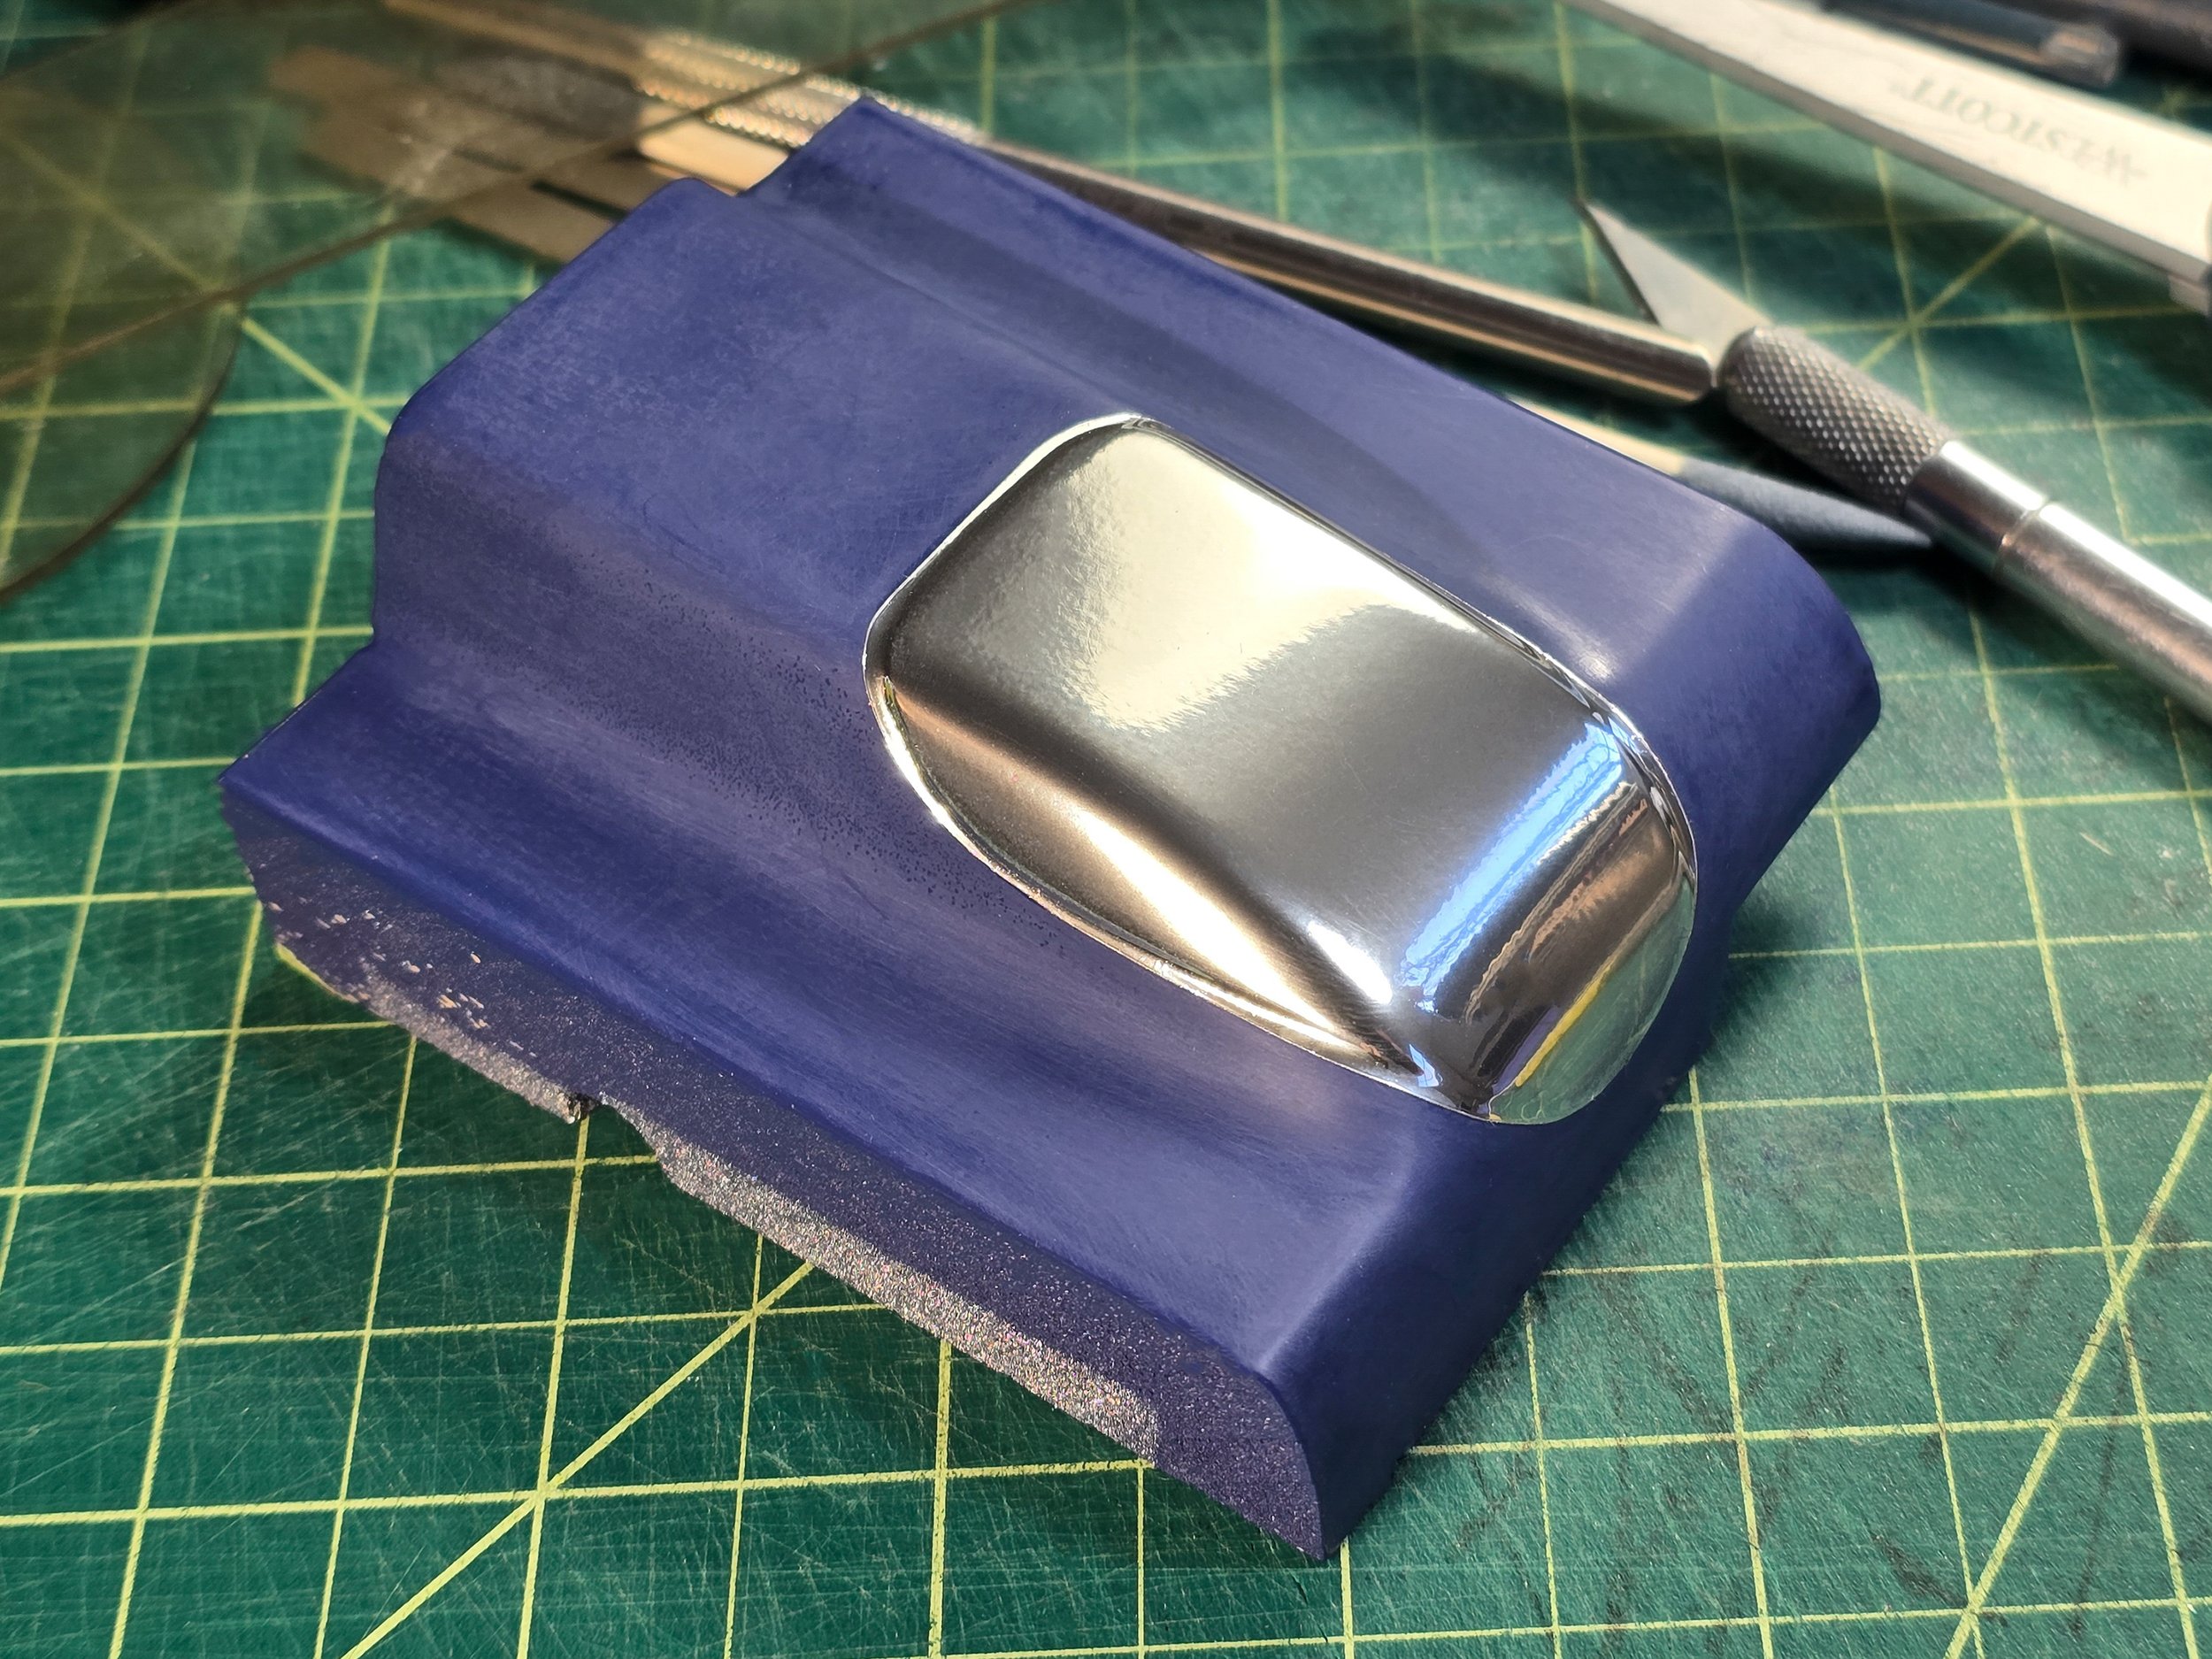
A chrome-like finish was tried to compare with the original silver paint. There are so many new finishes available that I wanted to see if one of them would be an improvement.
I wasn’t convinced that this was better, so I did more testing.
One half of the chrome was masked off and sanded before applying the chosen silver paint. I had already tried numerous silvers to get the right look. Some were too dull, some simply the wrong color, and others simply rubbed off.
The preferred silver is next to the chrome, which had lost some shine due to the masking. The whole block was then clear coated to test the compatibility of the finishes.
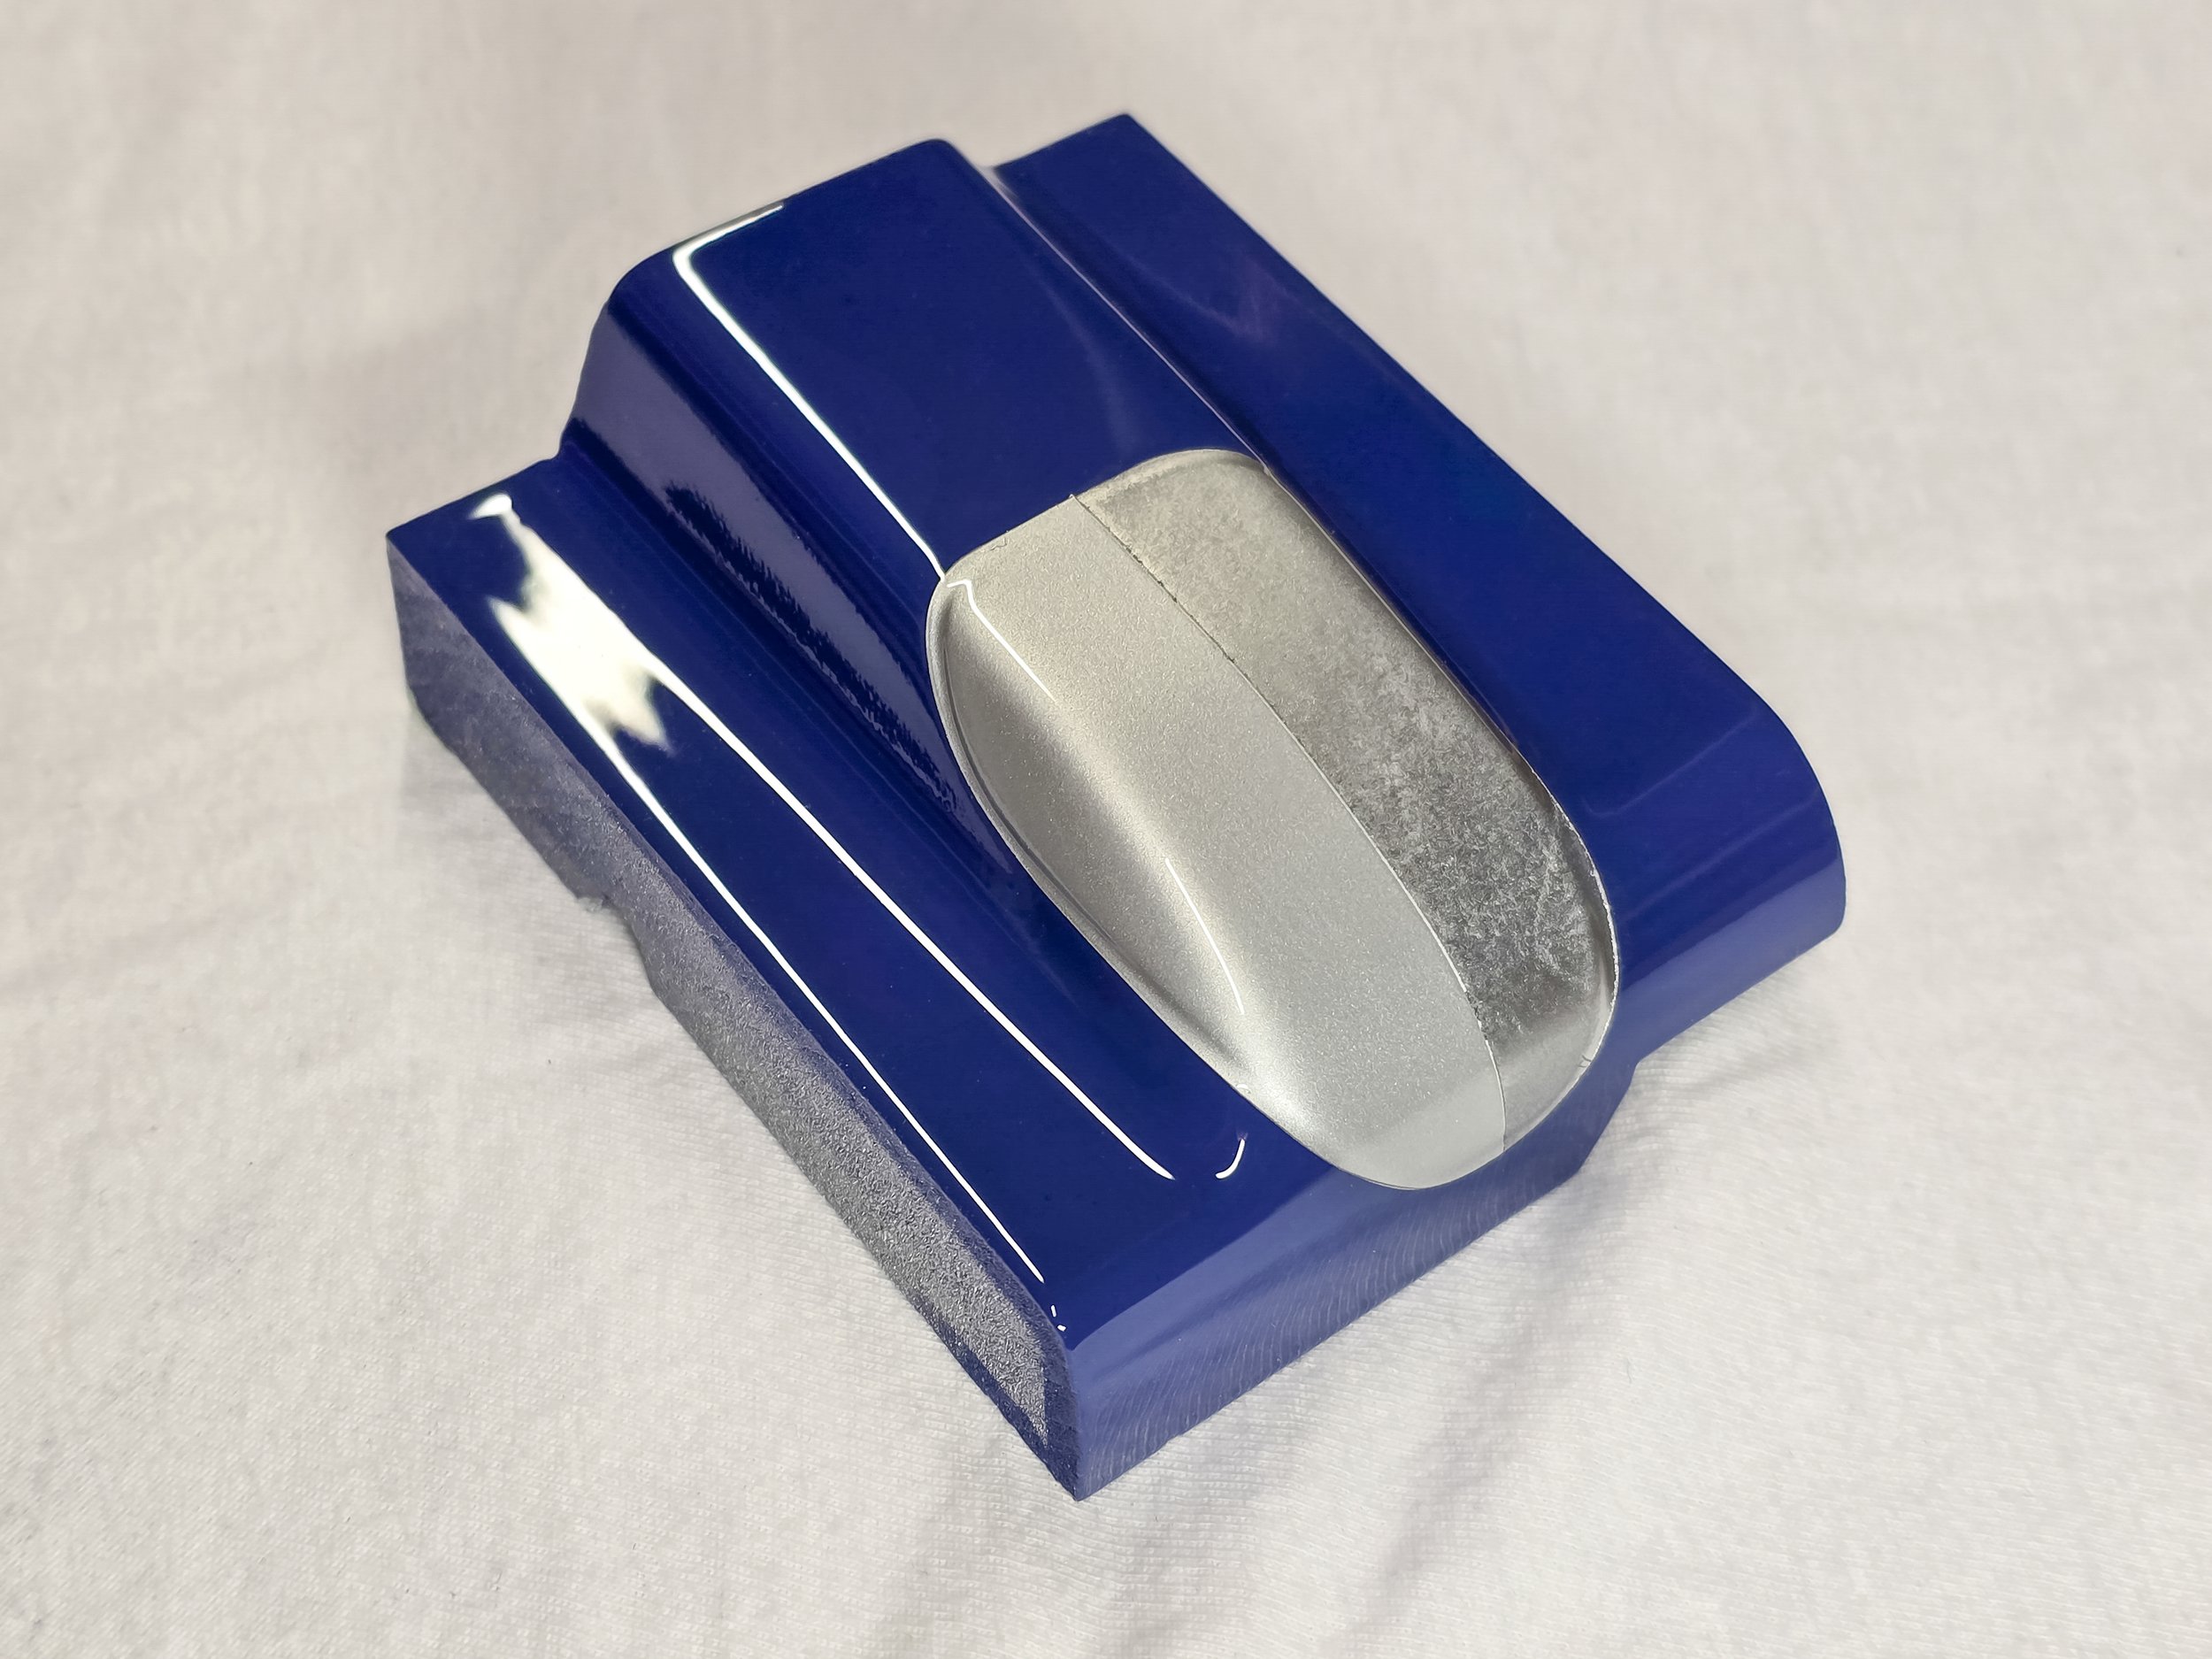
Silver is the winner! The chrome will come in handy some other time.
The extra luster of the clear coat really brings out the richness of the blue. Finding the right Sunoco blue is another long story to be covered in a future post.
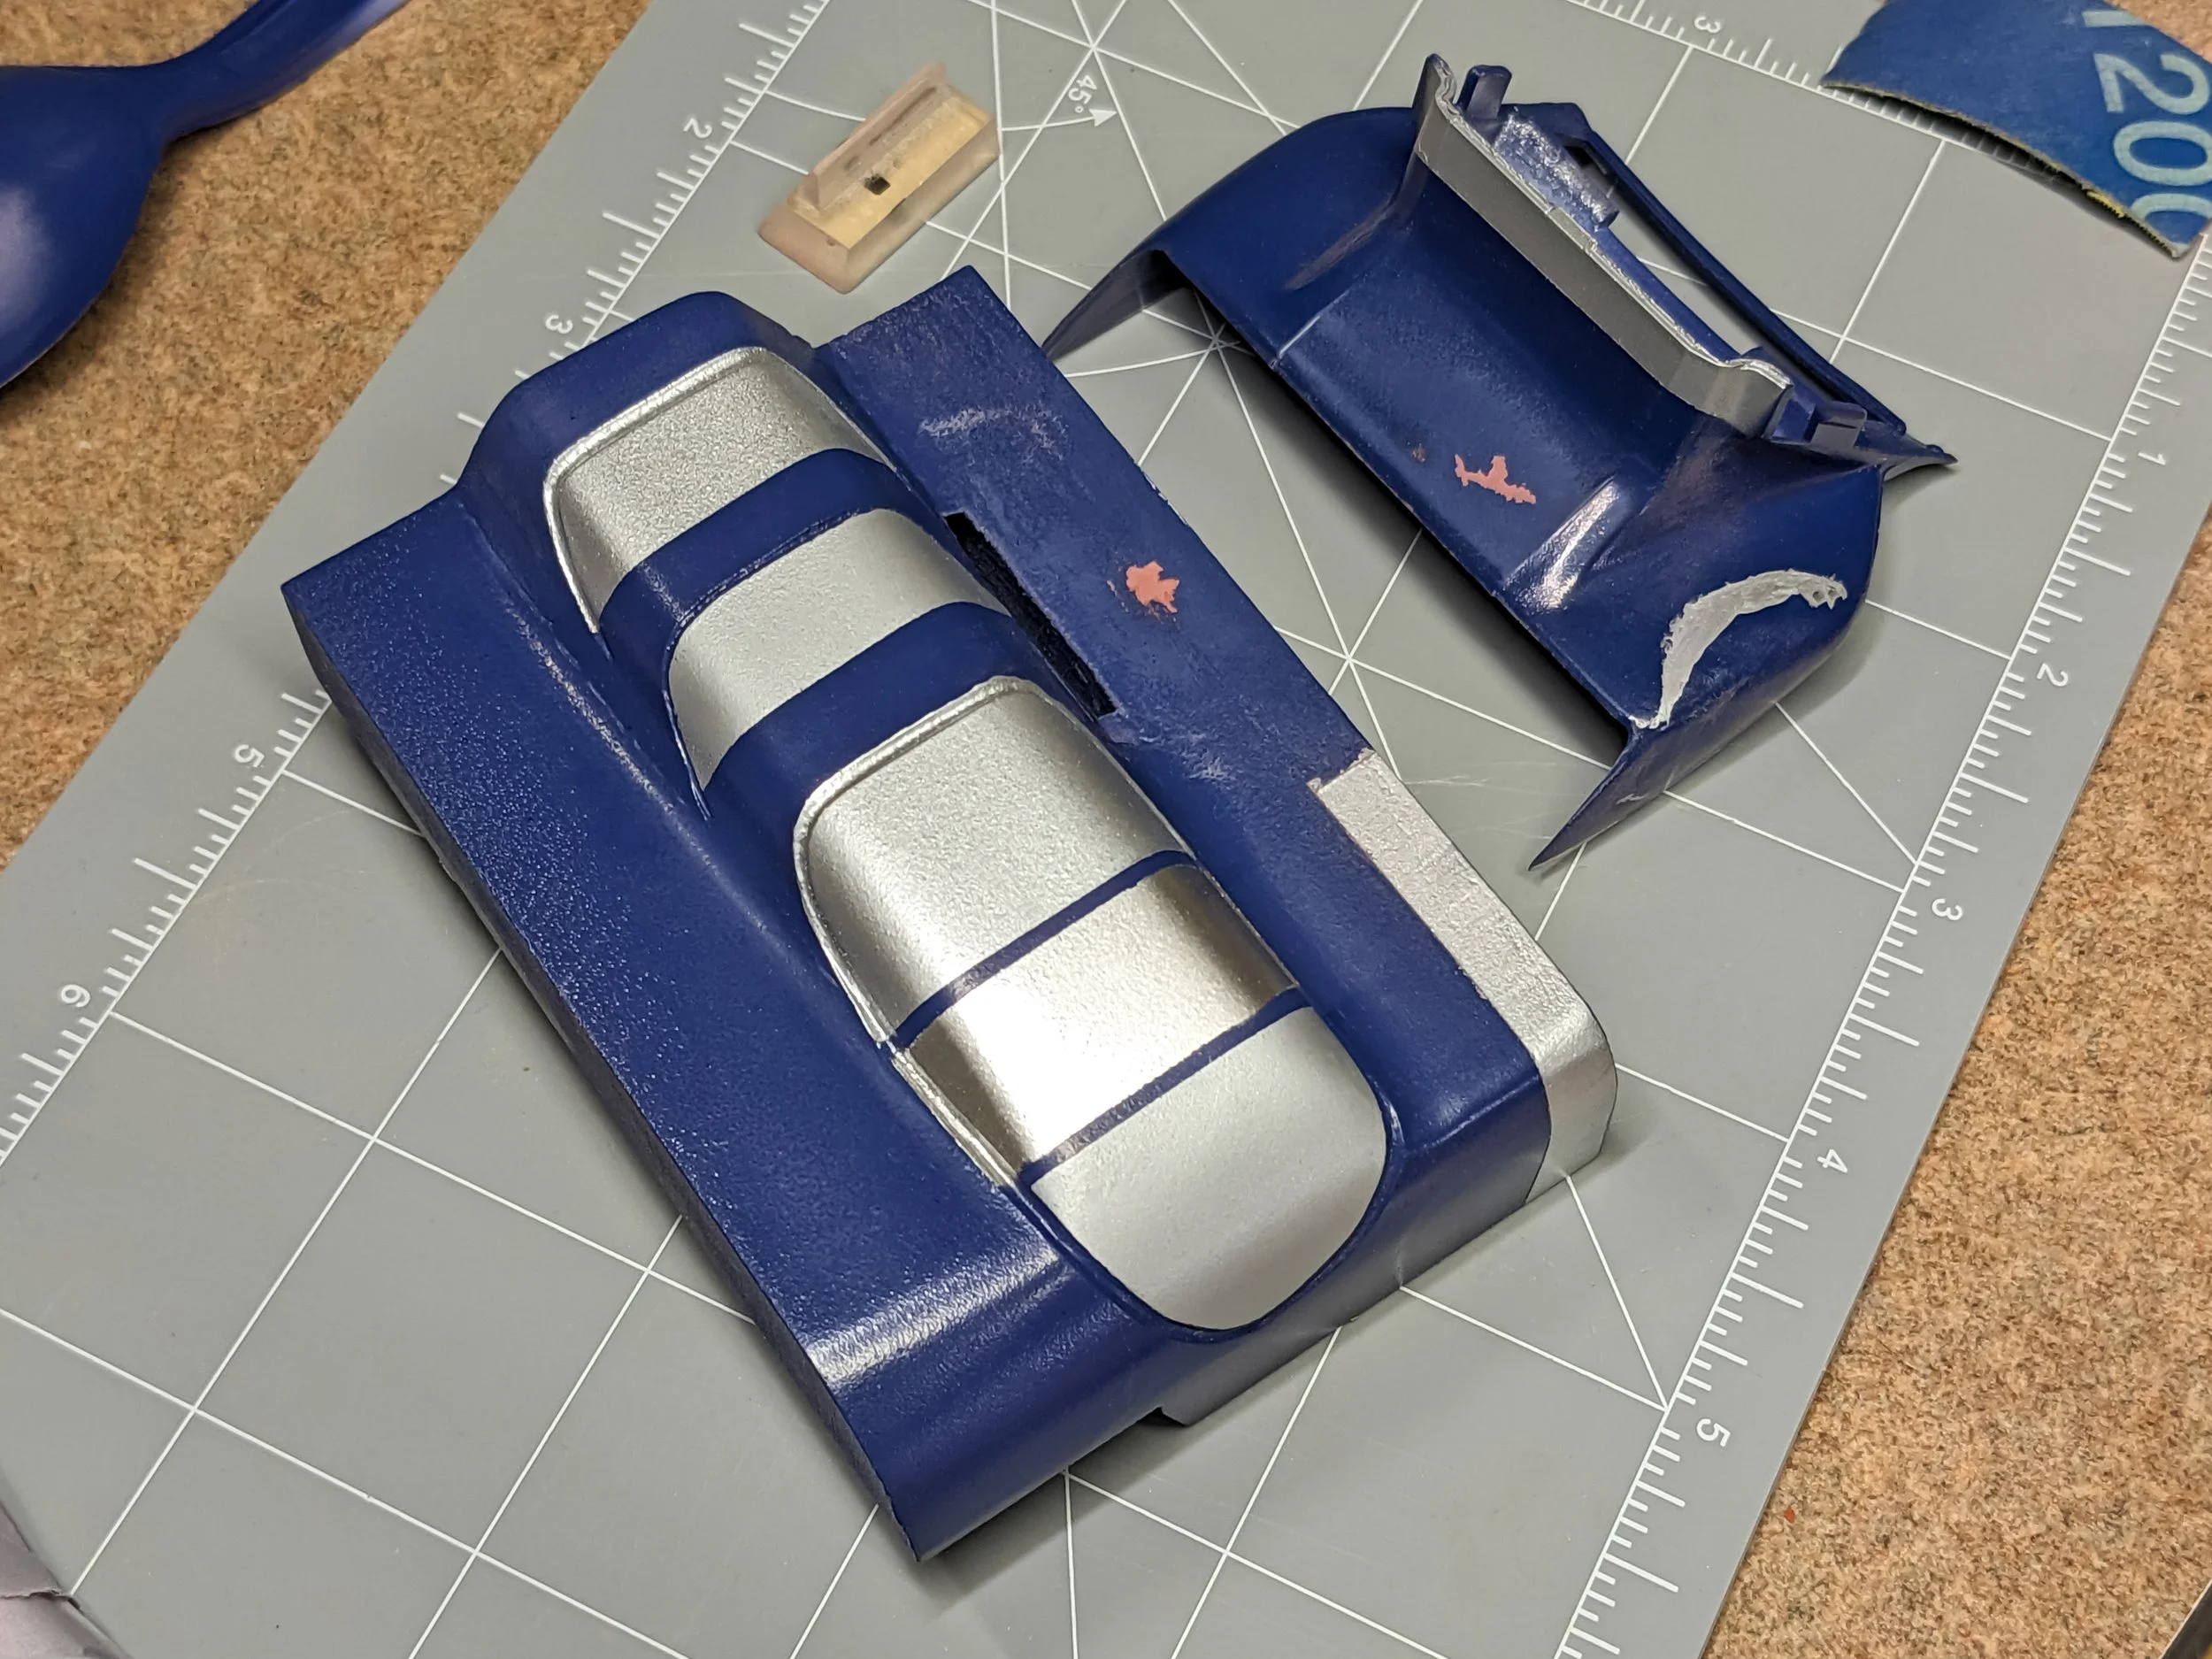
The second fender facsimile block was used for testing different silver colors and sheens. Many different masking techniques were tried as well. Which edge of the groove should be silver was another question to be answered.
Body corrections were continuing along with headlight testing, so different fillers were also being tested to make sure all materials played well together. The reddish spots were intentionally inflicted damage to be able to test the fillers.
Styrene model car parts from kits I never built were great practice pieces, especially for quick tests of difficult spraying challenges. Getting the color and clear into tight recesses and creases that are right next to broad subtle surfaces requires subtle changes to air pressure, fluid flow, and distance.
Because the color mix is much less viscous than the clear coat mix. I use two different size air brushes and one mini spray gun to apply them. More about that later too.
So many intertwined streams of tests are being worked on at any one time that it’s tricky to separate the threads into somewhat coherent stories. At least the major headlight hurdle has been cleared.
Please return to see future progress!
Links to previous Lola T70 posts are below:
- Lola T70 MK IIIB - 007 - Stance Matters
- Lola T70 MK IIIB - 006 - Persistent Bodywork
- Lola T70 MK IIIB - 005 - Ongoing Enhancements
- Lola T70 MK IIIB - 004 - Cutting Tire Profiles
- Lola T70 MK IIIB - 003 - Searching For Symmetry