

The noisy end of a Porsche 935 is also the most complicated part - full of intense, power-producing, ear-splitting loud bits that makes it go like the Dickens. The Co-Hog G935 engine bays are certainly far quieter, but still filled with parts. They've been moved along considerably and it’s time to show some progress.
Posing sedately, G935 number one shows off it tail end. The engine bay has been enclosed with the addition of lower fender extensions and the engine and ducting 3D printed parts are close to their final sizing and positioning.
They still look pretty rough but 3D printing is no panacea for hard work!
Each small printed piece; there are 20 in total (including the wing and fender extensions) has to be scraped and shaped, then primed, filled and sanded three times before they're ready for paint.
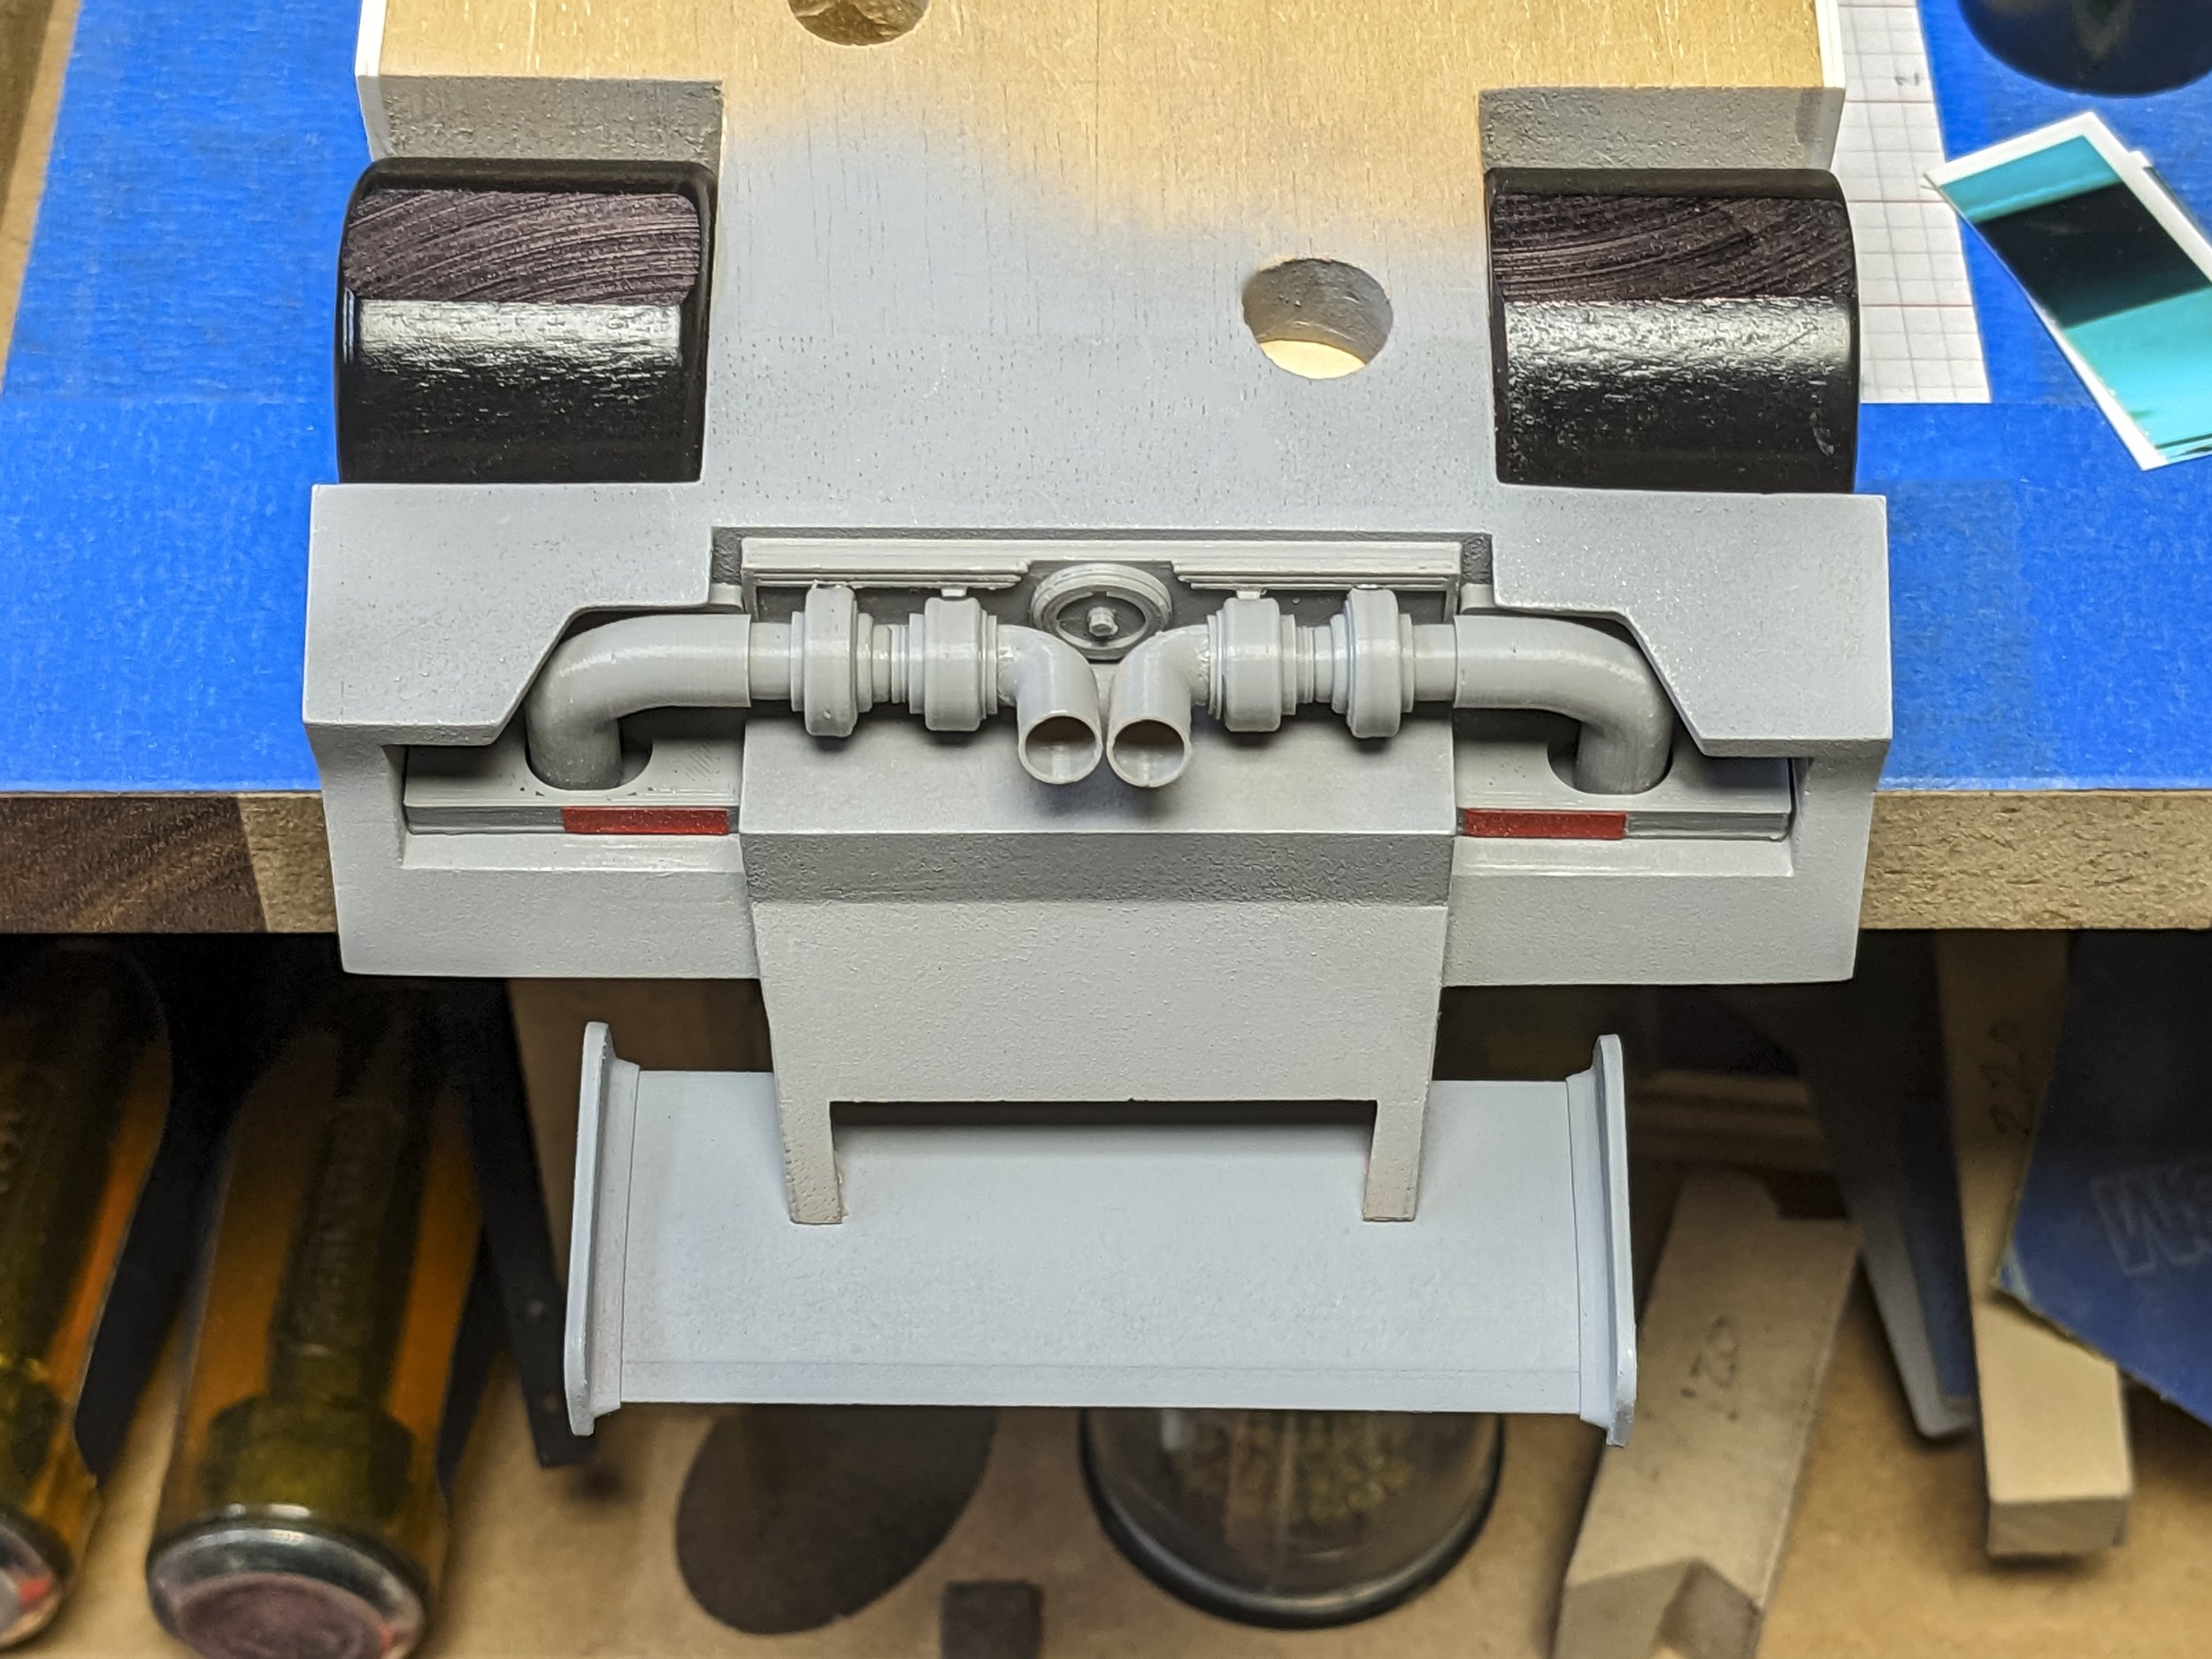
A bottom view shows some of the key component connection points. The turbos each have slots that fit snugly over rectangular bosses on the main engine plate to help keep things in line. The turbos and ducting pieces are all socketed together at the ends for a tight fit.
The wing tips also socket onto the ends of the main wing for a strong joint. Not shown here are the right angle supports that will connect to the bottom of the wing and the wing struts to provide more surface area for final gluing.
The flat pieces with angles at each end of the turbo assemblies are the bottom fender extensions. They are separate 3D printed parts attached and blended into the main body. More on those later.

There are three main subassemblies; two fender vents & tail light mounts, and two turbo and hose subassemblies. The main engine plate is a separate piece.
Here you can easily see the stair-stepping that the printing process creates, especially on round pieces. The layer by layer additive nature of printing parts means that even vertical walls on the parts have to be filled and flattened.
The end result is faster than making each part from scratch, but other 3D printing methods do give finer parts, albeit at a higher cost.

All the scraping and shaping is time-consuming in large part due to the tough and stringy nature of the gray PLA (poly lactic acid) material being printed. There are dozens of other materials available for just about any purpose, but PLA is a good strong starting point.
To get better results I’m trying a PLA/Wood. It blends in 40% wood which does make the shaping process easier. The jury is still out on strength and overall workability.

G935 number one is the development mule and everything is worked out on it first before being transferred to numbers 2, 3 and 4.
The bottom fender extensions I mentioned earlier are below the top set of arrows showing where they’ll be positioned. The right angle wing supports will be used on the wing as indicated by the lower set of arrows.
It’s easy to see how the wing tips socket onto the wing ends for a good solid fit.
It’s important to get the inside of the engine bays almost done before adding the fender extensions. It’s difficult to get into the nooks and crannies for finishing after adding them. Final painting will definitely be a challenge.

A clear plastic triangle was double-face taped to the bottom of the engine bay to act as a support during fitting and gluing in the fender extensions. All the angles make it interesting. You can see that I had to add two 0.010” (0.25 mm) styrene shims (the white layers) to properly reach the side of the fender.
This is also a good illustration of the jelutong finishing process. At the bottom of the photo you can see the unfilled pore lines. The angled surface above it has been sealed, primed, filled and sanded at least twice so far. The inside surfaces are closer yet to being done and the outside surfaces are almost done.

MCAD was a big help in making the fender extensions. First I made them in wood to get the shapes and details close to right. Then I translated those into MCAD and made more adjustments. Finally, they were 3D printed.
Even the flat printed surfaces require sanding and filling to make them right.
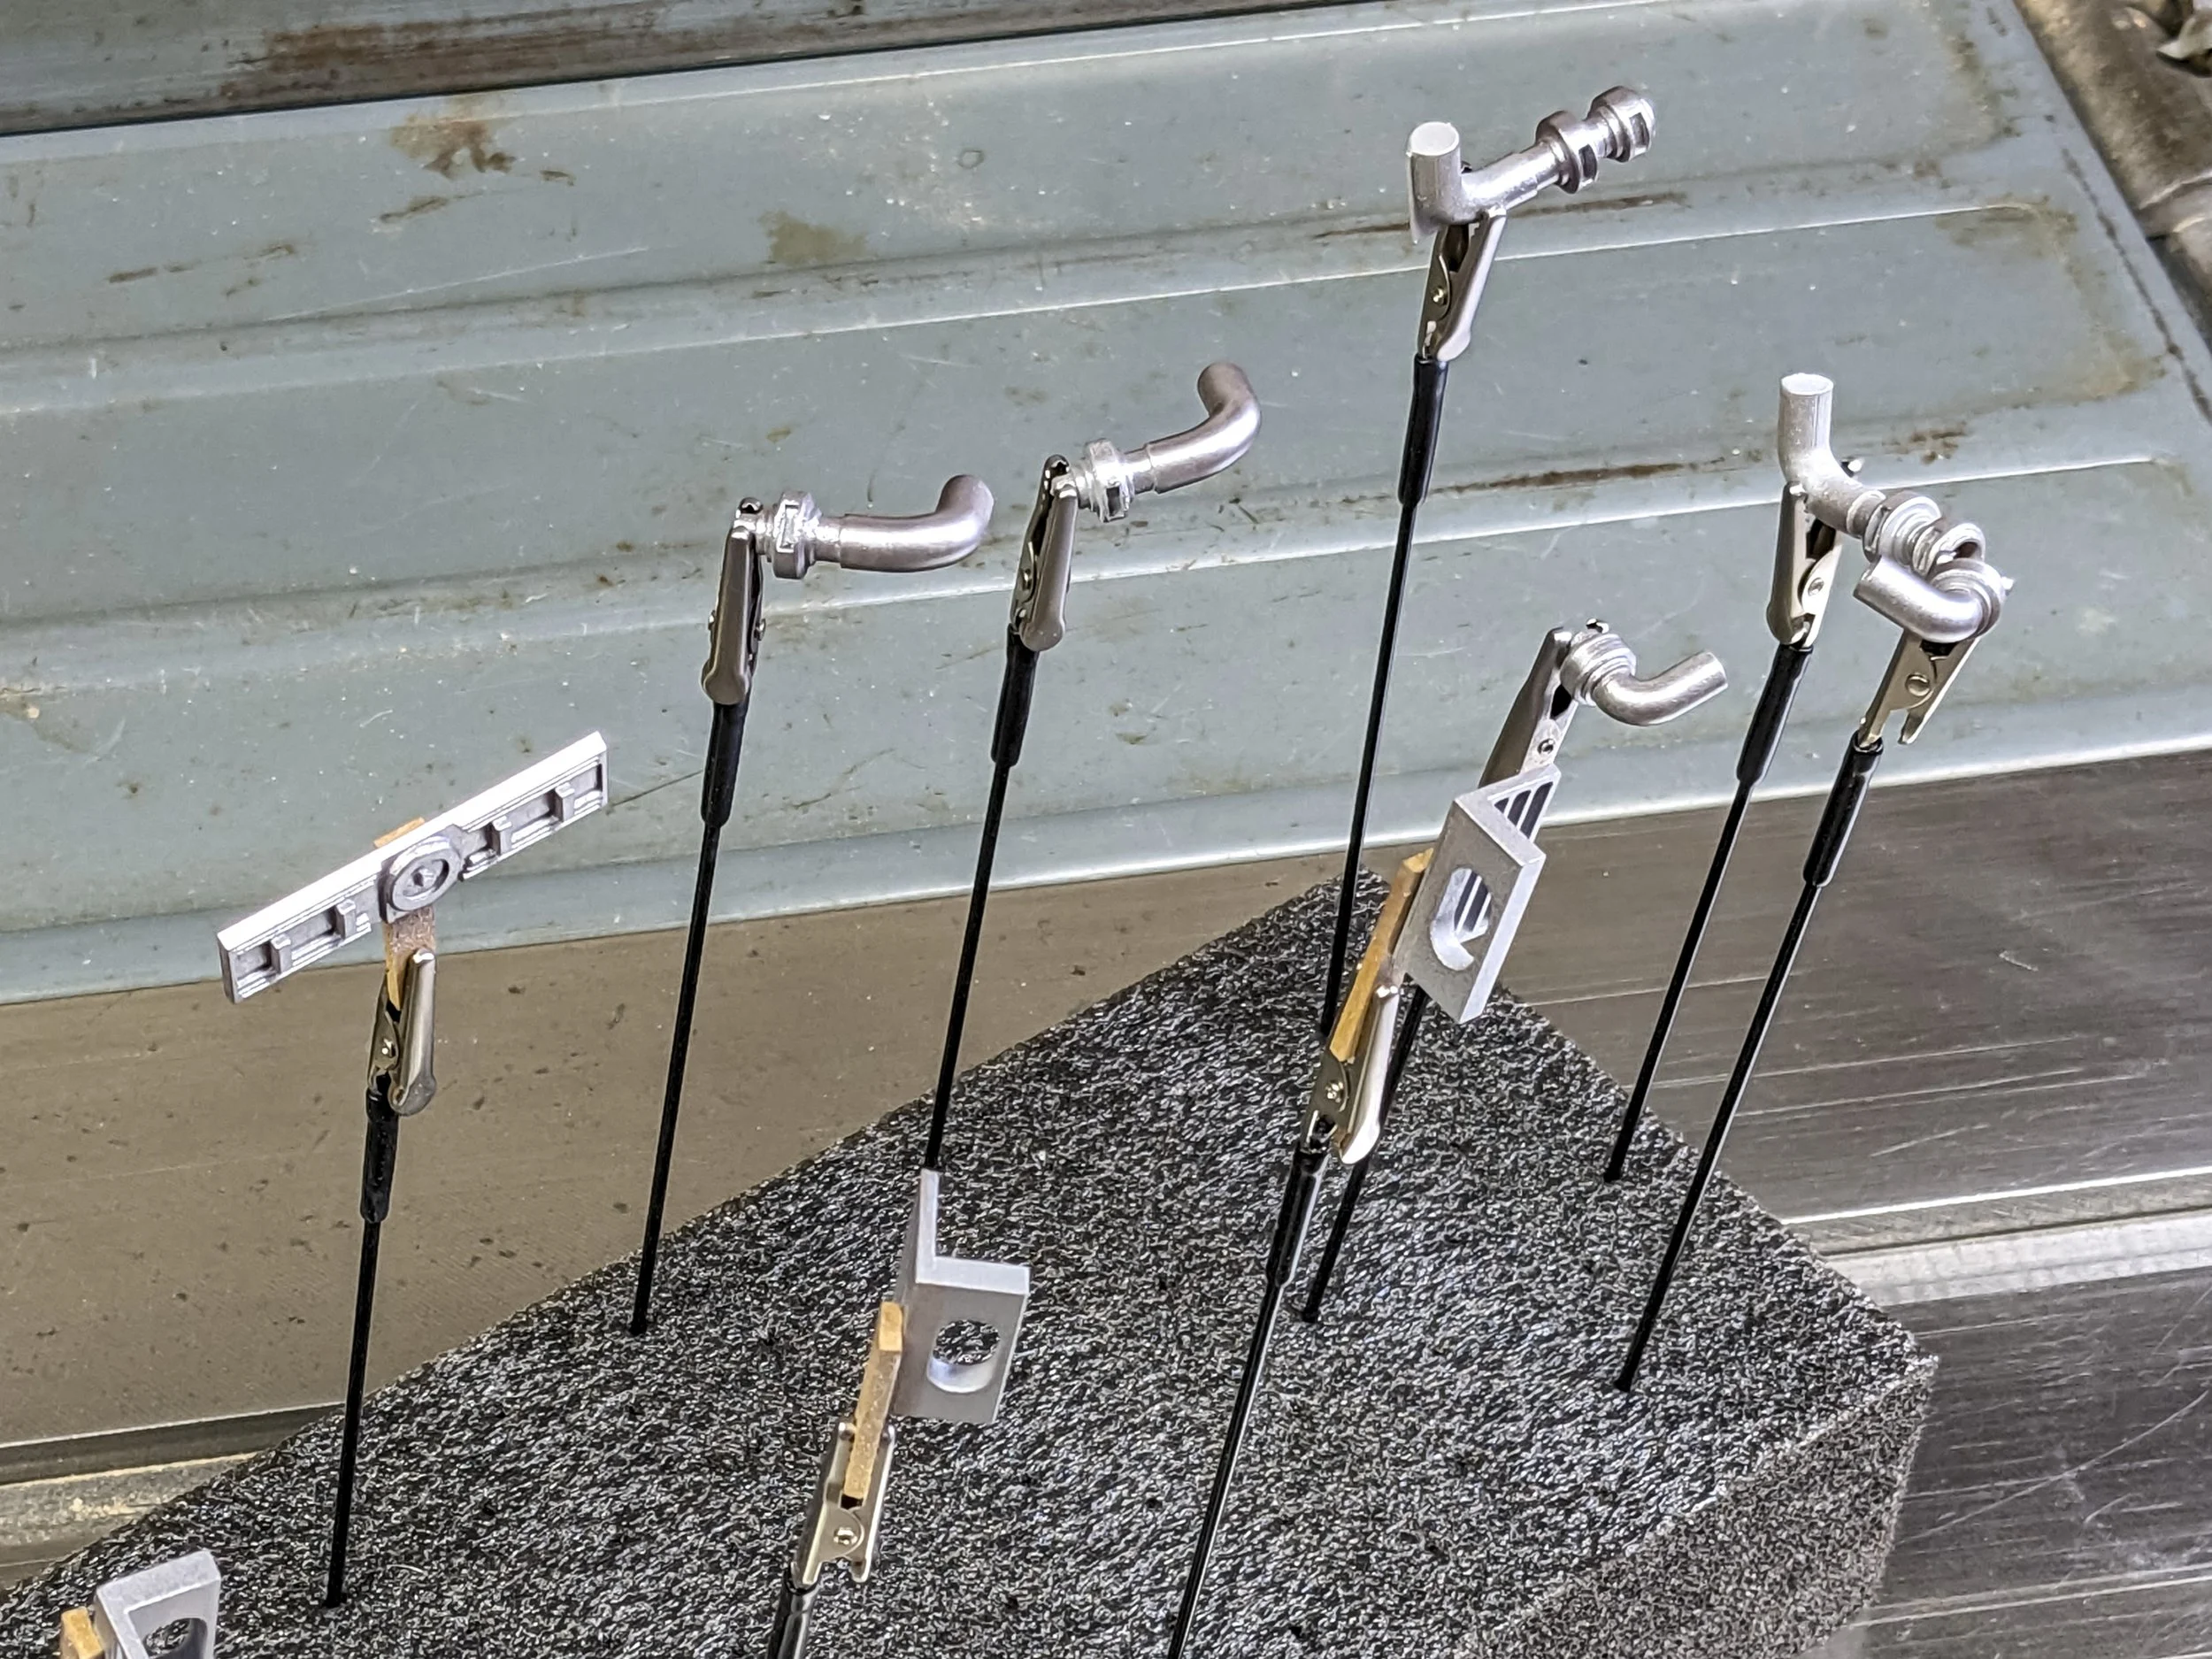
This is a set of finished pieces for one engine bay. The separate pieces were primed and filled, fitted together and then were given a base coat of silver water-based paint. Fitting them up before painting is a good way of masking those areas where the paint thickness makes assembly a problem.
Painting this way also provides a good use for many of the dozens of development parts because they can be used to properly mask and hold their respective mating parts. The gripping jaws can mark up the temporary mating parts while keeping the final pieces clean.
The turbo subassemblies remain together here. I’m working out final colors for most pieces and have to keep everything safely out of harm’s way.

Getting the finished colors to look right when together takes a series of trials. Flat palette boards and rounded spoons show each color and allow comparisons to help put together a potential paint scheme.
The amount of paint being mixed for these small parts is so tiny that adding exactly the right size drops of each color is difficult to match reliably. I'll mix my own colors once I know exactly what I want and can mix up larger batches.

This view of the AP Porsche 935 shows one solution to the color issues with a white body. Darker and more vivid colors will require some adjustments.
Next up will be even more progress on the engine bays - or maybe something else…
For more of the story click on any of the following links: